This guide will demonstrate how to install Visual Studio Code on Rocky Linux 9 or 8, a task essential for developers looking to leverage this powerful code editor. Visual Studio Code, commonly referred to as VS Code, is a free, open-source editor developed by Microsoft. It’s renowned for its versatility, supporting a wide range of programming languages and tools. Its ease of use and robust features make it a popular choice among developers worldwide.
Key Features of Visual Studio Code:
- Intelligent Code Completion: Streamlines coding with suggestions based on variable types, function definitions, and imported modules.
- Debugging Tools: Integrated debugging tools for a seamless troubleshooting experience.
- Built-in Git Commands: Manage your Git repositories directly within the editor.
- Extensibility: Customize your workspace with a vast library of extensions.
- Cross-Platform: Runs on Windows, Linux, and macOS.
Visual Studio Code stands out for its user-friendly interface and rich set of functionalities. Whether you’re working on web development, application building, or even machine learning projects, VS Code provides a comprehensive environment to write, test, and debug code. Now, let’s delve into the specifics of getting VS Code up and running on your Rocky Linux system.
Install Visual Studio Code on Rocky Linux 9 or 8 via DNF
Step 1: Update Rocky Linux Before VSCode Installation
Before proceeding with the Visual Studio Code installation, it is critical to update your Rocky Linux system. Updating ensures that your system has the latest security patches and is compatible with new software. Open your Terminal and enter the command:
sudo dnf upgrade --refreshThis command refreshes the repository metadata and upgrades all the packages to their latest versions.
Step 2: Set Up Visual Studio Code Repository on Rocky Linux
Visual Studio Code is not included in Rocky Linux’s default repositories. To install it, you must first add the official Microsoft repository. Begin by importing the Microsoft GPG key to authenticate the packages:
sudo rpm --import https://packages.microsoft.com/keys/microsoft.ascNext, create a repository file for Visual Studio Code. This file guides the package manager to the correct location for downloading VSCode. Execute the command below to create this file:
printf "[vscode]\nname=packages.microsoft.com\nbaseurl=https://packages.microsoft.com/yumrepos/vscode/\nenabled=1\ngpgcheck=1\nrepo_gpgcheck=1\ngpgkey=https://packages.microsoft.com/keys/microsoft.asc\nmetadata_expire=1h" | sudo tee -a /etc/yum.repos.d/vscode.repoWhen you run this command, the output will confirm that the repository file is successfully created.
Step 3: Install Visual Studio Code via DNF Command
With the repository in place, you can install Visual Studio Code. There are two versions available: the stable build and the insider build.
Installing the Stable Build
The stable build is recommended for most users due to its tested and proven reliability. Install it with:
sudo dnf install codeInstalling the Insider Build
For users interested in the latest features, despite possible stability issues, the insider build is an option. Install it with:
sudo dnf install code-insidersDuring the installation, you will be prompted to confirm the import of GPG keys. Ensure the key details match the following before proceeding:
Importing GPG key 0xBE1229CF:
 Userid     : "Microsoft (Release signing) <gpgsecurity@microsoft.com>"
 Fingerprint: BC52 8686 B50D 79E3 39D3 721C EB3E 94AD BE12 29CF
 From       : https://packages.microsoft.com/keys/microsoft.asc
After these steps, Visual Studio Code will be installed and ready to use on your Rocky Linux system.
Launching Visual Studio Code on Rocky Linux
CLI Commands to Launch VSCode
After successfully installing Visual Studio Code, it’s time to launch the application. This method is swift and efficient for developers and professionals who frequently work in a terminal. There are commands associated with each build of VSCode, and you should use the one corresponding to the build you installed.
For the stable build, execute the following command:
codeFor the insider build, use this command instead:
code-insidersGUI Method to Launch VSCode
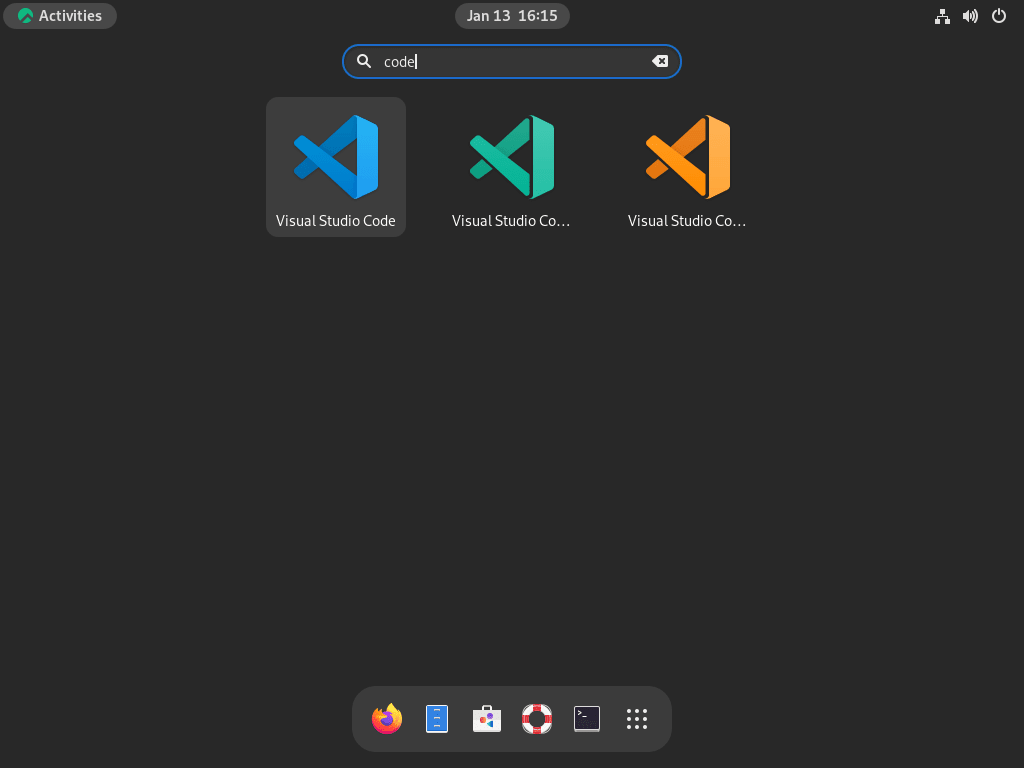
For those who are more comfortable using a graphical interface or perhaps not working with the terminal frequently, you can also launch VSCode through the desktop environment. This method is straightforward:
- Click on Activities, located usually at the top left corner of your desktop.
- Choose Show Applications, often represented with a grid of dots.
- Search for “Visual Studio Code” followed by the version (stable or insider) you installed.
- Click on the Visual Studio Code icon to launch the application.
First-Time Tips for Visual Studio Code on Rocky Linux
Now that you have successfully installed Visual Studio Code on Rocky Linux, let’s dive into some essential tips to enhance your coding experience:
General VSCode Tips on Rocky Linux
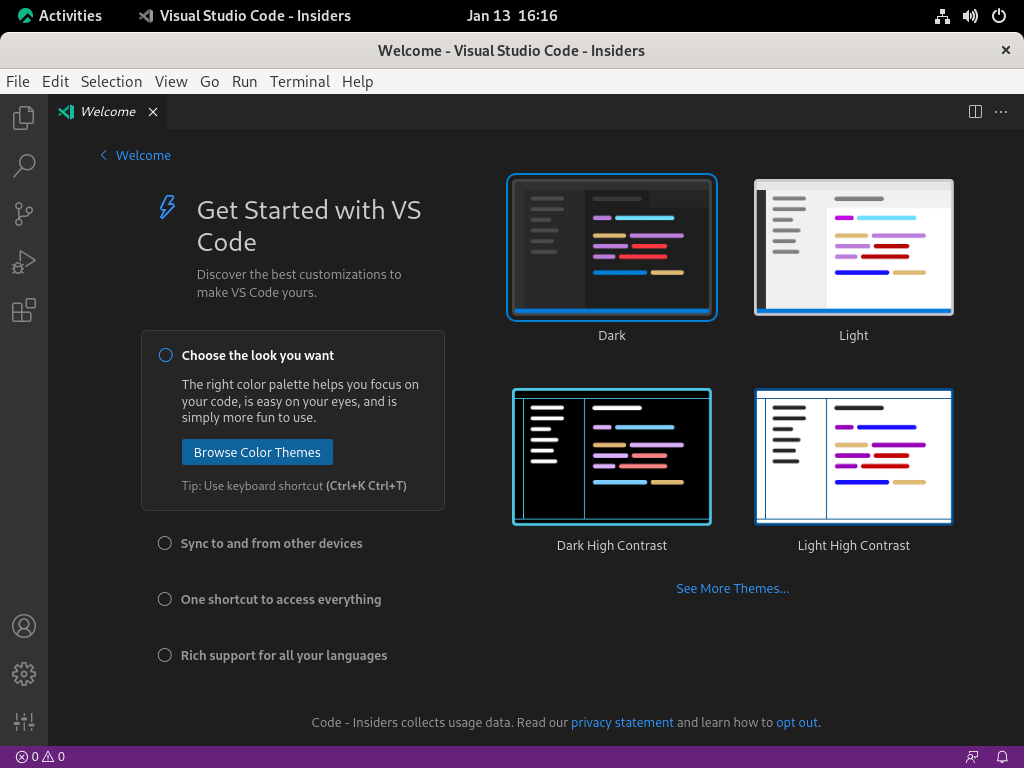
- Familiarize with the Interface: Explore the layout of VS Code to understand its components better. Key areas include:
- Activity Bar: Located on the side, it provides access to various views like Explorer, Search, Source Control, and Extensions.
- Side Bar: Displays different panels related to files, search, source control, and extensions.
- Editor Area: The central area where you write and edit your code.
- Status Bar: At the bottom, it shows important information about your project and provides quick access to various settings.
- Command Palette: This is a powerful feature. Press
Ctrl+Shift+Pto bring it up. The Command Palette lets you execute almost all commands available in VS Code, including opening files, changing settings, and accessing various features. - Integrated Terminal: A convenient tool, especially for Linux users. Open it within VS Code using
Ctrl+`. You can run shell commands, Git operations, or scripts directly, enhancing your workflow efficiency.
VSCode Customization Tips on Rocky Linux
- Themes and Appearance: Personalize your editor by selecting a theme that suits your style. Go to
File > Preferences > Color Theme. You can choose from a range of pre-installed themes or download new ones from the marketplace. - Font and Display Settings: Adjust the font size, type, and other display settings for comfort and efficiency. Navigate to
File > Preferences > Settingsand search for ‘Font’ to find relevant options. Consider enabling font ligatures for a more streamlined coding experience. - Extensions: Extend the functionality of VS Code with extensions. They can provide support for additional languages, enhanced debugging, code linting, and more. Access the Extensions view (
Ctrl+Shift+X) and explore a vast library of tools that can cater to your specific development needs.
Productivity Tips for VSCode on Rocky Linux
- Keyboard Shortcuts: Boost your productivity by mastering keyboard shortcuts.
Ctrl+K Ctrl+Sopens the keyboard shortcuts interface where you can browse and customize them. Key shortcuts to start with includeCtrl+Pfor quick file navigation andCtrl+/for toggling line comments. - Code Snippets: Utilize code snippets to save time on repetitive coding tasks. VS Code allows you to define and insert common code patterns quickly. To create or edit snippets, go to
File > Preferences > User Snippets. - Version Control Integration: The built-in Git support streamlines your version control workflow. You can commit, pull, push, and manage branches directly from the editor. Familiarize yourself with the Source Control panel and integrate it into your daily coding routine.
Additional VSCode Tips on Rocky Linux
- Multi-File Editing: Enhance your coding efficiency by editing multiple files simultaneously. You can split the editor (
Ctrl+\) to view and edit files side by side, which is especially helpful when comparing code across files. - Debugging: The integrated debugger is a powerful feature for identifying and fixing issues in your code. It supports various programming languages and allows you to set breakpoints, inspect variables, and step through code.
- Customize Workspace Settings: For project-specific configurations, adjust workspace settings. This can include setting language preferences, formatting styles, or extension behavior. Access these settings via the
.vscodefolder in your project directory.
Managing Visual Studio Code on Rock Linux 9 or 8
Update Visual Studio Code on Rocky Linux
Why Update?
Regular updates are crucial for maintaining the performance, security, and functionality of Visual Studio Code. Each update may introduce new features and important security patches.
Performing the Update
After installing Visual Studio Code through a package manager, it’s important to keep it updated. On systems like Rocky Linux that use the DNF package manager, you can update all software, including Visual Studio Code, with the command:
sudo dnf upgrade --refreshThis command refreshes the package list and upgrades all installed packages. To update only Visual Studio Code, use:
sudo dnf upgrade codeRemove Visual Studio Code from Rocky Linux
When to Uninstall?
You might need to uninstall Visual Studio Code for various reasons, such as for a fresh reinstall or because it’s no longer required.
Removal Process
To uninstall Visual Studio Code, use this command:
sudo dnf remove codeIf you have installed other versions, like the Insider version, remove it with:
sudo dnf remove code-insidersRemove Visual Studio Code RPM Repository
After uninstalling Visual Studio Code, it’s advisable to remove its repository to prevent unnecessary update checks. This step is especially important if you’re not planning to reinstall the software. Remove the repository with:
sudo rm /etc/yum.repos.d/vscode.repoRemoving the repository helps maintain a clean and efficient system, ensuring that updates are only checked for the software currently in use.
Conclusion
In conclusion, this guide has walked you through the essential steps to successfully install and manage Visual Studio Code on Rocky Linux 9 or 8. From setting up the software to customizing your workspace and leveraging powerful features for enhanced productivity, we’ve covered the key aspects to help you get the most out of VSCode.
Remember to regularly update your installation to access the latest features and security patches. Embrace the versatility of extensions, familiarize yourself with the integrated tools, and tailor your environment to suit your coding style. With these tips and tricks, you’re now well-equipped to embark on a seamless and efficient coding journey with Visual Studio Code on Rocky Linux.


