

VeraCrypt creates encrypted containers that protect sensitive files from unauthorized access, even if your device is lost or stolen. Whether you need to encrypt a USB drive for portable storage, protect a partition containing financial documents, or create a hidden volume with plausible deniability, VeraCrypt provides strong encryption using industry-standard algorithms including AES, Serpent, and Twofish. By the end of this guide, you will have VeraCrypt installed on Linux Mint and ready to create encrypted volumes.
Choose Your VeraCrypt Installation Method
On Linux Mint, you can install VeraCrypt through two methods, each suited to different needs and trust levels. The comparison table below outlines the key differences to help you choose the right approach for your system.
| Method | Channel | Version | Updates | Best For |
|---|---|---|---|---|
| PPA (Unit 193) | Launchpad PPA | Latest stable | Automatic via APT | Most users who want easy installation and updates |
| Compile from Source | GitHub Repository | Latest stable | Manual recompilation | Users who prefer building from official source or need custom builds |
We recommend the PPA method for most users because it provides automatic security updates and requires no manual maintenance. However, if you prefer not to trust third-party repositories or need custom build options (such as console-only builds without GUI dependencies), compiling from source gives you complete control over the installation.
Linux Mint Version Mapping
Linux Mint uses Ubuntu as its package base, so when adding PPAs or external repositories, you need to know which Ubuntu codename corresponds to your Mint version. The table below shows the mapping for currently supported releases.
| Linux Mint Version | Mint Codenames | Ubuntu Base | Ubuntu Codename |
|---|---|---|---|
| Linux Mint 22.x | Wilma (22), Xia (22.1), Zara (22.2), Zena (22.3) | Ubuntu 24.04 LTS | noble |
| Linux Mint 21.x | Vanessa (21), Vera (21.1), Victoria (21.2), Virginia (21.3) | Ubuntu 22.04 LTS | jammy |
This guide covers Linux Mint 21.x and 22.x. The PPA method works identically on both versions. The compile from source method requires different wxWidgets packages depending on your Mint version, with specific instructions provided below.
Update Linux Mint Before Installation
Before installing any new software, refresh your package index to ensure you download the latest available versions and avoid dependency conflicts. Open a terminal from the applications menu and run the following command:
sudo apt updateIf updates are available, you can apply them with the upgrade command. This step is optional but recommended to keep your system secure:
sudo apt upgradeMethod 1: Install VeraCrypt via PPA
The Unit 193 PPA provides pre-built VeraCrypt packages that integrate with Linux Mint’s package management system. As a result, this method handles dependencies automatically and delivers updates through the standard apt upgrade process.
Add the VeraCrypt PPA
Add the encryption PPA to your system’s software sources:
sudo add-apt-repository ppa:unit193/encryption -yThe -y flag automatically confirms the addition. You should see output showing the GPG key import:
gpg: keybox '/etc/apt/keyrings/A2464CAD19240F2C59FC031F9B9FBDD5426B515F.keyring' created
gpg: key 9B9FBDD5426B515F: public key "Launchpad PPA for Unit 193" imported
gpg: Total number processed: 1
gpg:               imported: 1
Refresh the package lists so APT can see the new packages:
sudo apt updateLook for the PPA in the output to confirm it was added correctly. The Ubuntu codename in the URL corresponds to your Mint version: jammy for Mint 21.x or noble for Mint 22.x:
Get:1 https://ppa.launchpadcontent.net/unit193/encryption/ubuntu jammy InRelease [24.6 kB]
Get:2 https://ppa.launchpadcontent.net/unit193/encryption/ubuntu jammy/main amd64 Packages [548 B]
...
Install VeraCrypt
Install VeraCrypt using APT:
sudo apt install veracryptVerify Installation
After the installation completes, confirm VeraCrypt installed correctly by checking its version:
veracrypt --versionIf successful, you should see output confirming the installed version:
VeraCrypt 1.26.24
Method 2: Compile VeraCrypt from Source
Alternatively, compiling from source gives you complete control over the build process and is the preferred method for users who want to verify the code themselves rather than trust third-party packages. This approach also allows custom build configurations such as console-only builds without GUI dependencies.
Install Build Dependencies
First, install the required development libraries. These include a C++ compiler (provided by GCC and build-essential on Linux Mint) and the wxWidgets GUI toolkit. Because the wxWidgets package name differs between Mint versions, use the correct command for your release.
Linux Mint 21.x (Ubuntu 22.04 base):
sudo apt install build-essential yasm pkg-config libwxgtk3.0-gtk3-dev libfuse-dev libpcsclite-dev git -yLinux Mint 22.x (Ubuntu 24.04 base):
sudo apt install build-essential yasm pkg-config libwxgtk3.2-dev libfuse-dev libpcsclite-dev git -yThe difference is the wxWidgets version: Linux Mint 21.x ships wxWidgets 3.0 (
libwxgtk3.0-gtk3-dev), while Linux Mint 22.x ships wxWidgets 3.2 (libwxgtk3.2-dev). Using the wrong package causes compilation to fail with missing header errors.
Specifically, these packages provide the following components:
build-essential: C/C++ compiler and core build toolsyasm: Assembler required for optimized encryption routines on x86/x64pkg-config: Helper tool for locating libraries during compilationlibwxgtk*-dev: wxWidgets GUI toolkit development fileslibfuse-dev: FUSE (Filesystem in Userspace) development files for mounting volumeslibpcsclite-dev: Smart card support for hardware tokensgit: Version control system for cloning the source repository
Clone the Source Repository
Download the VeraCrypt source code from the official GitHub repository. If you do not have Git installed on Linux Mint, the previous command already included it as a dependency:
git clone https://github.com/veracrypt/VeraCrypt.git ~/VeraCrypt
cd ~/VeraCrypt/src
This command clones the repository to your home directory, keeping your build files organized and separate from system directories.
Compile VeraCrypt
With the dependencies installed, run the make command to compile VeraCrypt. The -j$(nproc) flag uses all available CPU cores to speed up compilation:
make -j$(nproc)Compilation typically takes 2-5 minutes with multiple cores, or longer on single-core systems. You will see progress output as each component compiles:
Compiling Crypto/Aes_hw_cpu.o
Compiling Crypto/Aes.o
Compiling Crypto/Aescrypt.o
...
Compiling Main/Application.o
Compiling Main/CommandLineInterface.o
Linking VeraCrypt
Once complete, the VeraCrypt binary is located in the Main directory within the source tree.
For a console-only build without GUI dependencies, you must download wxWidgets source code separately and use
make NOGUI=1 WXSTATIC=1 WX_ROOT=/path/to/wxWidgets wxbuildfollowed bymake NOGUI=1 WXSTATIC=1. See the official repository README for details on static and headless builds.
Install the Compiled Binary
After compilation completes, copy the binary to a system-wide location so it is accessible from any terminal:
sudo cp Main/veracrypt /usr/local/bin/Verify the installation by checking the version:
veracrypt --versionVeraCrypt 1.26.24
Launch VeraCrypt
After installation, you can launch VeraCrypt either from the terminal or through your desktop environment’s application menu.
Launch from Terminal
To start VeraCrypt from the command line, run:
veracryptThis command opens the graphical interface. For command-line operations without the GUI, use the --text flag. For example, to mount an encrypted volume from the terminal:
veracrypt --text --mount /path/to/volume /mnt/veracryptLaunch from Applications Menu
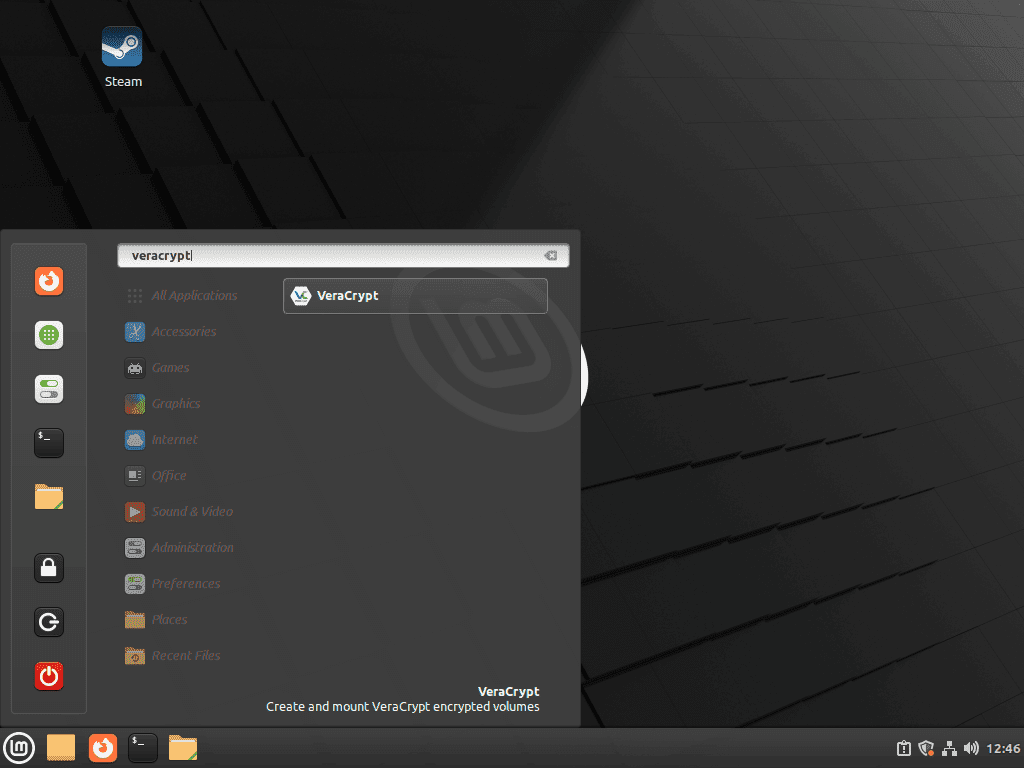
For desktop users, VeraCrypt appears in your applications menu after installation:
- Open your desktop environment’s application menu (Cinnamon, MATE, or Xfce menu).
- Search for “VeraCrypt” in the search bar.
- Click the VeraCrypt icon to launch the application.
Manage VeraCrypt
Update VeraCrypt
The update process depends on how you originally installed VeraCrypt.
PPA installation: VeraCrypt updates arrive through the standard system update process. Run the following to check for and apply updates:
sudo apt update && sudo apt upgradeAlternatively, to update only VeraCrypt without upgrading other packages:
sudo apt install --only-upgrade veracryptSource installation: Because the source install bypasses APT, you update it by pulling the latest release tag from GitHub and recompiling. The script below checks your current version, compares it to the latest GitHub release, and updates only when a newer version is available.
To set this up, create the update script:
nano ~/update-veracrypt.shThen paste the following content into the editor:
#!/usr/bin/env bash
# VeraCrypt Source Update Script
# This script checks for and installs the latest stable VeraCrypt release

set -euo pipefail

require_cmd() {
  command -v "$1" >/dev/null 2>&1 || { echo "Error: $1 is required."; exit 1; }
}

for cmd in curl git make; do
  require_cmd "$cmd"
done

if ! command -v veracrypt >/dev/null 2>&1; then
  echo "Error: veracrypt is not in PATH."
  exit 1
fi

INSTALL_PATH="$(command -v veracrypt)"
if [ "$INSTALL_PATH" = "/usr/bin/veracrypt" ]; then
  echo "Detected APT-managed veracrypt at /usr/bin/veracrypt."
  echo "Update it with: sudo apt update && sudo apt install --only-upgrade veracrypt"
  exit 0
fi

VERACRYPT_DIR="$HOME/VeraCrypt"
if [ ! -d "$VERACRYPT_DIR/.git" ]; then
  echo "Error: VeraCrypt source directory not found at $VERACRYPT_DIR"
  echo "Clone the repository first: git clone https://github.com/veracrypt/VeraCrypt.git ~/VeraCrypt"
  exit 1
fi

API_URL="https://api.github.com/repos/veracrypt/VeraCrypt/releases/latest"
RELEASE_JSON="$(curl -fsSL "$API_URL")"
LATEST_TAG="$(printf '%s' "$RELEASE_JSON" | grep -oP '"tag_name": "\K[^"]+')"
LATEST_VERSION="${LATEST_TAG#VeraCrypt_}"

if [ -z "$LATEST_VERSION" ]; then
  echo "Error: Could not determine the latest release from GitHub."
  exit 1
fi

CURRENT_VERSION="$(veracrypt --version 2>/dev/null | awk '{print $2; exit}')"
if [ -z "$CURRENT_VERSION" ]; then
  CURRENT_VERSION="unknown"
fi

echo "Install path: $INSTALL_PATH"
echo "Current version: $CURRENT_VERSION"
echo "Latest version: $LATEST_VERSION"

if [ "$CURRENT_VERSION" = "$LATEST_VERSION" ]; then
  echo ""
  echo "VeraCrypt is already up to date."
  exit 0
fi

echo ""
echo "A new version is available: $LATEST_VERSION"
read -p "Continue with update? (y/n) " -n 1 -r
echo ""

if [[ ! $REPLY =~ ^[Yy]$ ]]; then
  echo "Update cancelled."
  exit 0
fi

echo "Updating VeraCrypt from $CURRENT_VERSION to $LATEST_VERSION..."
echo ""

cd "$VERACRYPT_DIR/src"
git fetch --tags
git checkout "tags/$LATEST_TAG"

echo "Cleaning previous build..."
make clean 2>/dev/null || true

echo "Compiling VeraCrypt (this may take several minutes)..."
JOBS=$(nproc 2>/dev/null || echo 1)
make -j"$JOBS"

if [ ! -x "Main/veracrypt" ]; then
  echo "Error: Compilation failed. Check build dependencies."
  exit 1
fi

echo "Installing updated binary..."
if [ -w "$(dirname "$INSTALL_PATH")" ]; then
  cp Main/veracrypt "$INSTALL_PATH"
elif command -v sudo >/dev/null 2>&1; then
  sudo cp Main/veracrypt "$INSTALL_PATH"
else
  echo "Error: Cannot write to $INSTALL_PATH and sudo is not available."
  exit 1
fi

echo ""
echo "Update complete!"
veracrypt --version
Save the file by pressing Ctrl+O, then Enter, then exit with Ctrl+X. Make the script executable and run it:
chmod +x ~/update-veracrypt.sh
~/update-veracrypt.sh
Example output when you are already on the latest version:
Install path: /usr/local/bin/veracrypt
Current version: 1.26.24
Latest version: 1.26.24

VeraCrypt is already up to date.
The script checks out the tagged release rather than the latest commit, ensuring you only install official stable releases. If compilation fails, verify you have the correct wxWidgets development package for your Linux Mint version.
Remove VeraCrypt
The removal process depends on how you originally installed VeraCrypt.
PPA installation: To remove the package and clean up the PPA:
sudo apt remove veracrypt -y
sudo apt autoremove -y
sudo add-apt-repository --remove ppa:unit193/encryption -y
In this sequence, the apt autoremove command cleans up any dependencies that were installed alongside VeraCrypt and are no longer needed by other packages, such as the wxWidgets libraries.
Source installation: Instead, remove the binary you copied earlier and optionally delete the source directory:
sudo rm /usr/local/bin/veracryptThe following command permanently deletes the VeraCrypt source directory. If you want to keep the source code for future compilations, skip this step.
rm -rf ~/VeraCryptVerify the removal by checking that the command is no longer available:
which veracryptIf removal was successful, this command produces no output.
Troubleshooting
Unable to Locate Package After Adding PPA
If apt install veracrypt returns “Unable to locate package veracrypt” after adding the PPA, the package lists may not have updated correctly. Run apt update explicitly and check if APT can see the PPA packages:
sudo apt update
apt-cache policy veracrypt
The second command should show a candidate version from the PPA. If it shows Candidate: (none), verify the PPA source file exists and contains the correct Ubuntu codename:
cat /etc/apt/sources.list.d/unit193*For Mint 22.x, the file should reference noble. For Mint 21.x, it should reference jammy. If the codename is incorrect or the file is empty, remove the PPA and add it again:
sudo add-apt-repository --remove ppa:unit193/encryption -y
sudo add-apt-repository ppa:unit193/encryption -y
sudo apt update
sudo apt install veracrypt
Compilation Fails with wxWidgets Errors
If compilation fails with errors about missing wxWidgets headers or undefined symbols, first verify you installed the correct development package for your Linux Mint version:
apt-cache search libwxgtk | grep devFor example, output on Linux Mint 22.x:
libwxgtk3.2-dev - wxWidgets Cross-platform C++ GUI toolkit (GTK 3 development)
libwxgtk-media3.2-dev - wxWidgets Cross-platform C++ GUI toolkit (GTK 3 media library development)
libwxgtk-webview3.2-dev - wxWidgets Cross-platform C++ GUI toolkit (GTK 3 webview library development)
Then install the appropriate package (libwxgtk3.0-gtk3-dev for Mint 21.x or libwxgtk3.2-dev for Mint 22.x) and retry compilation:
cd ~/VeraCrypt/src
make clean
make -j$(nproc)
XmlParser Error on Non-English Systems
If VeraCrypt fails to launch with an error like “ParameterIncorrect at VeraCrypt::XmlParser::GetNodes,” your system locale is causing the XML parser to fail. This commonly occurs on systems using non-English languages. To fix it, launch VeraCrypt with an explicit English locale:
LANG=en_US.UTF-8 veracryptTo make this fix permanent, modify the desktop entry so VeraCrypt always launches with the correct locale:
sudo sed -i 's/Exec=veracrypt/Exec=env LANG=en_US.UTF-8 veracrypt/' /usr/share/applications/veracrypt.desktopIf the error persists after applying this fix, remove the configuration file at ~/.config/VeraCrypt/Configuration.xml to let VeraCrypt regenerate it with default settings.
FUSE-Related Mount Errors
VeraCrypt requires FUSE (Filesystem in Userspace) to mount encrypted volumes. If mounting fails with permission errors or “fuse: device not found” messages, ensure the FUSE kernel module is loaded and your user is in the fuse group:
sudo modprobe fuse
sudo usermod -aG fuse $USER
Log out and back in for the group change to take effect. After logging back in, verify your user is in the fuse group:
groupsIf configured correctly, the output should include fuse among your groups.
Volume Failed to Mount with Exit Code
If VeraCrypt shows an error like “Failed to mount volume” with an exit code, check the following common causes:
- Incorrect password or keyfile: VeraCrypt does not differentiate between wrong passwords and corrupted volumes. Verify you are using the correct credentials.
- Mount point does not exist: Create the mount point directory before mounting:
sudo mkdir -p /mnt/veracrypt - Volume already in use: If the volume is mounted elsewhere or a process is holding it open, unmount it first or reboot.
- Insufficient permissions on device: For encrypted USB drives, ensure your user has access to the device or run VeraCrypt with
sudo veracrypt.
Application Does Not Appear in Menu
If you installed VeraCrypt from source and it does not appear in your applications menu, the desktop entry file may be missing. To fix this, create one manually:
sudo tee /usr/share/applications/veracrypt.desktop <<'EOF'
[Desktop Entry]
Type=Application
Name=VeraCrypt
GenericName=Disk Encryption
Comment=Create and mount encrypted volumes
Exec=veracrypt
Icon=veracrypt
Categories=Utility;Security;
Terminal=false
EOF
The application should appear in your menu after a few seconds, or after logging out and back in.
Conclusion
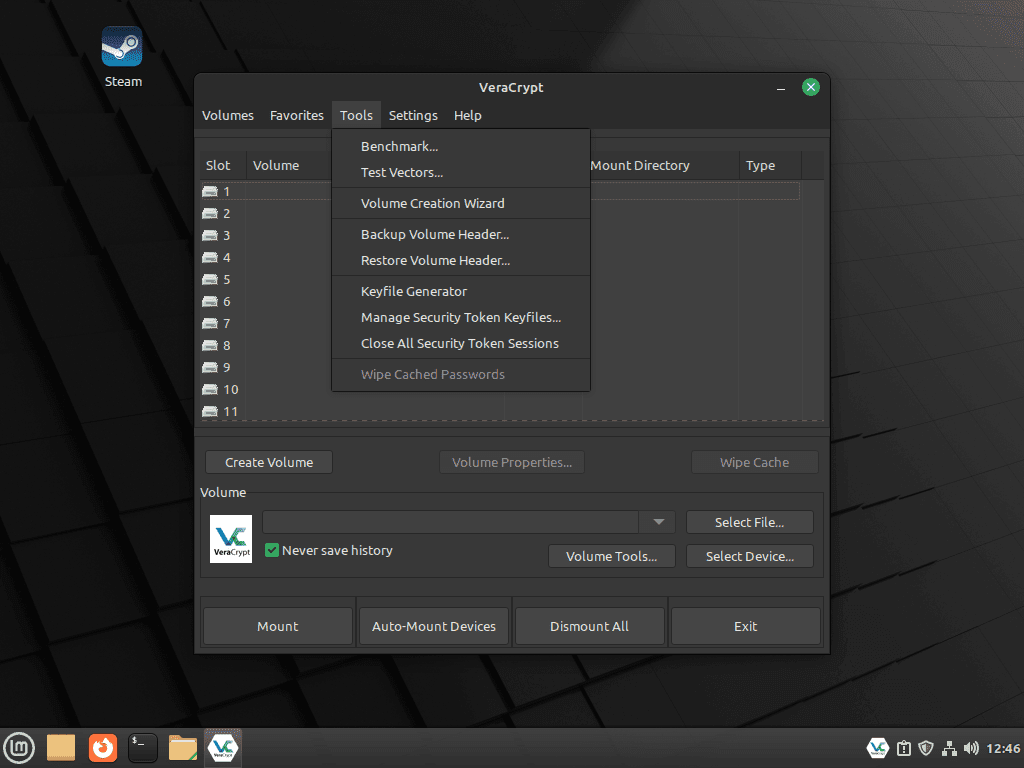
You now have VeraCrypt installed on Linux Mint, ready to create encrypted containers and protect sensitive data. The PPA method provides automatic updates through APT, while source compilation offers complete control for users who prefer to verify code before trusting it with their encrypted data. To get started creating encrypted volumes, launch VeraCrypt and select “Create Volume” to walk through the volume creation wizard. Consider reviewing the official VeraCrypt documentation to learn about advanced features like hidden volumes for plausible deniability and full-disk encryption for complete system protection.
Useful Links
Here are official resources for learning more about VeraCrypt:
- VeraCrypt Official Website: Download links, feature overview, and news about VeraCrypt releases.
- VeraCrypt Documentation: Comprehensive guides on creating volumes, mounting options, and security best practices.
- VeraCrypt GitHub Repository: Source code, build instructions, and issue tracker for reporting bugs.
- Unit 193 PPA: The Launchpad PPA page showing available packages and supported Ubuntu versions.
- VeraCrypt Discussion Forum: Community support forum for questions and troubleshooting.

Tried this, but am getting the following:
chris@chris-HP-Pavilion-Laptop-14-bf1xx:~$ sudo add-apt-repository ppa:unit193/encryption -y
You are about to add the following PPA:
https://www.veracrypt.fr/
VeraCrypt – Open source disk encryption with strong security for the Paranoid, based on TrueCrypt.
Debian and Rasbian builds: https://build.opensuse.org/project/show/home:unit193:veracrypt
More info: https://launchpad.net/~unit193/+archive/ubuntu/encryption
gpg: directory ‘/root/.gnupg’ created
gpg: keybox ‘/root/.gnupg/pubring.kbx’ created
gpg: /root/.gnupg/trustdb.gpg: trustdb created
gpg: keybox ‘/etc/apt/keyrings/A2464CAD19240F2C59FC031F9B9FBDD5426B515F.keyring’ created
gpg: key 9B9FBDD5426B515F: public key “Launchpad PPA for Unit 193” imported
gpg: Total number processed: 1
gpg: imported: 1
chris@chris-HP-Pavilion-Laptop-14-bf1xx:~$ sudo apt install veracrypt
Reading package lists… Done
Building dependency tree… Done
Reading state information… Done
E: Unable to locate package veracrypt
chris@chris-HP-Pavilion-Laptop-14-bf1xx:~$
Any suggestions what’s going wrong? Thanks!
Chris, thanks for reporting this. The article had a gap. It claimed the
-yflag would automatically refresh the package lists, but that does not always happen reliably. Runningsudo apt updateafter adding the PPA should fix it:The guide has been updated to include an explicit
apt updatestep after adding the PPA, along with a troubleshooting section for this exact issue. Your comment helped catch something that would have tripped up other readers. Appreciate you taking the time to report it.Best and most awesome answer on how to install this program. You are a major asset in the march towards Linux (in this case Mint) and the fleeing from MS Windows.
Thank you, so much. Appreciate how easy you made this for a nubie like me.
I installed Veracrypt according to the instructions, but when I try to open an existing Veracrypt container, it says, “Permission denied.”
I also installed the Debian and Ubuntu versions from the Veracrypt website with the same result.
What am I doing wrong?
Thanks for reporting this, Charlie. The “Permission denied” error when mounting VeraCrypt containers is typically caused by FUSE permissions. First, add your user to the fuse group:
Log out and back in for the group change to take effect, then verify with:
If
fuseappears in the output and the error persists, check that the container file itself is readable by your user. Runls -l /path/to/your/containerto verify permissions. If the container is on an external drive, the drive’s mount options may be restricting access. Try mounting the container withsudo veracryptas a test. If that works, the issue is filesystem permissions on the container file rather than VeraCrypt configuration.Linux Mint 22.1 Cinnamon 2025.05.28
I tried installing the VeraCrypt program using several methods, but after a successful installation, I receive the following error message upon launching it:
ParameterIncorrect at VeraCrypt::XmlParser::GetNodes:82
Thanks for reporting this, Attila. The “ParameterIncorrect at XmlParser::GetNodes” error is a known issue when VeraCrypt launches on systems with non-English locales. The XML parser fails to handle certain locale-specific formatting.
To fix it, launch VeraCrypt with the English locale set explicitly:
If that works, make the fix permanent by editing the desktop entry file:
After running this command, VeraCrypt will launch correctly from the applications menu. If the error persists, try removing the configuration file at
~/.config/VeraCrypt/Configuration.xmlto let VeraCrypt regenerate it with default settings.