

This guide will show you how to install TeamViewer on Ubuntu 24.04, 22.04, or 20.04 LTS releases using the command-line terminal and the official TeamViewer APT mirror. It will also include some tips for setup and first use.
Teamviewer is renowned for its efficient and user-friendly remote access capabilities, catering to a diverse range of users across different platforms. Whether you’re providing support, accessing your device remotely, or collaborating with a team, TeamViewer offers a suite of features to enhance productivity and connectivity which include:
- End-to-end encryption: This feature ensures that all your remote sessions are secure, protecting your data from unauthorized access during transmission.
- Cross-platform compatibility: With TeamViewer, you can connect seamlessly across various operating systems, including Windows, macOS, Linux, and mobile devices, enabling versatile remote access solutions.
- File transfer: Transferring files between connected devices is straightforward and secure, facilitating easy sharing of documents, images, and more during remote sessions.
- High-quality video and voice calls: Communicate effectively with team members or support recipients through crystal-clear audio and video calls, making remote collaboration more personal and productive.
- Remote printing: This convenient feature allows you to print documents located on a remote device directly to a local printer, enhancing workflow and document management.
- Black screen feature: Enable a black screen on the remote device to maintain privacy during remote access and keep sensitive information out of sight.
- Chat and whiteboard tools: Enhance your communication during remote sessions with integrated chat and whiteboard functionalities, allowing for instant messaging and collaborative drawing or note-taking.
- Group sharing and contact management: Organize your remote access better with tools for managing groups and contacts, simplifying the process of connecting with teams or individuals.
With these expanded features, TeamViewer stands out as a comprehensive remote access and collaboration tool. Let’s proceed to the installation steps on Ubuntu, getting you ready to leverage these powerful capabilities.
Install TeamViewer on Ubuntu via APT PPA
Update Ubuntu Before TeamViewer Installation
First, ensure your Ubuntu system is up-to-date with all existing packages. Do this by running the following command:
sudo apt update && sudo apt upgradeThis command will update the package list and upgrade all installed packages to their latest version.
Install Initial Packages For TeamViewer
Next, install the required dependencies for TeamViewer. Although your system likely already contains most of these packages, running the command below will ensure their installation:
sudo apt install software-properties-common apt-transport-https curl ca-certificates -yThese packages are essential for adding external repositories and performing secure transfers over HTTPS.
Import TeamViewer GPG Key and Repository
First, you need to verify the authenticity of the packages; you’ll need to import the GPG key to your keychain. You can do this by executing the following command in your terminal:
curl -fSsL https://linux.teamviewer.com/pubkey/currentkey.asc | sudo gpg --dearmor | sudo tee /usr/share/keyrings/teamview.gpg > /dev/nullNext, you’ll need to import the TeamViewer repository by running the following command:
echo "deb [arch=amd64 signed-by=/usr/share/keyrings/teamview.gpg] http://linux.teamviewer.com/deb stable main" | sudo tee /etc/apt/sources.list.d/teamviewer.listInstall TeamViewer via APT Command
After importing the repository, update your APT package list to reflect the changes by running the following:
sudo apt updateFinally, install TeamViewer by running the following command:
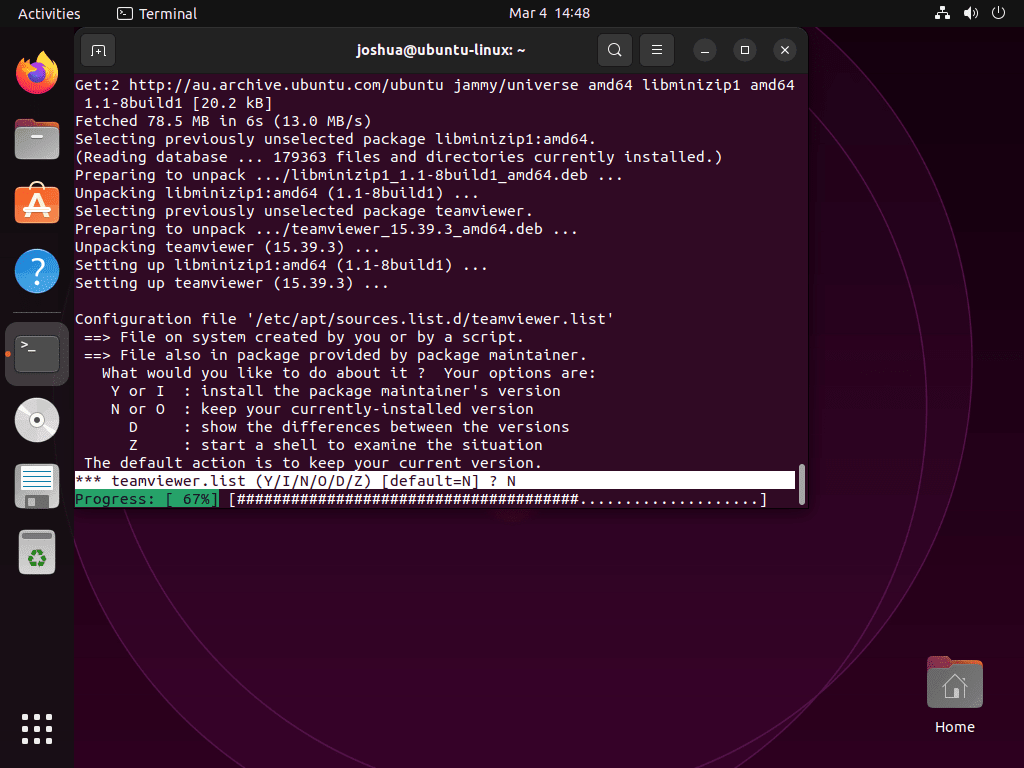
sudo apt install teamviewerNote: You may be prompted to keep the source or import the maintainer during the installation. It is recommended to choose the option to compare changes and keep the original if they are still the same. Type “N” to proceed.
Example of selecting No to replace the TeamViewer.list source you imported earlier!:
Launch TeamViewer on Ubuntu
After successfully installing TeamViewer on your Ubuntu system, you can launch the software in a few ways.
CLI Command to Launch TeamViewer UI
One way to launch TeamViewer is by using the command line terminal. You can quickly open it by executing the following command:
teamviewerGUI Path to Launch TeamViewer UI
For desktop users who prefer not to use the command line, the best way to use TeamViewer is to open the GUI of the application by following the path:
Activities > Show Applications > TeamViewer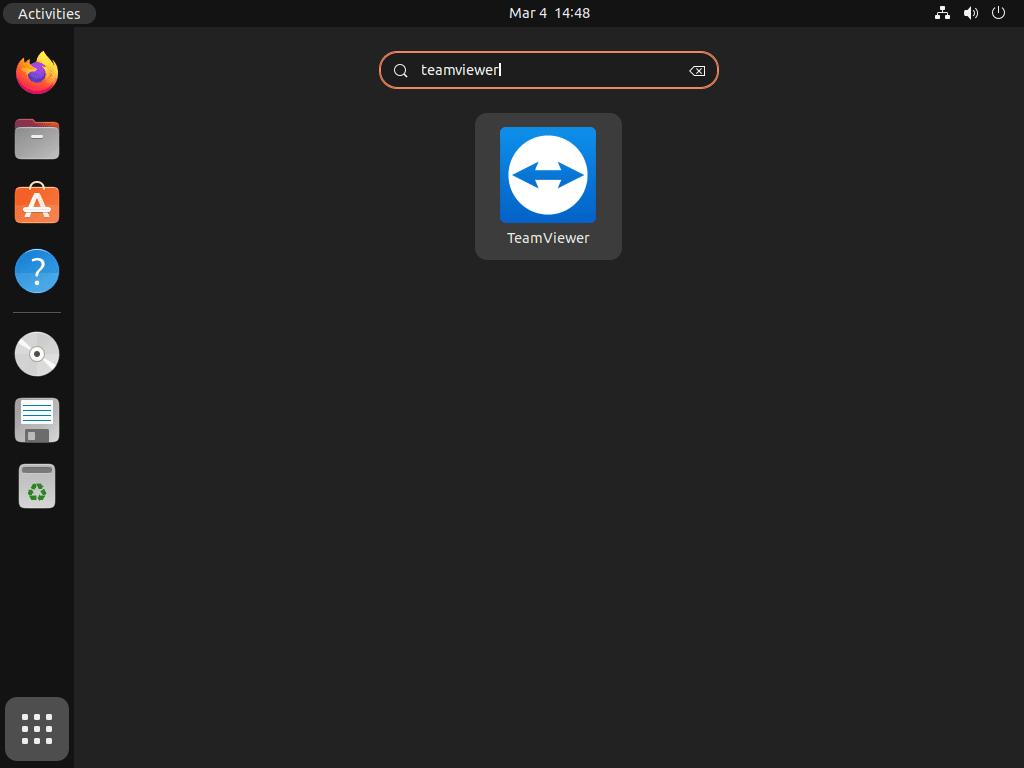
Wayland Potential Issues and Fix
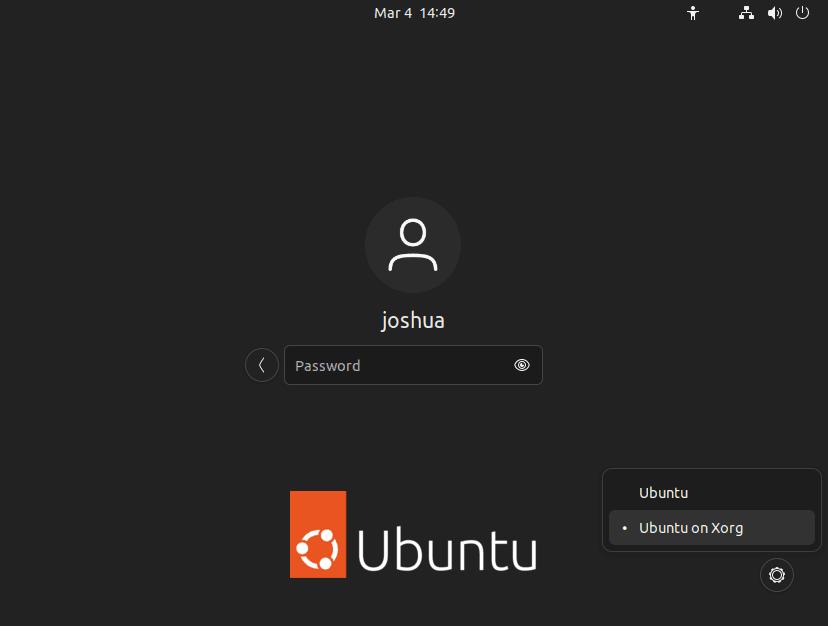
If you use Wayland, you might see an error message indicating TeamViewer doesn’t support it. Although developers have discussed Wayland support for years, they won’t implement it soon, potentially taking a decade. To use TeamViewer in the interim, log out and back in using Ubuntu on Xorg.
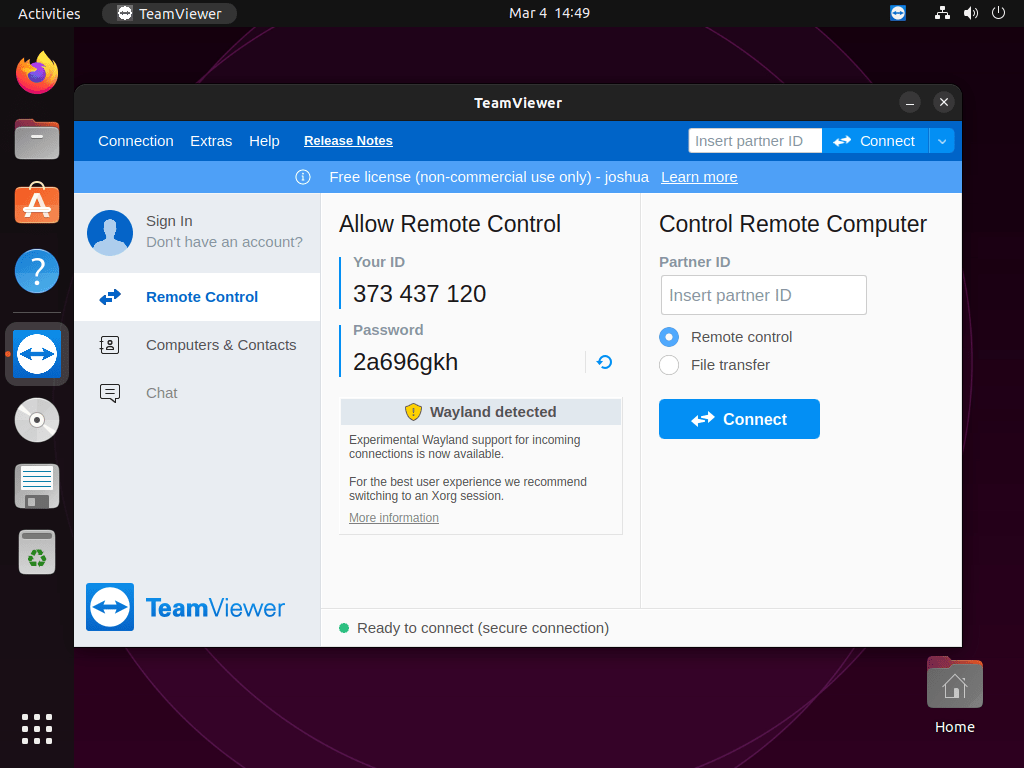
Example of Wayland detected error message on TeamViewer directly under password:
To log in using Ubuntu on Xorg, click on the gear icon in the bottom right corner of the login screen and select “Ubuntu on Xorg” before logging in.
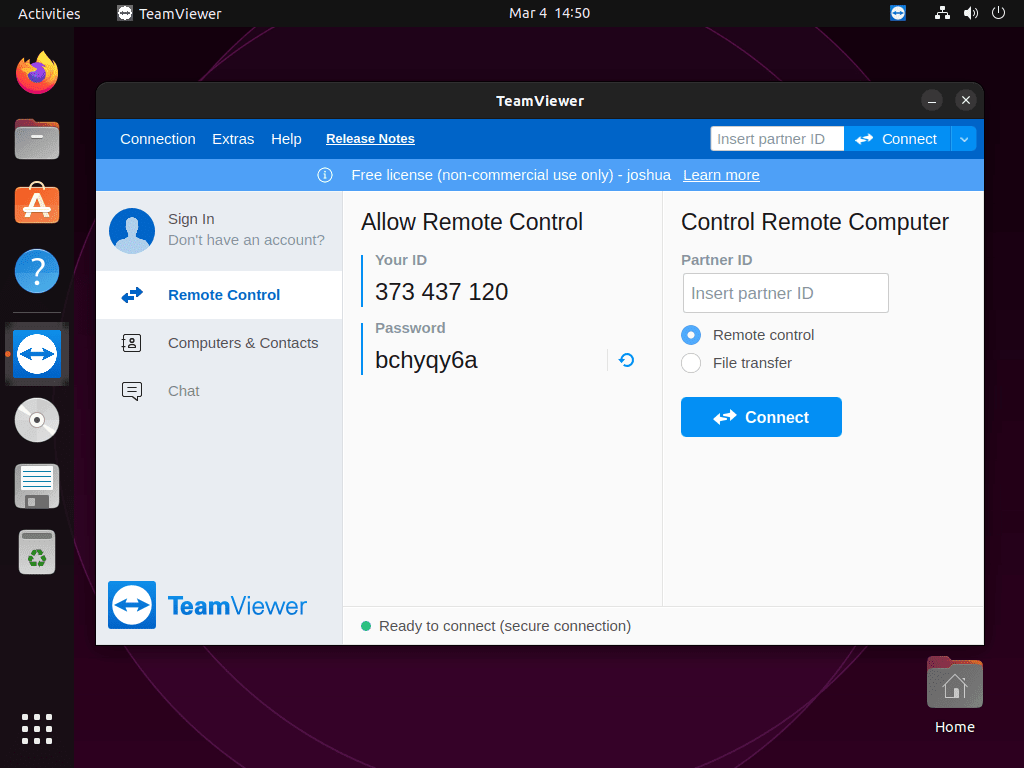
Once TeamViewer is open, you can start using it to connect to a remote PC by getting its address or giving another user your own.
Example of TeamViewer on Xorg and error message gone on Ubuntu:
Additional First-Time Tips with TeamViewer on Ubuntu
Now that you have successfully installed TeamViewer on Ubuntu, let’s dive into some first-time tips to maximize your experience with this powerful software:
General Tips for TeamViewer on Ubuntu
- Verify Installation: Ensure TeamViewer is correctly installed by checking its version with the command
teamviewer --versionin your terminal. - Secure Your Connection: Always set a strong, unique password for unattended access to prevent unauthorized use.
- Understand the Interface: Familiarize yourself with the TeamViewer interface to navigate easily and utilize its features effectively.
- Network Configuration: Ensure your firewall and router settings allow TeamViewer traffic, particularly if you’re operating in a corporate network environment.
Customizing TeamViewer on Ubuntu
- Adjust Display Settings: Customize your viewing options under
Extras > Options > Remote Controlto optimize the display quality and speed based on your internet connection. - Manage Audio and Video: In the
Optionsmenu, you can configure audio and video settings to ensure clear communication during remote sessions. - Configure Session Recording: Under
Extras > Options > Remote Control, set up automatic session recording to keep logs of your remote access activities for future reference or training. - Use Wake-on-LAN: If you need to access an Ubuntu machine that is turned off or in sleep mode, configure TeamViewer’s Wake-on-LAN feature to start the remote computer via another device within the same network.
Advanced Features in TeamViewer for Ubuntu
- Utilize VPN Feature: For advanced users, TeamViewer provides a VPN option for a secure and private connection, which can be especially useful for accessing restricted network services.
- Direct File Transfer: Use the File Transfer mode to send or receive files directly between connected devices without establishing a full remote control session.
- Multi-Monitor Support: If the remote Ubuntu machine has multiple monitors, TeamViewer can display each screen individually or simultaneously, enhancing the remote control experience.
- Chat Functionality: Use TeamViewer’s built-in chat feature for instant communication with the remote user. This feature is handy for providing instructions or clarifications during a session.
Keyboard Shortcuts for TeamViewer on Ubuntu
- Ctrl+Alt+Del: Send the “Control-Alt-Delete” command to the remote machine.
- Ctrl+T: Start or end a telephone call.
- Ctrl+F: Activate full-screen mode.
- Ctrl+L: Lock or unlock the remote computer.
Embracing these tips will better equip you to leverage TeamViewer’s capabilities on Ubuntu, enhancing your remote access and support experiences.
Additional Commands for TeamViewer on Ubuntu
TeamViewer Terminal Commands
Using TeamViewer in a Ubuntu terminal is a convenient way to access and control other devices remotely. Here are some quick tips on how to use TeamViewer in a terminal on Ubuntu:
Connect to a Remote Device:
Connect to a remote device by entering its ID and password. You can do this by executing the following command in the terminal:
teamviewer -i [remote ID] -p [remote password]Replace [remote ID] with the ID of the remote device you want to connect to and [remote password] with the password shared by the device owner.
Start a Remote Session:
To start a remote session, use the following command:
teamviewer -i [remote ID] -p [remote password] -lThis command will start a remote session with the device and open it in a new window.
Enable Fullscreen Mode:
To enable fullscreen mode in the remote session window, use the following command:
teamviewer -i [remote ID] -p [remote password] --FullscreenThis command will maximize the remote session window to fullscreen mode.
Enable Remote Control:
To enable remote control in the remote session window, use the following command:
teamviewer -i [remote ID] -p [remote password] --RemoteControlThis command will enable remote control, allowing you to control the remote device as if sitting in front of it.
Change the Quality of the Remote Session:
To change the quality of the remote session, use the following command:
teamviewer -i [remote ID] -p [remote password] --quality [quality level]Replace [quality level] with the desired quality level, ranging from 0 to 9, with 9 being the highest quality.
Transfer Files:
To transfer files between your local machine and the remote device, use the following command:
teamviewer -i [remote ID] -p [remote password] --FileTransferThis command will open the File Transfer window, allowing you to browse and transfer files between the two devices.
Record the Remote Session:
To record the remote session, use the following command:
teamviewer -i [remote ID] -p [remote password] --recordThis command will start recording the remote session and save it to your local machine.
End the Remote Session:
To end the remote session, use the following command:
teamviewer -i [remote ID] -p [remote password] --killThis command will terminate the remote session and close the TeamViewer window.
Update TeamViewer
The software should update automatically with your system packages for desktop users using the APT package manager. However, if you would like to check manually, you can use the following command in your terminal:
sudo apt update && sudo apt upgradeThis command will update all the packages on your system, including TeamViewer if a newer version is available.
Remove TeamViewer
If you no longer want TeamViewer installed on your system, you can remove it using the following command:
sudo apt remove teamviewerThis command will remove TeamViewer, including all its configuration files, from your system.
If you plan not to re-install the software again, you can remove the repository list file by executing the following command:
sudo rm /etc/apt/sources.list.d/teamviewer.listThis command will delete the repository list file, preventing your system from downloading updates for TeamViewer in the future.
After removing the repository list file, you can remove the GPG key by executing the following command:
sudo rm /usr/share/keyrings/teamviewer.gpgFinal Thoughts
Throughout this guide, we’ve walked you through the steps to install TeamViewer on Ubuntu, shared essential tips for first-time users, and highlighted some key features to get the most out of your remote desktop experience. Remember, the key to a smooth TeamViewer session lies in securing your connections, customizing settings for your needs, and exploring the powerful features available. Whether you’re supporting a friend or managing remote systems, TeamViewer on Ubuntu is a reliable and versatile tool. Keep exploring, stay secure, and make the most of your remote connections!