

This guide is tailored to demonstrate how to install TeamViewer on Linux Mint 21 as well as its older supported release, Linux Mint 20. TeamViewer is a powerful remote access and control tool that has carved a niche for itself in the realm of remote support and online meetings. With TeamViewer, users can effortlessly connect to remote computers, conduct online meetings, and transfer files securely.
Features that set TeamViewer apart:
- Cross-platform support: TeamViewer is compatible with a plethora of platforms including Windows, macOS, Linux, iOS, and Android.
- Robust security: It employs end-to-end encryption and two-factor authentication, ensuring secure communication channels.
- Intuitive interface: TeamViewer’s user-friendly interface ensures even a novice user can navigate through its features with ease.
- Multi-user support sessions: Allowing several users to join a remote support session, it enables collaborative problem-solving.
Tailoring TeamViewer to your requirements involves fine-tuning a variety of settings. This guide ensures a comprehensive walkthrough that covers not only installation but also an overview of configuration options that are essential for optimizing TeamViewer. Be it for providing remote technical support, holding virtual meetings, or accessing files on your computer remotely, TeamViewer is a formidable tool that can cater to various needs efficiently and securely. This guide is structured to equip you with the knowledge and steps necessary to install and configure TeamViewer on Linux Mint without any hiccups.
Section 1: Install TeamViewer via APT Repository
In this section, you will learn the process of installing TeamViewer on your Linux Mint system by leveraging TeamViewer’s official APT repository. Utilizing this repository guarantees that you are fetching the latest TeamViewer packages directly from a trusted source, ensuring security and reliability.
Step 1: Update Linux Mint
The first order of business is to make sure your Linux Mint system is updated. This is imperative as it ensures that all packages are up-to-date, which contributes to a seamless installation process. Run the commands below to update your system:
sudo apt update
sudo apt upgrade
This sequence of commands first refreshes the package list and then upgrades all the installed packages to their most recent versions. Initiating an installation process with an updated system is considered best practice.
Step 2: Install Required Dependencies
TeamViewer has certain dependencies that need to be present for it to function properly. To ascertain that these dependencies are installed, execute the following command:
sudo apt install dirmngr ca-certificates software-properties-common apt-transport-https curl -yThese packages are essential for adding external repositories and ensuring secure data transfers over HTTPS. If you experience any difficulties during the TeamViewer installation, it’s prudent to double-check this step and confirm that all the necessary packages are installed.
Step 3: Install TeamViewer
With your Linux Mint system up-to-date and the required dependencies installed, you’re all set to install TeamViewer.
Initially, you need to make certain of the authenticity of the packages by importing TeamViewer’s GPG key. This is crucial for verifying the integrity of the packages. Execute the command below to import the key:
curl -fsSL https://download.teamviewer.com/download/linux/signature/TeamViewer2017.asc | gpg --dearmor | sudo tee /usr/share/keyrings/teamview.gpg > /dev/nullFollowing that, add the TeamViewer repository to your system. This will allow the APT package manager to fetch TeamViewer packages straight from the official source. Run the command below to add the repository:
echo "deb [arch=amd64 signed-by=/usr/share/keyrings/teamview.gpg] http://linux.teamviewer.com/deb stable main" | sudo tee /etc/apt/sources.list.d/teamviewer.listHaving added the TeamViewer repository, the next step is to update your APT package list to synchronize it with the recent changes. Do this by executing:
sudo apt updateNow, everything is set to install TeamViewer. Run the following command:
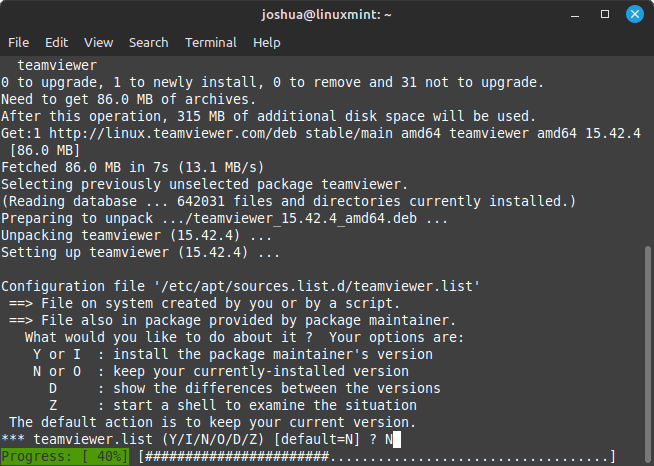
sudo apt install teamviewerDuring installation, you may be inquired about keeping the source or importing the maintainer. It is wise to select the option to compare changes and maintain the original if no modifications are detected. This can be selected by typing “N” when asked.
Example of selecting No to replace the TeamViewer.list source you imported earlier:
Section 2: Initiating TeamViewer on Linux Mint
Having successfully installed TeamViewer on your Linux Mint system, the logical next step is to get it up and running. There are two predominant methods for launching TeamViewer: using the terminal, which is generally favored by those who are comfortable with command line interfaces, and through the graphical user interface which is more intuitive and typically preferred by those who like a visual approach.
Step 1: Launch TeamViewer Through the Terminal
The terminal is a powerful tool that allows for a more direct and efficient way to interact with your system. To get TeamViewer started through the terminal, you just need to execute one simple command.
Enter the following command into the terminal:
teamviewerExecuting this command fires up TeamViewer, and its graphical user interface will become visible on your screen. This interface is where you can either log in if you have an account, or create a new one to start using TeamViewer’s features.
Step 2: Launch TeamViewer Through the Graphical User Interface
For those who prefer a more visually-guided experience, the graphical user interface provides an alternative way to launch TeamViewer. This is often more accessible, particularly for those who may not have extensive experience using the terminal.
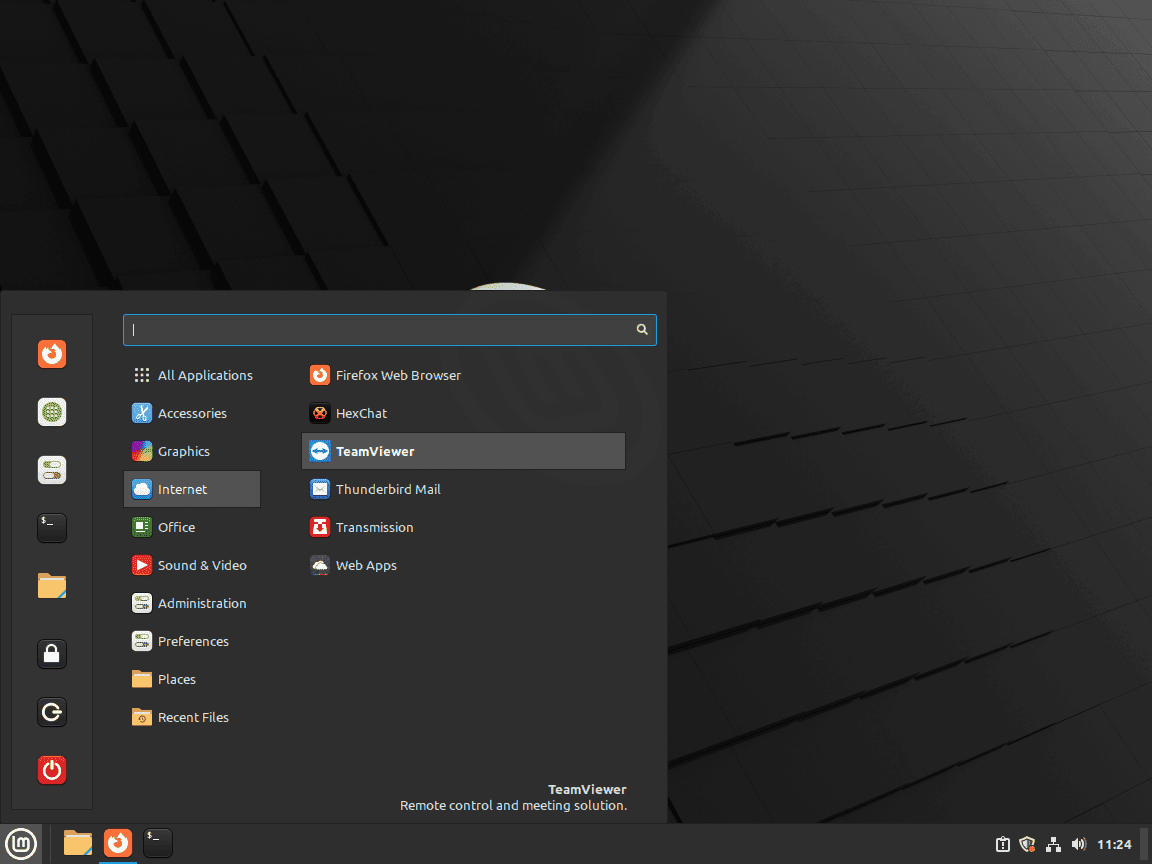
To launch TeamViewer via the graphical user interface, you need to go through the following path:
Menu > All Applications > TeamViewerBy clicking on the Linux Mint menu, you can navigate to the list of all installed applications and locate TeamViewer from the list. Once you find TeamViewer, simply click on its icon to launch the application.
Example of locating and launching TeamViewer through the Linux Mint application menu:
First-Time Launch Setup
When you run TeamViewer for the first time, you will be prompted to accept the End User License Agreement (EULA) and Data Processing Addendum (DPA). It is imperative that you review these documents and click on the “I accept” checkbox.
Once TeamViewer is open, you can start establishing connections. It is critical to exercise caution when sharing your TeamViewer credentials with others, particularly in remote scenarios. Make sure to change your password after each session if you shared it with someone for remote access.
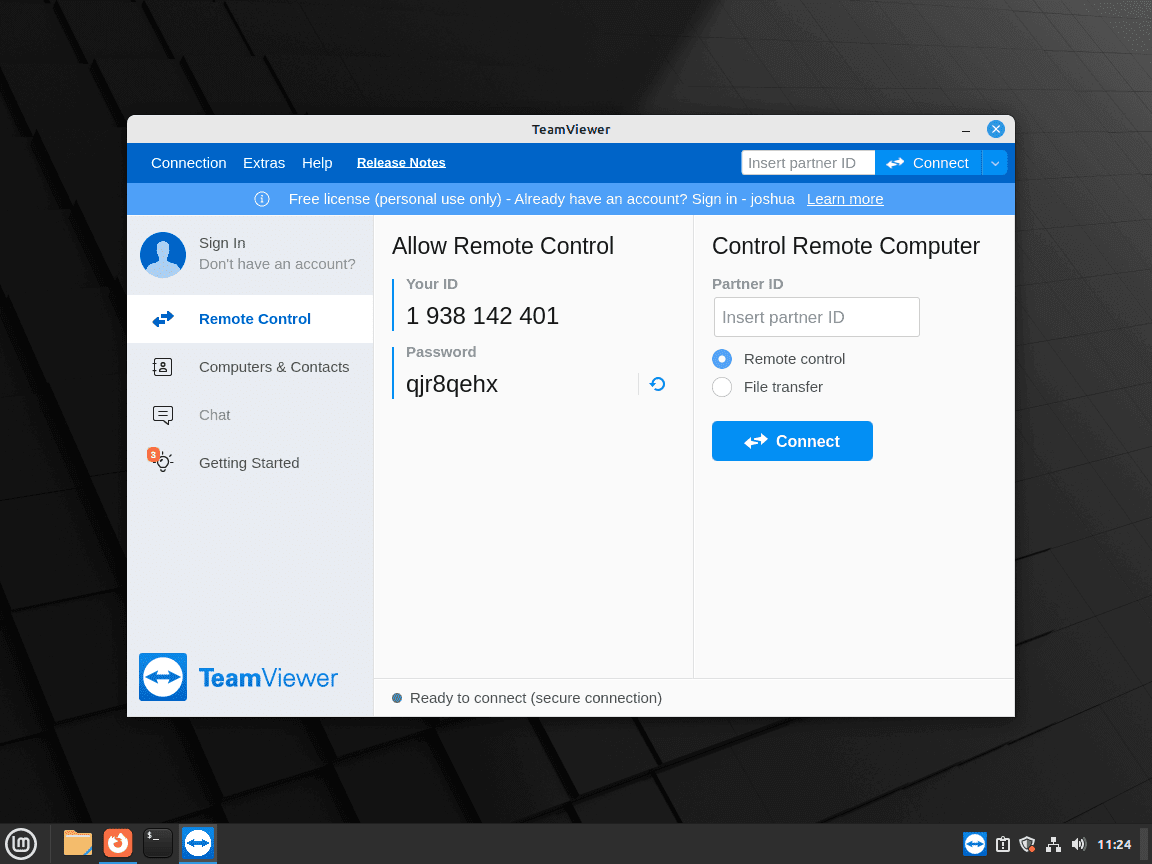
Example of TeamViewer default UI on Linux Mint:
Section 3: Tips for Getting Started with TeamViewer on Linux Mint
As you embark on using TeamViewer on Linux Mint, there are some best practices and tips that can enhance your experience and ensure smooth remote connections. In this section, we will explore valuable insights that are specifically tailored to TeamViewer users on Linux systems.
Configure TeamViewer for Unattended Access
One of the foremost features of TeamViewer is the ability to access remote systems unattended. This is highly convenient for managing servers or assisting clients without the need for them to be physically present at their systems. To set up unattended access, open TeamViewer, go to the Connection menu, and select Setup unattended access.... Follow the instructions to configure a secure password for remote connections.
Utilize the TeamViewer Linux Command Line Interface
Linux users often find comfort in the flexibility and power of command line tools. TeamViewer on Linux Mint comes with a variety of command line options. You can control various aspects of the software through the terminal. For instance, to check the status of TeamViewer, you can use:
teamviewer --infoThis will display information such as your TeamViewer ID, status, and version.
Optimize Performance and Quality Settings
Depending on the network conditions and the purpose of the remote connection, you may need to adjust TeamViewer’s performance and quality settings. To do this, open TeamViewer, click on Extras in the menu bar, and select Options. In the Remote Control tab, you can adjust settings such as quality, resolution, and audio. For instance, if you are working over a slow internet connection, reducing the quality may provide a smoother experience.
Take Advantage of TeamViewer Modules
TeamViewer offers various modules that can be tailored to specific use cases. For example, the Meeting module allows for video conferencing and collaboration. Another useful module is the File Transfer tool, which enables you to securely transfer files between the local and remote systems. This can be particularly handy when providing technical support or sharing documents.
Secure Your TeamViewer Account
Security is paramount, especially in the context of remote access. TeamViewer offers multiple layers of security features that you should leverage. Two-factor authentication is highly recommended as it adds an extra layer of protection. Additionally, consistently updating your TeamViewer application ensures that you are protected from any known vulnerabilities.
Troubleshooting TeamViewer on Linux Mint
Sometimes things don’t go as smoothly as planned. TeamViewer logs can be invaluable in diagnosing issues with the software. You can find the log files in the following directory:
/var/log/teamviewerBy examining these logs, you can gain insights into what might be causing any issues you are experiencing.
Section 4: Managing TeamViewer on Linux Mint
In this section, we will focus on how to effectively manage TeamViewer on Linux Mint. This includes how to update or upgrade TeamViewer to the latest version, and how to uninstall TeamViewer if it’s no longer needed.
Updating TeamViewer
TeamViewer is likely to receive updates that enhance its functionality and security. It’s essential to keep the software up-to-date to benefit from the latest features and security patches.
Linux Mint users typically have the convenience of the APT package manager, which usually updates software packages automatically. However, if you want to manually ensure that TeamViewer is updated, you can do so using the terminal.
Enter the following command to update the package lists for upgrades and then upgrade the installed packages including TeamViewer if there’s a new version available:
sudo apt update && sudo apt upgradeThis command first updates the local database with the latest changes in the repositories (sudo apt update), and then upgrades the installed packages to their latest versions (sudo apt upgrade).
Uninstalling TeamViewer
There might be instances where you no longer require TeamViewer on your Linux Mint system. In such cases, it’s good practice to uninstall the software to free up resources and maintain a clean system environment.
Start by entering the following command in the terminal:
sudo apt remove teamviewerThis command instructs the APT package manager to remove TeamViewer from your system.
If you are certain that you will not be reinstalling TeamViewer, it’s advisable to also remove the TeamViewer repository from your system to keep your repositories list clean.
Execute the following command to remove the repository list file:
sudo rm /etc/apt/sources.list.d/teamviewer.listAfter removing the repository list file, it’s also prudent to remove the GPG key that was used to verify the authenticity of TeamViewer packages. Execute the following command to remove the GPG key:
sudo rm /usr/share/keyrings/teamviewer.gpgConclusion
In summary, this guide provided a streamlined approach to installing TeamViewer on Linux Mint, focusing on efficient and effective methods. We explored how to set up TeamViewer through both the command line and the graphical user interface, which are essential techniques for different kinds of users. Furthermore, we discussed launching TeamViewer via terminal and graphical user interface, thus ensuring flexibility in handling the software according to personal preference. Additionally, practical tips for getting started with TeamViewer were outlined, fostering a safer and more proficient utilization of the software. Lastly, managing TeamViewer by keeping it up-to-date and understanding the uninstallation process were covered, emphasizing the importance of system maintenance and security.
As a final recommendation, it is imperative for users to consistently keep TeamViewer updated to safeguard against potential vulnerabilities and to have access to the latest features. Also, understanding the foundational aspects of TeamViewer is crucial for maximizing its capabilities efficiently.
Additional Useful Links
Dive into these official resources for more in-depth knowledge and support regarding TeamViewer and Linux Mint:
- TeamViewer Official Website: This is the primary source for everything related to TeamViewer. Here you will find downloads, documentation, and official support.
- TeamViewer Community: Engage with other TeamViewer users, share your experiences, and find solutions to common issues in this official community forum.
- TeamViewer Knowledge Base: A repository of articles, guides, and tips officially curated by TeamViewer.