Python is a go-to programming language known for its simplicity and broad range of applications. If you’re using Pop!_OS, learning to install Python can open doors to fields like web development, data analysis, and artificial intelligence.
Why Choose Python with Pop!_OS?
- Readability: Python’s clear syntax is beginner-friendly.
- Efficiency: Achieve more with fewer lines of code.
- Versatility: Extensive libraries and frameworks for diverse projects.
- Community Support: Ongoing updates and a plethora of resources from a global network of developers.
Our forthcoming guide will walk you through how to install Python on Pop!_OS using the default APT repository. For those interested in the latest Python features, we’ll also cover a Python PPA that provides stable and experimental build access. Stay tuned for the step-by-step instructions.
While the Python PPA is optimized for Ubuntu LTS, Pop!_OS users on short-term releases might want to stick with the pre-installed version for best compatibility.
Section 1: Install Python via Default APT on Pop!_OS
Step 1: Updating System Packages on Pop!_OS Before Python Installation
We first ensure that your Pop!_OS system packages are up-to-date. An updated system guarantees minimal compatibility issues and equips you with the latest software. In the terminal, execute the following commands:
sudo apt update
sudo apt upgrade
The command sudo apt update refreshes your system’s package list, and sudo apt upgrade updates all installed packages to their latest versions.
Step 2: Install Python on POP OS
With your system updated, we now install Python. Pop!_OS, being Ubuntu-based, has Python in its official repositories, making the installation straightforward. To install Python version 3, enter the following command in your terminal:
sudo apt install python3Step 3: Discovering Additional Python Packages to Install on POP OS
Python’s versatility comes in part from its rich ecosystem of additional packages. These packages are collections of Python .py scripts, or modules, that provide various specific functionalities. You can search for these packages using the apt tool.
For instance, to search for packages related to Python’s popular data analysis library, pandas, you would use:
sudo apt-cache search pandasIf you are interested in NumPy, a package highly used in scientific computing, you can search for it as follows:
sudo apt-cache search numpySimilarly, you can replace ‘numpy’ or ‘pandas’ with any other package name to find relevant packages. It’s important to note that package names are case-sensitive, so enter them correctly.
Section 2: Install Python on Pop!_OS via PPA
Step 1: Updating System Packages on Pop!_OS Before Python Installation via PPA
In alignment with best practices from Section 1, we’ll start by ensuring your Pop!_OS system is up to date. Execute the following commands in your terminal:
sudo apt update
sudo apt upgrade
Step 2: Importing Python PPA on POP OS
Next, we’ll import the Python PPA (Personal Package Archive) from Launchpad. This gives us access to various Python versions. Launchpad PPAs are an essential source for Ubuntu users to install software unavailable in the official repositories.
Run this command to add the PPA:
sudo add-apt-repository ppa:deadsnakes/ppa -yStep 3: Updating APT Cache List
After adding a new PPA, updating the APT package cache is crucial to recognize the newly added repository. Run this command:
sudo apt updateStep 4: Searching for Available Python Versions on POP OS
After updating your APT package cache, you may be interested in exploring the different versions of Python available for installation from the PPA. The apt-cache command is a valuable tool for this.
For example, to see all the Python 3 versions available in the repository, use this command:
sudo apt-cache search python3To narrow down the list to specific versions, such as Python 3.11, you can use:
sudo apt-cache search python3.11Step 5: Install Additional Python Versions on Pop!_OS
In this step, we will install the latest release candidate of Python 3.12 and the stable release of Python 3.11. You’re not limited to these versions; you could install Python 3.10 or 3.9 based on your requirements.
Run this command to install Python 3.12 and Python 3.11:
sudo apt install python3.12 python3.11Section 3: Install Python Upstream Builds via PPA on Pop!_OS
This section guides you on accessing the bleeding edge of Python development by installing the upstream Python builds using a Personal Package Archive (PPA). These builds often come with the latest features but can also carry unstable elements. Therefore, they are primarily suitable for experimental or development environments.
Step 1: Importing the Python Upstream PPA on POP OS
Start the process by importing the Python Upstream PPA. This PPA contains the nightly builds for different Python versions. Run the following command to add it to your system:
sudo add-apt-repository ppa:deadsnakes/nightly -yStep 2: Updating the APT Packages List on Pop!_OS for Python PPA
Once the PPA is added, the next step is to update your system’s APT package list. This ensures it knows the new packages in the recently added PPA. Update the APT package list by running:
sudo apt updateStep 3: Install or Upgrade Python on Pop!_OS
The Python Upstream PPA allows you to install or upgrade to the latest nightly builds of various Python versions. For example, if you’ve already installed the latest release candidate of Python 3.12 and the stable release of 3.11, this command will upgrade those installations to the latest upstream builds. If these versions are not present on your system, the command will install them. Run the following command for either installation or upgrade:
sudo apt install python3.12 python3.11Section 4: Validating Python with a Test Application on Pop!_OS
This section will validate our Python installation by creating and running a simple application. This step assures us that our installed Python versions are functioning correctly.
Step 1: Creating a Simple Python Script on Pop!_OS
For our validation purpose, let’s create a minimal Python script that prints out the version of Python it’s run with. To do this, we use the built-in platform module. This module provides functionality to get information about the underlying platform, including the Python version.
Open a new file named python_version_test.py in your preferred text editor and input the following code:
import platform

print(f'Python version: {platform.python_version()}')
This script imports the platform module and prints out the version of Python it’s run with.
Step 2: Running the Test Script with Different Python Versions on Pop!_OS
Now that our test script is ready, we can run it with the installed Python versions. This verifies that each Python version can execute a simple script and identifies itself correctly.
For Python 3.12, use the following command:
python3.12 python_version_test.pyFor Python 3.11, use this command:
python3.11 python_version_test.pyFor each command, you should see an output similar to Python version: 3.12.0 or Python version: 3.11.0, respectively. These outputs confirm that our installed Python versions are operational and correctly recognized.
Through these steps, we’ve established the functionality of our Python installations by running a basic test script. Remember, validating installations this way is helpful to ensure the correct setup of new software or versions.
Section 5: Transitioning Between Python Environments on Pop!_OS
In a context where your Linux Mint system accommodates multiple Python versions, there may be scenarios where you desire to designate a particular version as the default. This section provides a detailed walkthrough of the necessary steps to transition seamlessly between distinct Python environments.
Step 1: Establishing Symbolic Links for Python Versions on Pop!_OS
Our first order of business involves creating symbolic links for each Python version individually. Symbolic links act like shortcuts that point to the actual file or directory. To facilitate this process, execute the subsequent commands, adapting them as required based on the Python versions you have installed on your system:
sudo update-alternatives --install /usr/bin/python python /usr/bin/python2.7 1
sudo update-alternatives --install /usr/bin/python python /usr/bin/python3.7 2
sudo update-alternatives --install /usr/bin/python python /usr/bin/python3.8 3
sudo update-alternatives --install /usr/bin/python python /usr/bin/python3.9 4
sudo update-alternatives --install /usr/bin/python python /usr/bin/python3.10 5
sudo update-alternatives --install /usr/bin/python python /usr/bin/python3.11 6
sudo update-alternatives --install /usr/bin/python python /usr/bin/python3.12 7
Remember that the scenario above was just for illustrative purposes. You’ll probably require only two or three versions, so modify accordingly.
You’ll notice a number at the tail end of each command (e.g., 1, 2, 3, etc.). This number signifies the priority of the version. A more significant number corresponds to a higher priority. In this example, Python 3.12 precedes the highest priority (7), while Python 2.7 sits at the opposite end of the spectrum with the lowest priority (1).
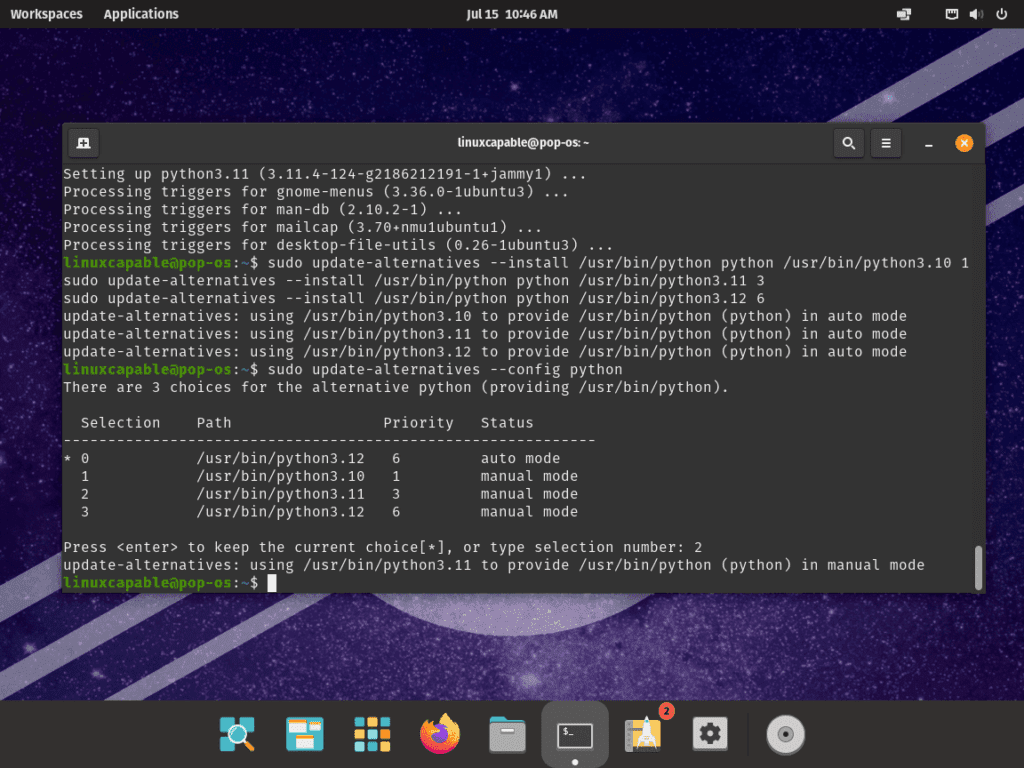
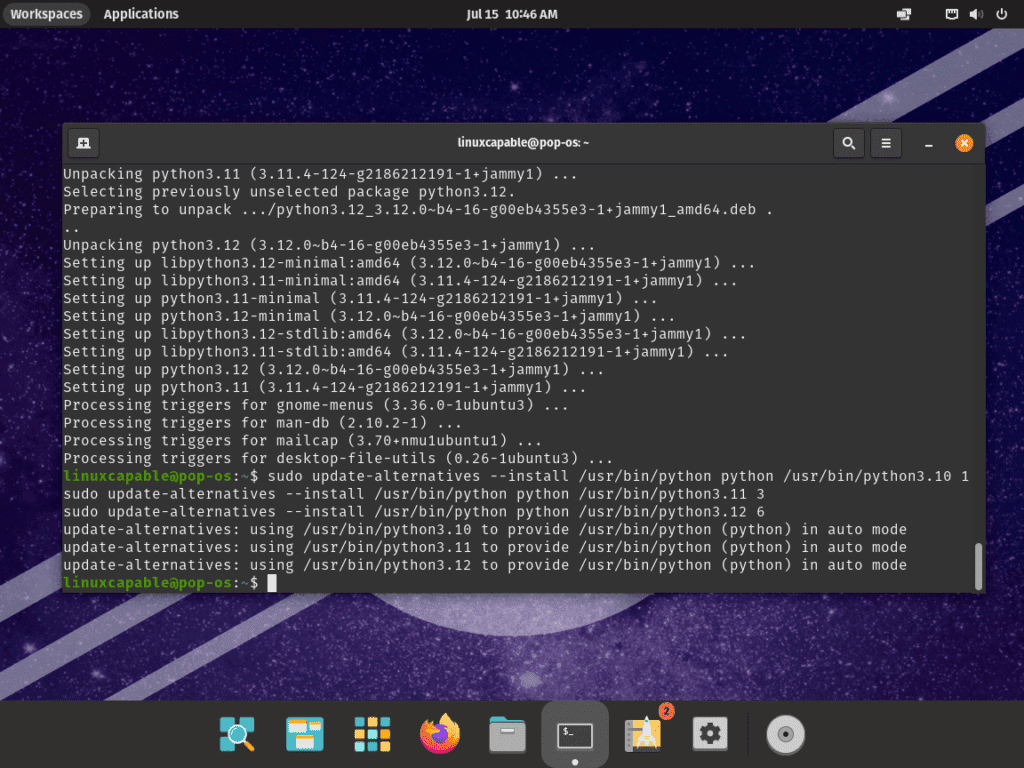
Another example that may suit more users is just setting the release candidate and the last two stable versions:
sudo update-alternatives --install /usr/bin/python python /usr/bin/python3.10 1
sudo update-alternatives --install /usr/bin/python python /usr/bin/python3.11 3
sudo update-alternatives --install /usr/bin/python python /usr/bin/python3.12 6Step 2: Transitioning to an Alternative Python Version on Pop!_OS
To alter the default Python version, all you need to do is input the appropriate selection number in the command that follows:
sudo update-alternatives --config pythonFor instance, to default from Python 3.12 to Python 3.11, you would input the number associated with Python 3.11 in the list. The output of the command should mirror something like this:
update-alternatives: using /usr/bin/python3.11 to provide /usr/bin/python (python) in manual modeWith these steps, we’ve outlined a straightforward approach to managing your Python environment, allowing you to set your preferred version as the default whenever required.
Conclusion and Final Thoughts
In this article, we’ve journeyed through the necessary steps to install Python on Pop!_OS successfully. We started with updating your system and retrieving the most current Python version from the official sources. We delved deeper into the installation process and explored managing multiple Python environments on your system. This process, although seemingly complicated, is simplified when taken step by step and empowers you with the flexibility and control necessary for effective Python development.
It’s worth noting that managing your Python environment and keeping it up to date is crucial for avoiding potential conflicts and ensuring the smooth execution of your code. Make it a habit to routinely check for updates and switch between environments when necessary to maintain optimal performance.


