
PowerShell, developed by Microsoft, is a crucial tool for system administrators and developers looking to install PowerShell on Linux Mint 21 or its older stable release of Linux Mint 20. Designed for Windows, Linux, and macOS platforms, this powerful scripting language and command-line shell offers a user-friendly environment. It efficiently automates tasks and manages configurations, simplifying the execution of complex scripts and commands for users.
Key Features of PowerShell:
- Object-Based Output: PowerShell outputs objects, simplifying data manipulation and filtering.
- Scripting Language: Built on .NET, supports complex script writing and functionality extension.
- Cross-Platform: Available on Windows, Linux, and macOS, it’s versatile for managing different operating systems.
- Pipelining Support: PowerShell supports pipelining, allowing efficient chaining of commands.
- Remote Management: It provides a framework for seamlessly executing commands on remote systems.
- Integrated Environment: PowerShell includes an Integrated Scripting Environment (ISE) for script development and debugging.
PowerShell is not just a command-line shell but a comprehensive scripting language that provides automation and system management capabilities. This guide will walk you through the steps to install PowerShell on Linux Mint 21 or its older stable release of Linux Mint 20 using the official third-party APT repository. This approach ensures you can access the latest version through the command-line terminal.
PowerShell Pre-Installation Steps on Linux Mint 21 or 20
Before installing, ensuring your system is up-to-date with all existing packages is a good practice.
sudo apt update && sudo apt upgradeThe following dependencies will need to be installed. Most of these packages would already be present on your system, but running the command can help ensure they’re installed:
sudo apt install dirmngr ca-certificates software-properties-common apt-transport-https curl -yInstall PowerShell on Linux Mint 21 or 20 via APT
First, you will need to import the GPG key and the repository. Luckily, this is straightforward, and you will always have the most up-to-date version on your system.
Import the GPG key using the following command.
curl -fsSL https://packages.microsoft.com/keys/microsoft.asc | gpg --dearmor | sudo tee /usr/share/keyrings/powershell.gpg > /dev/nullNext, import the repository. Ensure you import the correct repository that matches your Linux Mint version:
Import PowerShell for Linux Mint 21:
echo deb [arch=amd64,armhf,arm64 signed-by=/usr/share/keyrings/powershell.gpg] https://packages.microsoft.com/ubuntu/22.04/prod/ jammy main | sudo tee /etc/apt/sources.list.d/powershell.listImport PowerShell for Linux Mint 20:
echo deb [arch=amd64,armhf,arm64 signed-by=/usr/share/keyrings/powershell.gpg] https://packages.microsoft.com/ubuntu/20.04/prod/ focal main | sudo tee /etc/apt/sources.list.d/powershell.listPlease ensure the following commands is accurately copied: Linux Mint 21 is based on Ubuntu Jammy Jellyfish, while Linux Mint 20 is based on Ubuntu Focal Fossa. If you follow guides primarily designed for Ubuntu, which incorporate the system source name into commands, be aware that using Linux Mint’s source name in these commands will not work, as the corresponding directories do not exist.
Once done, run an APT update to reflect the new additional repository.
sudo apt updateNow, you can install PowerShell using the following command.
sudo apt install powershellActivate PowerShell on Linux Mint 21 or 20
After completing the installation, use the following command to activate PowerShell.
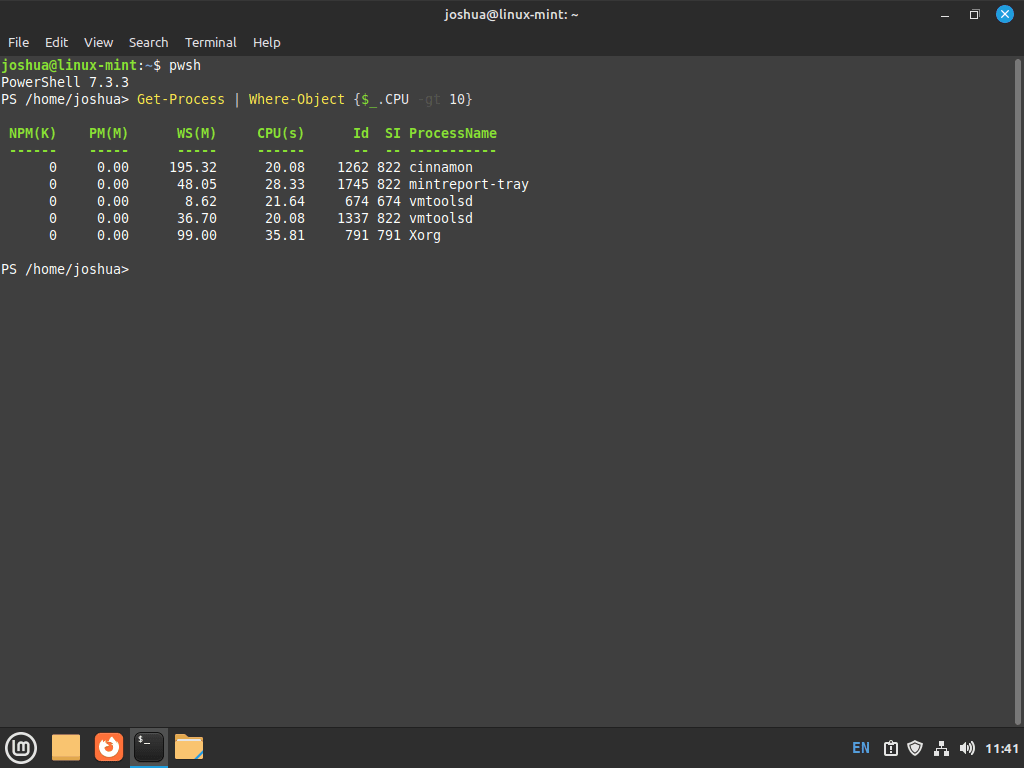
pwshGetting Started with PowerShell
Basic PowerShell Commands with Linux Mint
Here are some basic commands to help first-time users get started with PowerShell:
Get-Help: Access help documentation for any cmdlet.
Get-Help Get-ProcessNew-Item: Create a new file or folder.
New-Item -Path <FolderPath> -ItemType Directory
New-Item -Path <FilePath> -ItemType FileCopy-Item: Copy a file or folder.
Copy-Item -Path <SourcePath> -Destination <DestinationPath>Remove-Item: Delete a file or folder.
Remove-Item -Path <Path>
Rename-Item: Rename a file or folder.
Rename-Item -Path <OldPath> -NewName <NewName>Filtering and Sorting with PowerShell on Linux Mint
PowerShell offers various cmdlets to filter and sort data:
Where-Object: Filter objects based on a condition.
Get-Process | Where-Object {$_.CPU -gt 10}
Sort-Object: Sort objects by property values.
Get-Process | Sort-Object -Property CPU -Descending
Select-Object: Select specific properties from objects.
Get-Process | Select-Object -Property Name, Id, CPUPowerShell Scripting Basics with Linux Mint
PowerShell allows you to create and run scripts for automating tasks:
Creating a script: Save a series of commands to a .ps1 file.
# Example: script.ps1
$Processes = Get-Process
$FilteredProcesses = $Processes | Where-Object {$_.CPU -gt 10}
$FilteredProcesses | Format-Table -Property Name, Id, CPU
Running a script: Execute the script using the following command.
.\script.ps1These examples should help first-time users get started with PowerShell. As you become more familiar with PowerShell, you will discover its powerful capabilities for automating tasks, managing systems, and streamlining workflows.
Additional PowerShell Commands with Linux Mint 21 or 20
Update PowerShell on Linux Mint
Run the following command to check for updates using the command line, which allows a blanket check for updates across all APT packages:
sudo apt update && sudo apt upgradeRemove (Uninstall) PowerShell From Linux Mint
When you no longer want PowerShell installed on your system, use the following command to remove it:
sudo apt remove powershellNext, remove the repository and GPG key using the following command.
sudo rm /etc/apt/sources.list.d/powershell.list /usr/share/keyrings/powershell.gpgConclusion
In conclusion, installing PowerShell on Linux Mint is a straightforward process that opens up a world of powerful features and capabilities for system administration, automation, and scripting. Following this guide, you’ve successfully installed PowerShell and explored its basic commands and usage. As you dive deeper into PowerShell, you’ll discover its potential to revolutionize how you manage your systems and accomplish tasks.