
For those working with databases on Debian systems, phpMyAdmin is a top choice. This guide will show you how to Install phpMyAdmin with LEMP on Debian 12 Bookworm, Debian 11 Bullseye, or Debian 10 Buster. For newer users of Linux and database tools, phpMyAdmin is a tool that helps manage MySQL and MariaDB databases using a simple web interface. It’s great for both new and experienced developers.
Here’s why phpMyAdmin is so valuable:
- User-Friendly: Its design makes it easy for anyone to manage databases, tables, and more.
- Many Features: You can quickly create, modify, and delete databases and tables.
- Run SQL Directly: Instead of using the command line, you can run SQL queries from your browser.
- Import/Export Data: It supports many data formats like SQL, CSV, and XML for importing and exporting.
- Visual Design: The Designer feature shows a visual map of your database, making it easier to understand.
phpMyAdmin truly shines when integrated with the LEMP stack. LEMP consists of Linux, Nginx (the web server), MariaDB (the database system), and PHP (for dynamic content). Together, this combination creates a robust platform for web applications. Opting for this manual installation method over pre-packaged bundles offers greater control over configurations. More crucially, it allows you to choose the Nginx, MariaDB, and PHP versions you want to pair with phpMyAdmin.
Our guide will take you step by step through setting up phpMyAdmin with LEMP on your Debian system. You’ll be ready to manage your databases more efficiently by the end.
Install LEMP Stack on Debian for phpMyAdmin
Step 1: Refreshing Debian System
Start updating your Debian system with the most recent packages for a secure and error-free setup. This proactive step aims to reduce the likelihood of conflicts during the installation process.
sudo apt update && sudo apt upgradeShould you update the Kernel or many packages, a reboot is necessary.
Step 2: Install Nginx
First, install Nginx to establish a LEMP stack. Execute the following command:
sudo apt install nginxTypically, the system enables the Nginx service by default after installation. However, always prudently check its status and ensure it functions as expected:
systemctl status nginx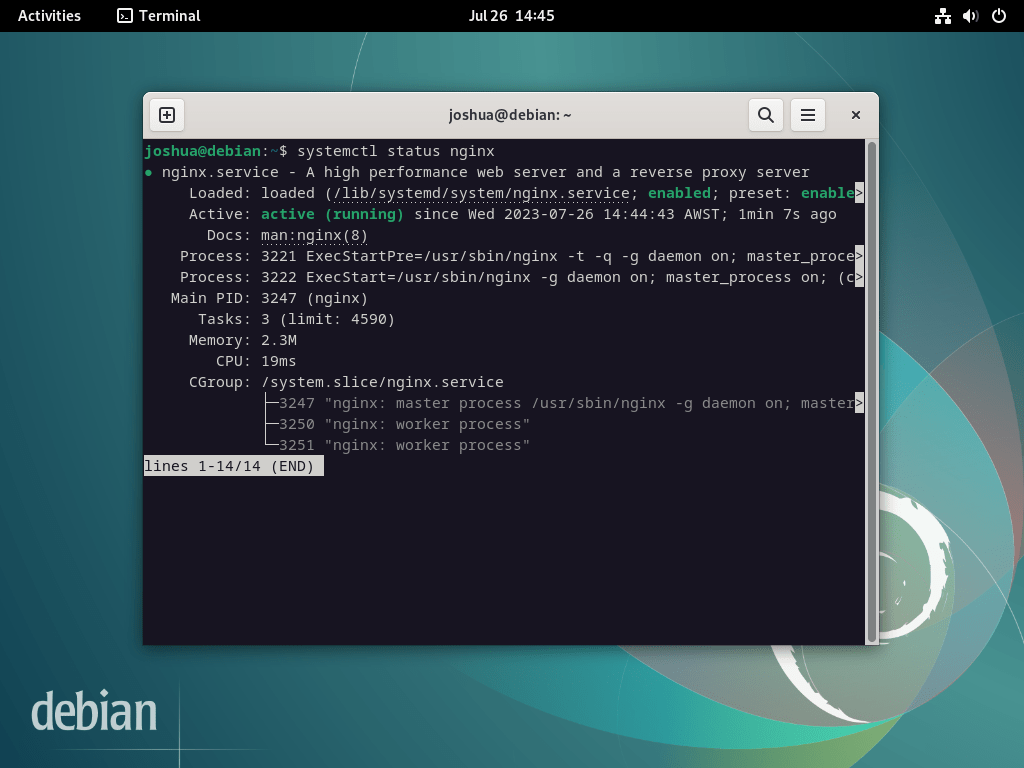
If the server is not active, use the following command to enable Nginx and ensure it starts automatically upon every reboot:
sudo systemctl enable nginx --nowThis command installs the default version of Nginx.
If you’re interested in deploying the latest stable or the mainline version of Nginx, consider following our guide on how to upgrade Nginx on Debian 12, 11, or 10 Linux.
Step 3: Install MariaDB
Next, in the LEMP stack setup, install the database component. Many choose MariaDB over MySQL because of its superior performance and additional features.
If you’d like to install a different version of MariaDB from the official MariaDB.org repositories, our guide on how to install MariaDB 11.x or 10.x on Debian 12, 11, or 10 Linux.
To install MariaDB, run the following:
sudo apt install mariadb-server mariadb-clientUpon completion, confirm the MariaDB service’s enablement and correct function, similar to your verification of Nginx:
systemctl status mariadb
If MariaDB is not activated, use the command below to activate it and ensure it starts on reboot.
sudo systemctl enable mariadb --nowTo bolster your MariaDB’s security, execute the provided security script, mysql_secure_installation, during the installation process. The default settings of a fresh MariaDB installation often leave vulnerabilities that malicious actors can exploit.
sudo mysql_secure_installationExecuting the security script guides you through several steps to fortify your MariaDB’s security. These steps involve setting the root password, limiting remote access, deleting anonymous user accounts, and removing the test database.
NOTE: RUNNING ALL PARTS OF THIS SCRIPT IS RECOMMENDED FOR ALL MariaDB
      SERVERS IN PRODUCTION USE!  PLEASE READ EACH STEP CAREFULLY!

In order to log into MariaDB to secure it, we'll need the current
password for the root user. If you've just installed MariaDB, and
haven't set the root password yet, you should just press enter here.

Enter current password for root (enter for none):
OK, successfully used password, moving on...

Setting the root password or using the unix_socket ensures that nobody
can log into the MariaDB root user without the proper authorisation.

You already have your root account protected, so you can safely answer 'n'.

Switch to unix_socket authentication [Y/n] Y <---- Type Y then press the ENTER KEY.
Enabled successfully!
Reloading privilege tables..
 ... Success!


You already have your root account protected, so you can safely answer 'n'.

Change the root password? [Y/n] Y <---- Type Y then press the ENTER KEY.
New password:
Re-enter new password:
Password updated successfully!
Reloading privilege tables..
 ... Success!


By default, a MariaDB installation has an anonymous user, allowing anyone
to log into MariaDB without having to have a user account created for
them.  This is intended only for testing, and to make the installation
go a bit smoother.  You should remove them before moving into a
production environment.

Remove anonymous users? [Y/n] Y <---- Type Y then press the ENTER KEY.
 ... Success!

Normally, root should only be allowed to connect from 'localhost'.  This
ensures that someone cannot guess at the root password from the network.

Disallow root login remotely? [Y/n] Y <---- Type Y then press the ENTER KEY.
 ... Success!

By default, MariaDB comes with a database named 'test' that anyone can
access.  This is also intended only for testing, and should be removed
before moving into a production environment.

Remove test database and access to it? [Y/n] Y <---- Type Y then press the ENTER KEY.
 - Dropping test database...
 ... Success!
 - Removing privileges on test database...
 ... Success!

Reloading the privilege tables will ensure that all changes made so far
will take effect immediately.

Reload privilege tables now? [Y/n] Y <---- Type Y then press the ENTER KEY.
 ... Success!

Cleaning up...

All done!  If you've completed all of the above steps, your MariaDB
installation should now be secure.

Thanks for using MariaDB!
Step 4: Install PHP
To round up the LEMP stack setup, install the PHP service. PHP, through the PHP-FPM service and additional modules needed by phpMyAdmin, serves as the bridge between Nginx and MariaDB.
If you wish to install a specific version of PHP, refer to our guide on installing any PHP 8.x version available on Debian 12, 11, or 10 Linux.
To deploy PHP and PHP-FPM, along with the necessary modules on your Debian system, execute the following:
sudo apt install php-fpm php-mbstring php-bcmath php-xml php-mysql php-common php-gd php-cli php-curl php-zip php-gdAfter PHP installation, confirm the status of the PHP service, just like you did for MariaDB and Nginx.
For PHP 8.2, which is the default on Debian Bookworm, for instance, the specific command would be:
systemctl status php8.2-fpm
Should the PHP service remain inactive, use the following command to enable it and ensure it starts automatically on each reboot.
sudo systemctl enable php-fpm --nowDownload and install phpMyAdmin with LEMP on Debian 12, 11, or 10
This section elucidates the procedure to procure the phpMyAdmin archive and set up the requisite directories, permissions, and database entries.
Step 1: Create a Super User for phpMyAdmin on Debian
Conventionally, you can access phpMyAdmin using the root user. However, to adhere to robust security practices, create a distinct superuser instead of using the root user. This concept aligns with the Linux practice of leveraging a sudo user instead of logging in directly as root.
First, authenticate yourself in the terminal interface:
sudo mariadb -u rootUpon successful authentication, the subsequent step involves creating a database within the MariaDB terminal.
CREATE USER PMAUSER IDENTIFIED BY 'password here change';Next, create a user and endow them with the required permissions, as illustrated below:
GRANT ALL PRIVILEGES ON *.* TO 'PMAUSER'@'localhost' IDENTIFIED BY 'password here change' WITH GRANT OPTION;Replacing the placeholder password “password here change” with a secure password is pivotal before executing the commands.
Upon establishing the user and setting permissions, remember to refresh the privileges for the changes.
FLUSH PRIVILEGES;To exit the MariaDB terminal, utilize the following command.
QUIT;Step 2: Download the phpMyAdmin Source Code on Debian
This section sheds light on how to procure the source archive for phpMyAdmin. Leveraging the command-line terminal provides an efficient method to download the latest version in all languages.
To download the phpMyAdmin archive, execute the following command in the terminal.
DATA="$(wget https://www.phpmyadmin.net/home_page/version.txt -q -O-)"
URL="$(echo $DATA | cut -d ' ' -f 3)"
VERSION="$(echo $DATA | cut -d ' ' -f 1)"
wget https://files.phpmyadmin.net/phpMyAdmin/${VERSION}/phpMyAdmin-${VERSION}-all-languages.tar.gz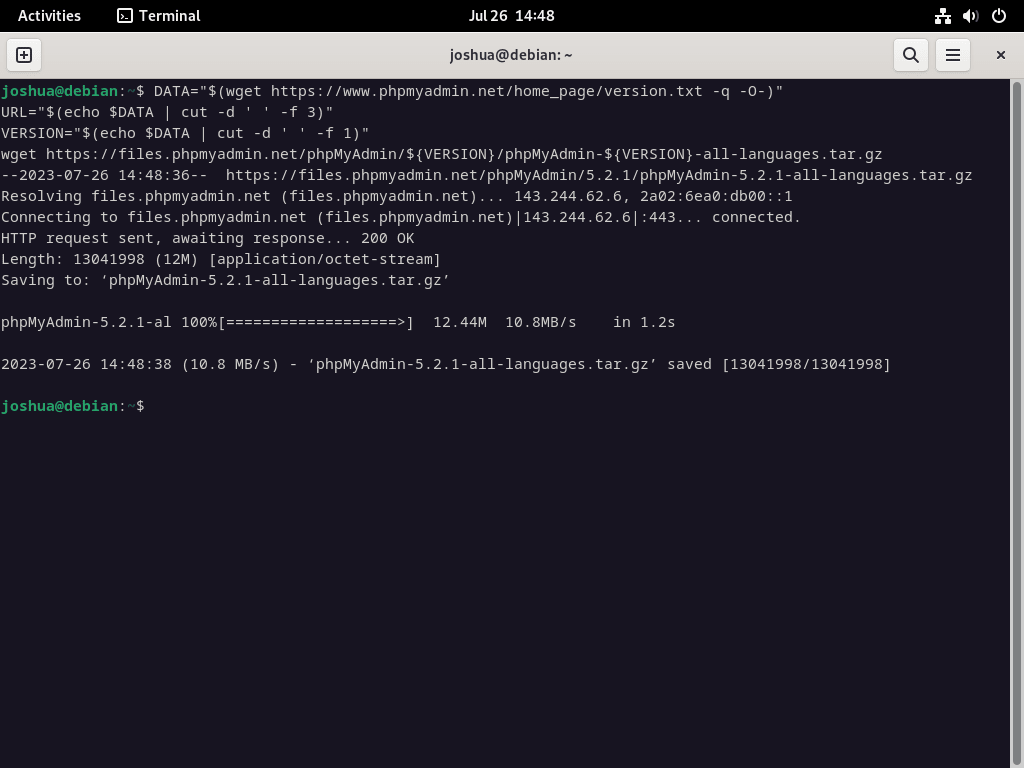
If you desire the English-only version of phpMyAdmin, replace the last line of the previous command with the following:
wget https://files.phpmyadmin.net/phpMyAdmin/${VERSION}/phpMyAdmin-${VERSION}-english.tar.gzFollowing the download, the succeeding step is to extract the phpMyAdmin archive by executing the below command:
tar xvf phpMyAdmin-${VERSION}-all-languages.tar.gzStep 3: Configure phpMyAdmin on Debian
The next phase involves migrating all extracted files to their final destination in the /var/www/ directory using the mv command.
sudo mv phpMyAdmin-*/ /var/www/phpmyadminWhen you install phpMyAdmin from the source, you will observe that a TMP directory does not exist by default. Consequently, it would be best if you created this directory manually.
sudo mkdir /var/www/phpmyadmin/tmpThe phpMyAdmin directory includes a default configuration-example file, which you need to rename for phpMyAdmin to recognize it. Use the CP command to create a copy of the default file in the /var/www/phpmyadmin/ directory, ensuring a backup.
To replicate the config.sample.inc.php to config.inc.php, execute the following command:
sudo cp /var/www/phpmyadmin/config.sample.inc.php /var/www/phpmyadmin/config.inc.phpAfter copying the file, open it with a preferred text editor. In this example, we are using the nano text editor:
sudo nano /var/www/phpmyadmin/config.inc.phpphpMyAdmin employs a Blowfish cipher. To modify this setting, navigate to the line that commences with $cfg[‘blowfish_secret’].
$cfg['blowfish_secret'] = ''; /* YOU MUST FILL IN THIS FOR COOKIE AUTH! */Assign a string of 32 random characters within the single quotation marks. Use the pwgen program as a convenient method to generate this string. Execute the following terminal command to install pwgen:
This keeps all actions clear and directly attributed to the user (or whoever is doing the action).
sudo apt install pwgen After installation, execute the command below:
pwgen -s 32 1This command will generate a string of 32 random characters to serve as the blowfish secret.
Example of inserting the cipher into the configuration file (Do not copy):
UvqAlsvTxRdYIyO8TnlkJsVQaWs2LfgLExample in the configuration file:

For a majority of users, the remaining default settings should be adequate. However, if your server is located on another server within your network, you will need to locate and modify the line $cfg[‘Servers’][$i][‘host’] to reflect the private IP address. An illustration of this modification is shown below:
$cfg['Servers'][$i]['host'] = '192.168.55.101';Step 4: Configure phpMyAdmin File Permissions on Debian
Assigning the directory owner permissions to www-user is crucial for ensuring compatibility and security.
To set the chown permission:
sudo chown -R www-data:www-data /var/www/phpmyadmin/To set the chmod permission:
sudo find /var/www/phpmyadmin/ -type d -exec chmod 755 {} \;
sudo find /var/www/phpmyadmin/ -type f -exec chmod 644 {} \;
In the succeeding section, we will discuss creating and setting up the Nginx service Block for your phpMyAdmin service.
Section 3: Setting Up an NGINX Server Block for phpMyAdmin
To seamlessly access the phpMyAdmin web interface, create an NGINX server block as an essential step. Establish a distinct sub-domain to bolster security measures and fend off brute-force attacks, which comes highly recommended. Feel free to name this sub-domain whatever you find suitable.
Step 1: Create Nginx Server Block for phpMyAdmin on Debian
Let’s begin by creating and opening your server block with the nano text editor. Execute the following command:
sudo nano /etc/nginx/sites-available/phpmyadmin.confStep 2: Configure Nginx Server Block
Upon successfully opening the server block file, copy and paste the following text into the file. Be sure to substitute the domain URL with your own:
server {
  listen 80;
  listen [::]:80;
  server_name pma.example.com;
  root /var/www/phpmyadmin/;
  index index.php index.html index.htm index.nginx-debian.html;

  access_log /var/log/nginx/phpmyadmin_access.log;
  error_log /var/log/nginx/phpmyadmin_error.log;

  location / {
    try_files $uri $uri/ /index.php;
  }

  location ~ ^/(doc|sql|setup)/ {
    deny all;
  }

  location ~ \.php$ {
    fastcgi_pass unix:/run/php/php8.2-fpm.sock;
    fastcgi_param SCRIPT_FILENAME $document_root$fastcgi_script_name;
    include fastcgi_params;
    include snippets/fastcgi-php.conf;
  }

  location ~ /\.ht {
    deny all;
  }
}
Here are some critical points to note about the example above:
/run/php/php8.2-fpm.sock;– This path needs to reflect the version of PHP-FPM in use. For instance, it could be 8.3, 8.1, 8.0, 7.4, etc.root /var/www/phpmyadmin/;– This refers to the path defined in this guide. If your phpMyAdmin is situated elsewhere, ensure to update this line accordingly.
If you are the sole person accessing the server from a static IP address, consider adding the following code above the first location entry:
  allow <your ip address>;
  deny all;

  location / {
    try_files $uri $uri/ /index.php;
  }
The above code effectively blocks unauthorized visitors to the page with a 403 error, granting access solely to your IP address. It’s a substantial defense against brute-force attacks, although it might not suit all setups.
Step 3: Saving and Exiting the Text Editor
To save your changes, hit (CTRL+O), and to exit the editor, press (CTRL+X).
Step 4: Creating a Symlink to the Configuration File
Next, create a symbolic link from the sites-available directory to the sites-enabled directory where the configuration file resides:
sudo ln -s /etc/nginx/sites-available/phpmyadmin.conf /etc/nginx/sites-enabled/Step 5: Performing a Dry Run Test
Conducting a dry run test is crucial before leaping to restart the NGINX service. This measure is essential in live environments, ensuring that any modifications to your configuration files won’t trigger NGINX errors:
sudo nginx -tIf your configuration is error-free, the following output will greet you:
nginx: the configuration file /etc/nginx/nginx.conf syntax is ok
nginx: configuration file /etc/nginx/nginx.conf test is successful
Step 6: Restarting Your NGINX Service
Finally, to make the changes effective, restart your NGINX service:
sudo systemctl restart nginxThat wraps up this section on creating an NGINX server block for phpMyAdmin. In the next section, you will open and log in to the web interface of phpMyAdmin.
Navigating the phpMyAdmin Web Interface
Begin your interaction with phpMyAdmin’s interface by launching your preferred web browser. Input pma.example.com in the address bar, ensuring you replace “example” with your domain name or server IP address. Remember, you can also use localhost in internal environments.
After doing this, you will land on the phpMyAdmin login screen, as demonstrated in the following image:
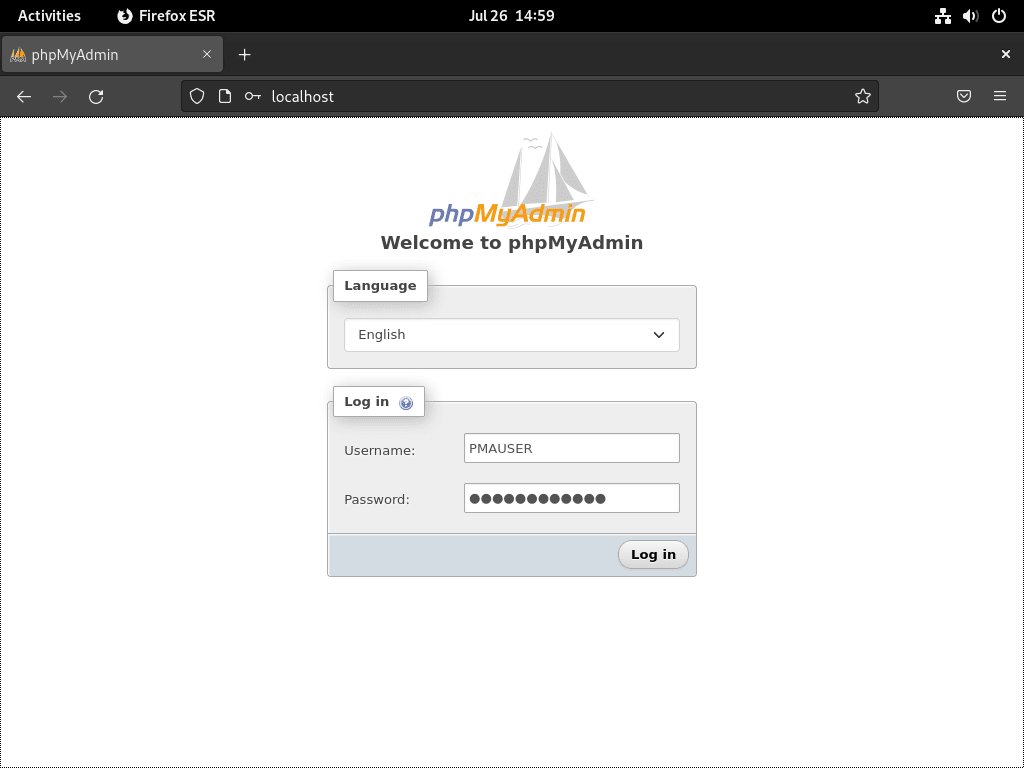
Navigate through the login screen by entering your credentials and selecting “proceed” or “login.” This action grants you access to the phpMyAdmin dashboard, which the succeeding image depicts.
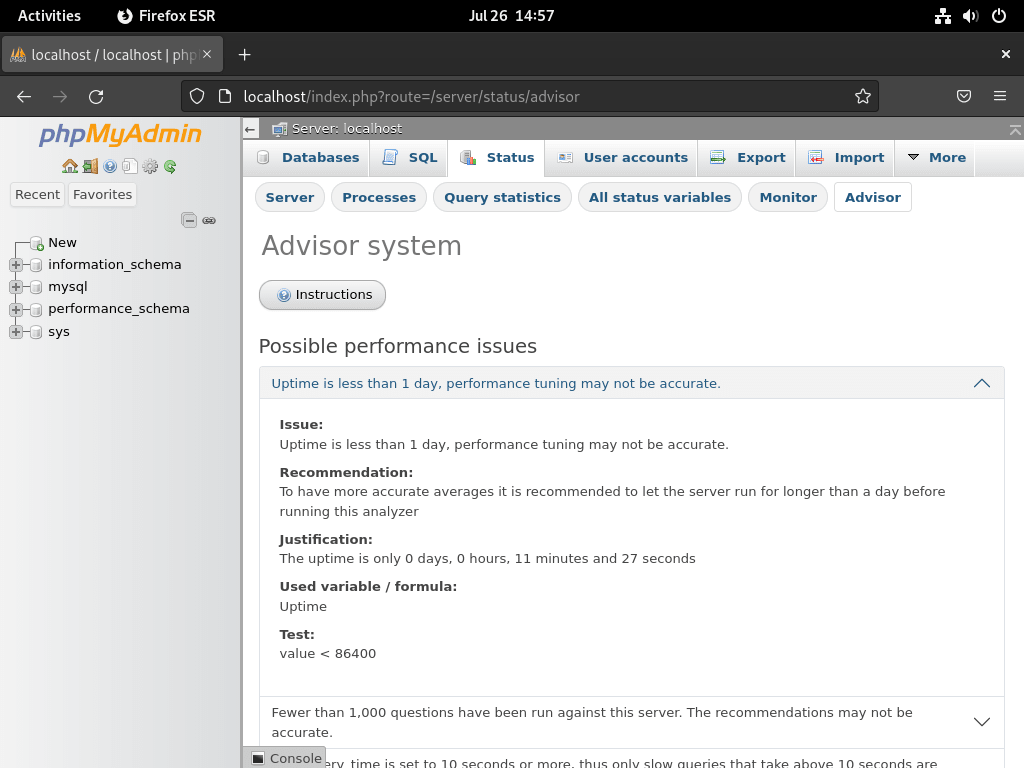
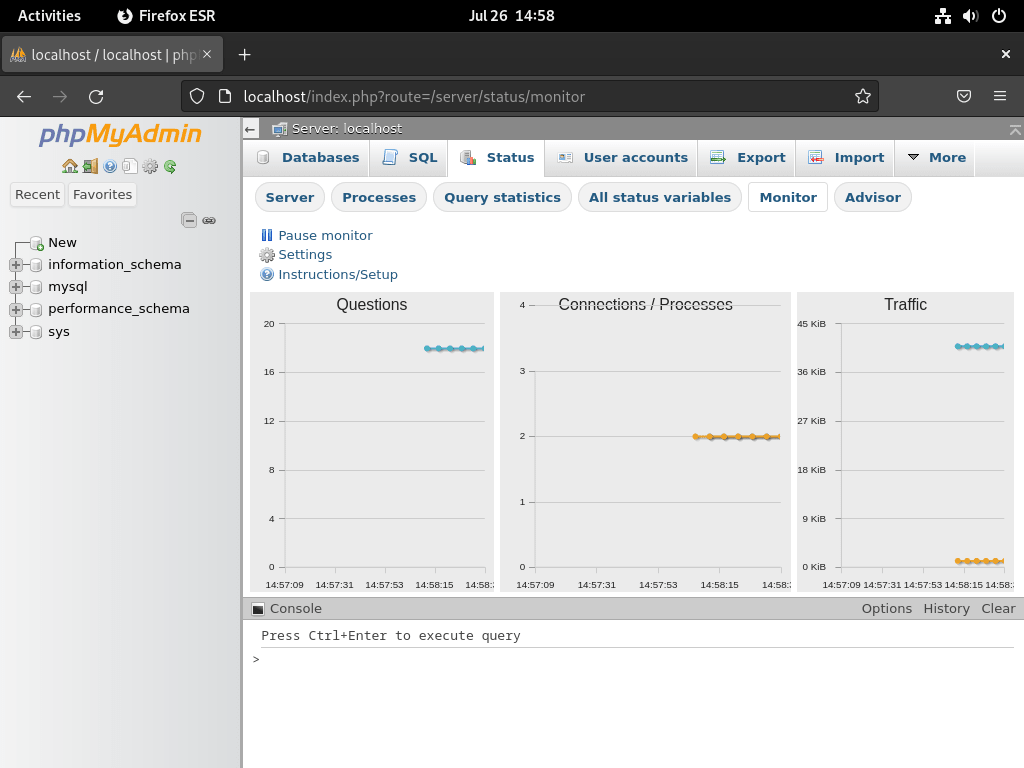
As a first-time phpMyAdmin user, you might want to acquaint yourself with the “status page.” It provides a comprehensive insight into your database’s status and health.

Beyond the stats page, phpMyAdmin also incorporates an “advisor system.” It’s a handy feature that offers suggestions for performance enhancements.
However, it’s prudent to remember that while the advisor recommends waiting for 24 hours, most consider a minimum of 72 hours more optimal. This ensures that the database sampling occurs over an extended period, providing more accurate recommendations.
Additionally, the advisor system should not be your only basis for changes. Altering your MySQL or MariaDB configuration files needs careful contemplation, thorough testing, and possibly multiple iterations. The goal is to optimize the configurations for the best results, and this often takes time.
Secure phpMyAdmin with LEMP Stack on Debian via Let’s Encrypt SSL Certificate
Create an SSL Certificate via Certbot
To harden the security of your phpMyAdmin instance, run Nginx over HTTPS using an SSL certificate. Leveraging Let’s Encrypt, a renowned certificate authority offering free, automated, and open SSL certificates, provides the most straightforward method.
First, install the certbot package, which aids in managing Let’s Encrypt SSL certificates, by running:
sudo apt install python3-certbot-nginx -yAfter completing the certbot package installation, create your SSL certificate by executing:
sudo certbot --nginx --agree-tos --redirect --hsts --staple-ocsp --email you@example.com -d pma.example.comUpon initiating the certificate installation process:
- A prompt will inquire about receiving emails from EFF (Electronic Frontier Foundation).
- Whether you agree (Y) or disagree (N), the system will automatically install and configure your TLS certificate.
- The configuration encompasses enforcing HTTPS 301 redirects, adding a Strict-Transport-Security header, and implementing OCSP Stapling.
- Remember to substitute the email and domain name in the command with your precise details.
Upon completing this setup, your URL will migrate from HTTP://pma.example.com to HTTPS://pma.example.com, automatically redirecting any access to the previous HTTP URL to the secure HTTPS URL.
Create a Cron Job for SSL Renewal
Establish a cron job that automatically renews your certificates to streamline the process further. Certbot provides an auto-renewal script for this purpose. Before setting up this job, judiciously perform a dry run test to confirm everything operates correctly using the following command:
sudo certbot renew --dry-runTo schedule the automatic renewal, open the crontab file by executing:
sudo crontab -eRegularly check for certificate renewal—at least once daily—to ensure your certificate remains valid. If a renewal becomes necessary, the script will automatically update the certificate. Utilize the cron syntax to set the renewal at your preferred time.
00 00 */1 * * /usr/sbin/certbot-auto renewConclusion
In conclusion, installing phpMyAdmin on Debian using a LEMP stack, while intricate, is a straightforward process that provides robust database management functionality. We’ve taken you through setting up a LEMP stack on your Debian server and then securing and optimizing your environment with the Let’s Encrypt SSL certificate. We’ve also covered essential tips for getting started with the phpMyAdmin interface. As you progress, continue to explore and learn about the features phpMyAdmin offers. The platform’s comprehensive features and user-friendly interface make managing your databases easier, faster, and more efficient.