This guide will demonstrate how to install Nvidia Drivers on Debian 12, 11, or 10 Linux utilizing the command-line terminal with either Debian’s repository or the Nvidia CUDA official APT repository for the latest versions.
Nvidia drivers are essential for leveraging the full power and efficiency of Nvidia graphics cards. These drivers are designed to enhance the performance of graphical applications, from gaming to professional graphic design and computational work. With Nvidia’s proprietary drivers, users gain access to optimized hardware acceleration, improved frame rates, and support for the latest graphic technologies such as ray tracing, deep learning super sampling (DLSS), and virtual reality (VR). The drivers also ensure compatibility with a wide range of applications and games, offering updates that improve stability and security. For professionals and developers, Nvidia drivers are key to unlocking the computational capabilities of GPUs for tasks like machine learning, data analysis, and scientific simulation.
- Optimized Hardware Acceleration: Ensures smooth, efficient operation of graphics-intensive applications.
- Enhanced Frame Rates: Improves gaming and video playback quality.
- Support for Latest Technologies: Enables features like ray tracing, DLSS, and VR.
- Broad Application Compatibility: Ensures seamless interaction with a wide array of software.
- Frequent Updates: Offers improvements in stability, performance, and security.
- Improved Stability and Security: Reduces the likelihood of crashes and vulnerabilities.
- Unlock Computational Capabilities: Essential for GPU-accelerated machine learning and data analysis tasks.
- Professional and Developer Support: Tailored drivers enhance graphic design and scientific simulation productivity.
These drivers are not just about visual performance; they are a bridge to cutting-edge technologies and computational advancements.
Now, let’s dive into the technical how-to of installing Nvidia Drivers on Debian.
Pre-Installation Steps Before Nvidia Drivers Installation
Update Debian System Packages Before Nvidia Drivers Installation
Before proceeding with the tutorial, ensuring your system is up-to-date with all existing packages is good.
sudo apt updateProceed to upgrade any outdated packages using the following command.
sudo apt upgradePrevious Nvidia Installations From Debian (Situational)
When Nvidia drivers over the standard packages, it can result in unexpected issues, especially if you install the Nvidia drivers from Debian’s repository, then import the Nvidia Cuda repository and try to re-install or upgrade directly over those packages. If you use one method, stick to it, and if you want to swap, ensure you remove the previous installation to avoid conflicts.
Below, I will briefly review some options for removing the previous Nvidia Drivers.
Example 1: Remove Previous Nvidia Drivers Installed via APT
First, use a blanket command to remove any traces of Nvidia installation on your system:
sudo apt autoremove nvidia* --purgeExample 2: Remove Previous Nvidia Drivers Installed via RUNFILE
The second method is for anyone who installed the Nvidia drivers using the “.run” file. To remove the runfile type of installation, use the following command:
sudo /usr/bin/nvidia-uninstallExample 3: Remove Previous Nvidia Cuda Drivers Installed via RUNFILE
Lastly, remove the CUDA toolkit runfile installation using the following command.
sudo /usr/local/cuda-X.Y/bin/cuda-uninstallThese few methods may remove the Nvidia Drivers.
Enable Contrib and Non-Free Repositories on Debian
The first task is enabling the “contrib” and “non-free” repositories to your Debian repositories. From Debian 12 Bookworm onwards, the command changes. Ensure you use the correct command matching your Debian distribution version.
First, make sure you have installed the following on your Debian system:
sudo apt install software-properties-common -yBookworm and onwards:
sudo add-apt-repository contrib non-free-firmwareBullseye and Buster downwards:
sudo add-apt-repository contrib non-freeOnce added, update your APT cache with the following command:
sudo apt updateInstall Nvidia Drivers on Debian via DEFAULT APT Repository
Install Linux Kernel Headers
Before installing any Nvidia drivers, you will need to install the proper kernel headers for the NVIDIA driver to build with. You can install either 64bit or 32bit, and you can find this out by running the lscpu command:
lscpu | grep CPUExample output:
CPU op-mode(s):                  32-bit, 64-bit
CPU(s):                          2
On-line CPU(s) list:             0,1
CPU family:                      23
CPU MHz:                         3900.025
NUMA node0 CPU(s):               0,1
From the output, the system is 64bit, so you need to install the following headers:
sudo apt install linux-headers-amd6432-bit Debian systems, use the following command instead:
Note: DO NOT USE THE BELOW COMMANDS IF YOU ARE ON A 64-BIT SYSTEM.
non-PAE kernel:
sudo apt install linux-headers-686PAE kernel:
sudo apt install linux-headers-686-paeInstall Nvidia Drivers via Debian’s Default Repository
Next, you can install the “nvidia-detect,” which will automatically suggest the best package for your graphics card.
To do this, use the following command:
sudo apt install nvidia-detectWith Nvidia-detect installed, execute the command to identify your current Nvidia Graphics Card:
nvidia-detectThe output reveals that the example machine features a GeForce GTX 1650 card and recommends installing the nvidia-driver package. However, this remains a suggestion.
Next, install the recommended package:
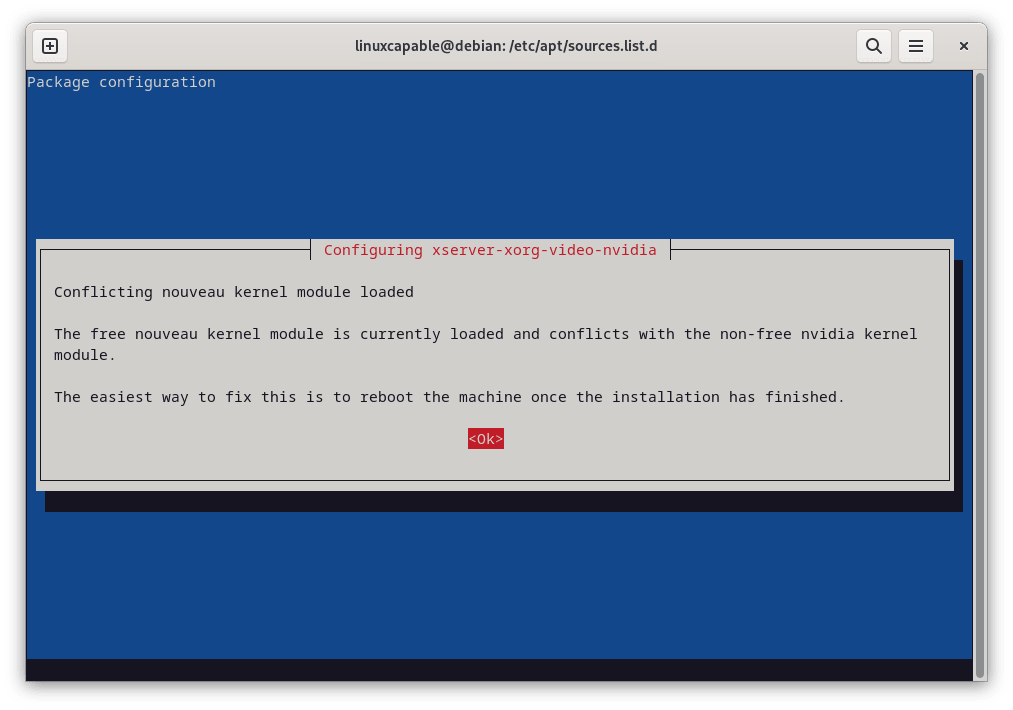
sudo apt install nvidia-driver linux-image-amd64You will see a note about the free Nouveau graphics driver conflicting with the installed new driver. As per the message, you need to reboot to correct this; for now, press the “ENTER KEY” to proceed.
Reboot and Confirm Installation
Once installed, reboot your system:
sudo rebootSituational: Install Nvidia Legacy Drivers (For Older Cards)
If your Nvidia Graphics card is quite old from 400 Series downwards, you will need to install the legacy drivers. The process is the same, just with a new install command:
sudo apt install nvidia-legacy-390xx-driver firmware-misc-nonfreeOnce complete, do not forget to reboot your system.
sudo reboot nowYou can technically install the 340 series, but it no longer has support and contains several major security flaws. Although you might consider replacing 390xx with 340xx, Debian advises against it.
Install Nvidia Drivers on Debian via Nvidia APT PPA
The second method lets you install the latest drivers for your desktop or server from the Nvidia Cuda APT repository. I suggest you use these drivers because you’ll get updates immediately after their release. This approach benefits security and performance since Nvidia frequently releases updates. Now, you also have the option to install the open-source version.
Identify Your Nvidia Graphics Card on Debian
If you have an older NVIDIA Graphics card, start by identifying it to ensure support. However, if you own a brand-new card, you can skip this part because your card undoubtedly has support.
Now, let’s identify your graphics card module:
lspci | grep -e VGAExample output:
03:00.0 VGA compatible controller: NVIDIA Corporation TU117 [GeForce GTX 1650] (rev a1)Import Nvidia GPG Key on Debian
First, check if you have already installed the following packages by using this command:
sudo apt install dirmngr ca-certificates software-properties-common apt-transport-https dkms curl -yNext, import the GPG key, and ensure you match the import to your distribution version.
Note: Please comment or message me via the contact form if the GPG import fails. Every so often, Debian can change its GPG keys. This is rare, but it does occur; if it does, I’ll update the command.
Bookworm:
curl -fSsL https://developer.download.nvidia.com/compute/cuda/repos/debian12/x86_64/3bf863cc.pub | sudo gpg --dearmor | sudo tee /usr/share/keyrings/nvidia-drivers.gpg > /dev/null 2>&1Bullseye:
curl -fSsL https://developer.download.nvidia.com/compute/cuda/repos/debian11/x86_64/3bf863cc.pub | sudo gpg --dearmor | sudo tee /usr/share/keyrings/nvidia-drivers.gpg > /dev/null 2>&1Buster:
curl -fSsL https://developer.download.nvidia.com/compute/cuda/repos/debian10/x86_64/3bf863cc.pub | sudo gpg --dearmor | sudo tee /usr/share/keyrings/nvidia-drivers.gpg > /dev/null 2>&1Import Nvidia APT Repository
Second, import the repository for your Debian system, and again ensure you import the correct one to match your Debian distribution version.
Bookworm:
echo 'deb [signed-by=/usr/share/keyrings/nvidia-drivers.gpg] https://developer.download.nvidia.com/compute/cuda/repos/debian12/x86_64/ /' | sudo tee /etc/apt/sources.list.d/nvidia-drivers.listBullseye:
echo 'deb [signed-by=/usr/share/keyrings/nvidia-drivers.gpg] https://developer.download.nvidia.com/compute/cuda/repos/debian11/x86_64/ /' | sudo tee /etc/apt/sources.list.d/nvidia-drivers.listImport Nvidia Repository for Debian 10 Buster:
echo 'deb [signed-by=/usr/share/keyrings/nvidia-drivers.gpg] https://developer.download.nvidia.com/compute/cuda/repos/debian10/x86_64/ /' | sudo tee /etc/apt/sources.list.d/nvidia-drivers.listInstall Nvidia Drivers – Proprietary or Open-Source Options
Update your sources list to reflect the newly added repository.
sudo apt updateNext, install the latest NVIDIA drivers; below are some examples with and without CUDA and proprietary and open-source versions.
Proprietary Nvidia Drivers
Install NVIDIA Drivers Without Cuda Support
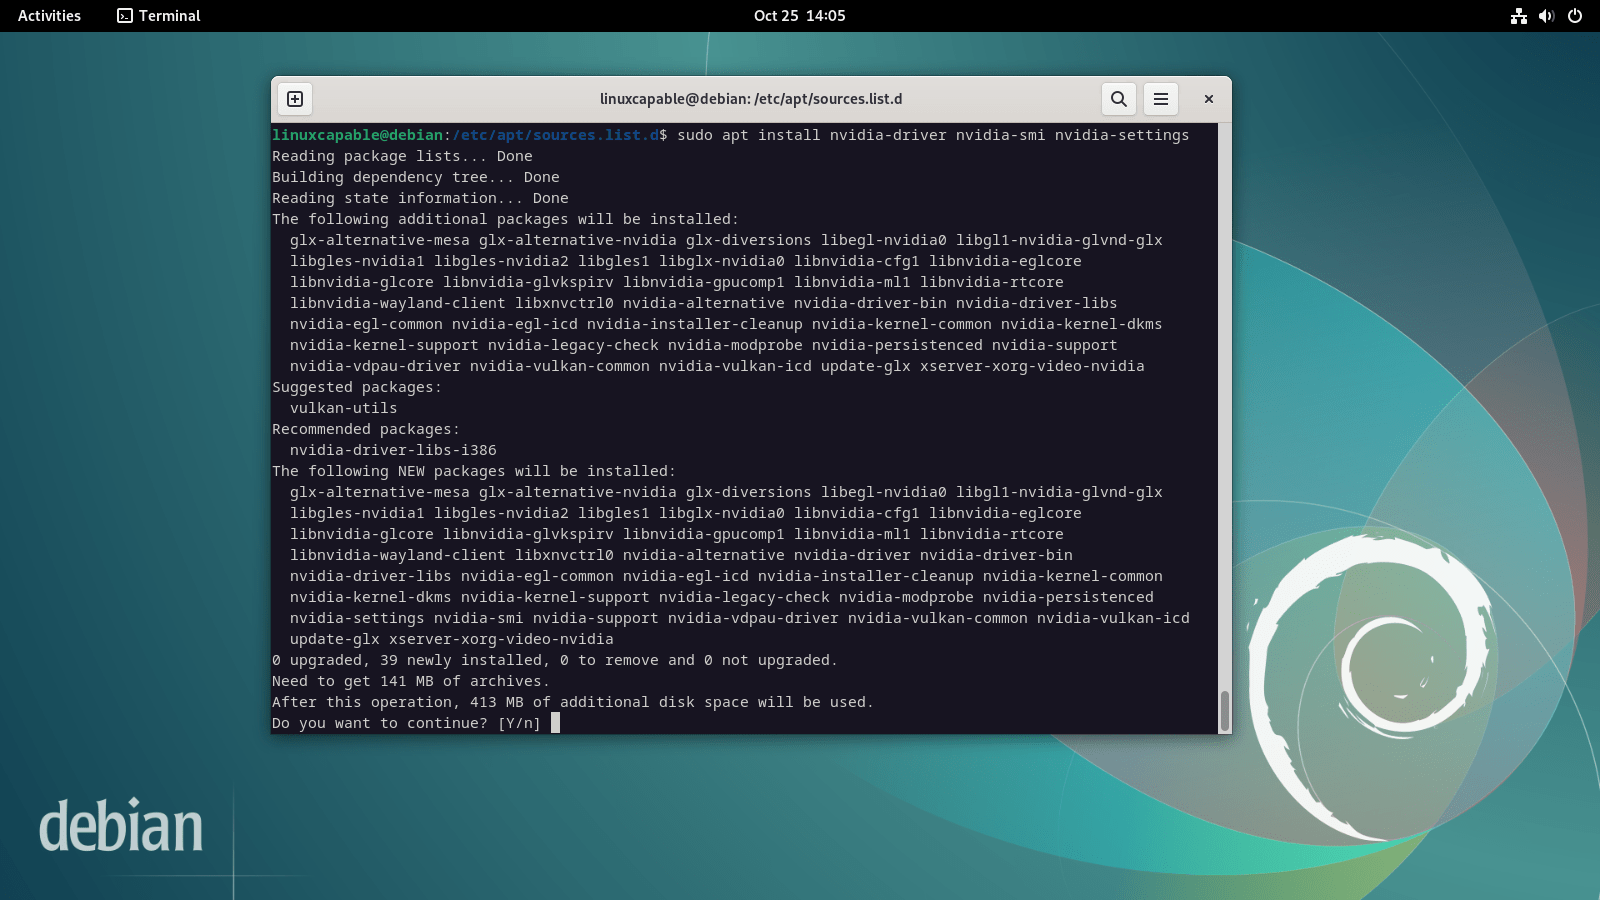
sudo apt install nvidia-driver nvidia-smi nvidia-settingsInstall NVIDIA Drivers With Cuda Support (Proprietary):
sudo apt install nvidia-driver cuda nvidia-smi nvidia-settingsOpen-Source Nvidia Drivers
Install NVIDIA Drivers Without Cuda Support (Opensource):
sudo apt install nvidia-driver nvidia-kernel-open-dkms nvidia-smi nvidia-settingsInstall NVIDIA Drivers With Cuda Support (Opensource):
sudo apt install nvidia-driver nvidia-kernel-open-dkms cuda nvidia-smi nvidia-settingsNote: The download is large and can take a while; given this is a general release, it is recommended to install all the drivers to avoid any issues or inconsistencies on your Debian desktop.
One good thing about the Nvidia repository installation is that if you forgot to remove the previous one, you will see a prompt for users with pre-existing installations before the installation continues. Select Yes to remove any existing drivers. Failure to do this may cause system instability. Once done, the installation will be complete.
Reboot
During the final phase of the installation, most users will typically see a message like the image below:
To activate the installation, reboot your system. You can use the following command after completing the installation:
sudo rebootSituational: Install 32-bit Support for Nvidia Drivers on Debian
You can easily enable and install 32-bit support first. Install the 64-bit drivers mentioned earlier, and then follow these steps.
First, activate the 32-bit architecture using this command:
sudo dpkg --add-architecture i386Update the APT-CACHE to reflect the changes to the architecture:
sudo apt updateInstall 32-bit support, and remove the Cuda package “libcuda1-i386” for those users not requiring it.
sudo apt install libcuda1-i386 nvidia-driver-libs-i386Reboot your PC:
sudo rebootConfirm Nvidia Drivers Installation on Debian
Verify Nvidia Drivers Utilizing via CLI Command
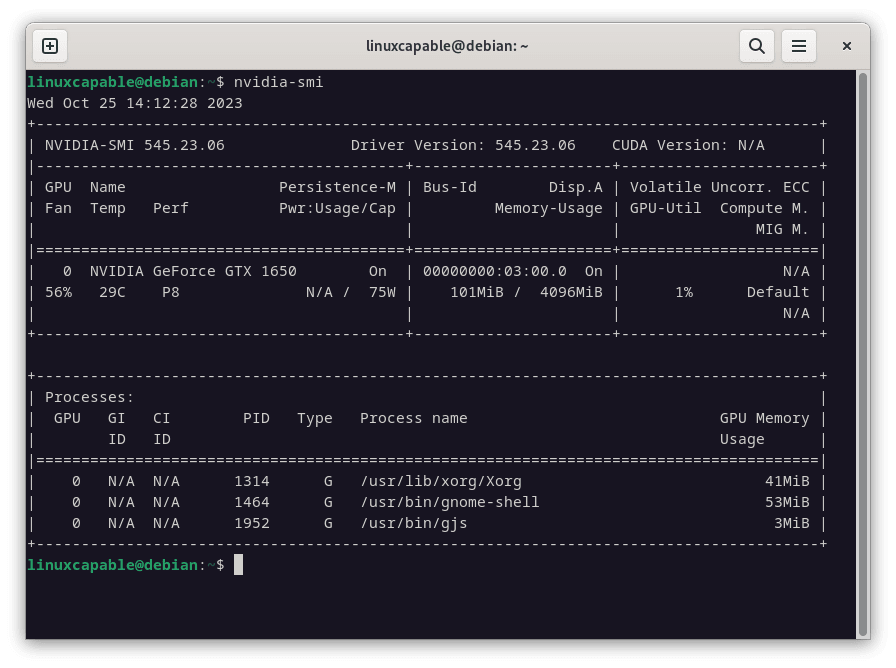
First, verify the installation by running NVIDIA-SMI, as the manual installation steps showed beforehand.
nvidia-smiIf successful, you should see something similar too:
Verify Nvidia Drivers Utilizing via GUI
Alternatively, you can open the GUI for desktop users using the following command:
nvidia-settingsOr open the application icon located in the following path:
Activities > Show Applications > Nvidia X Server
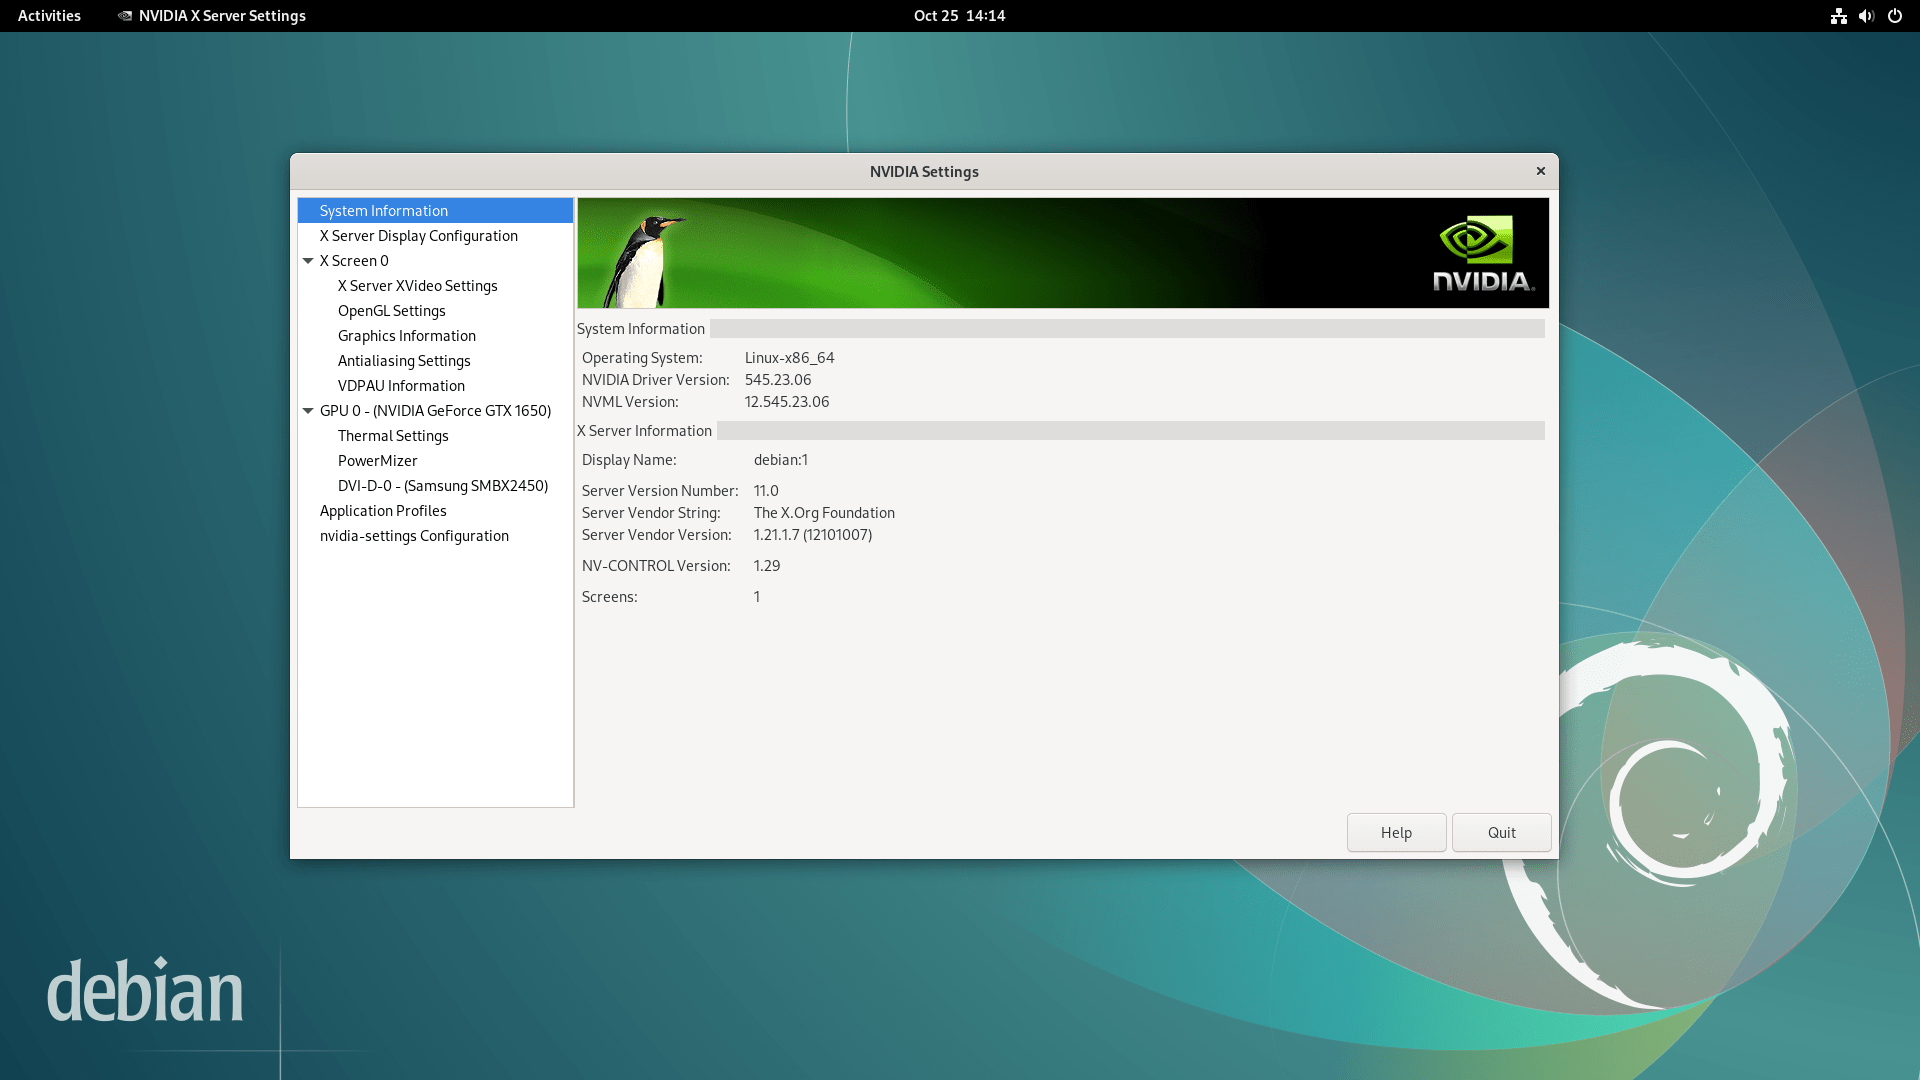
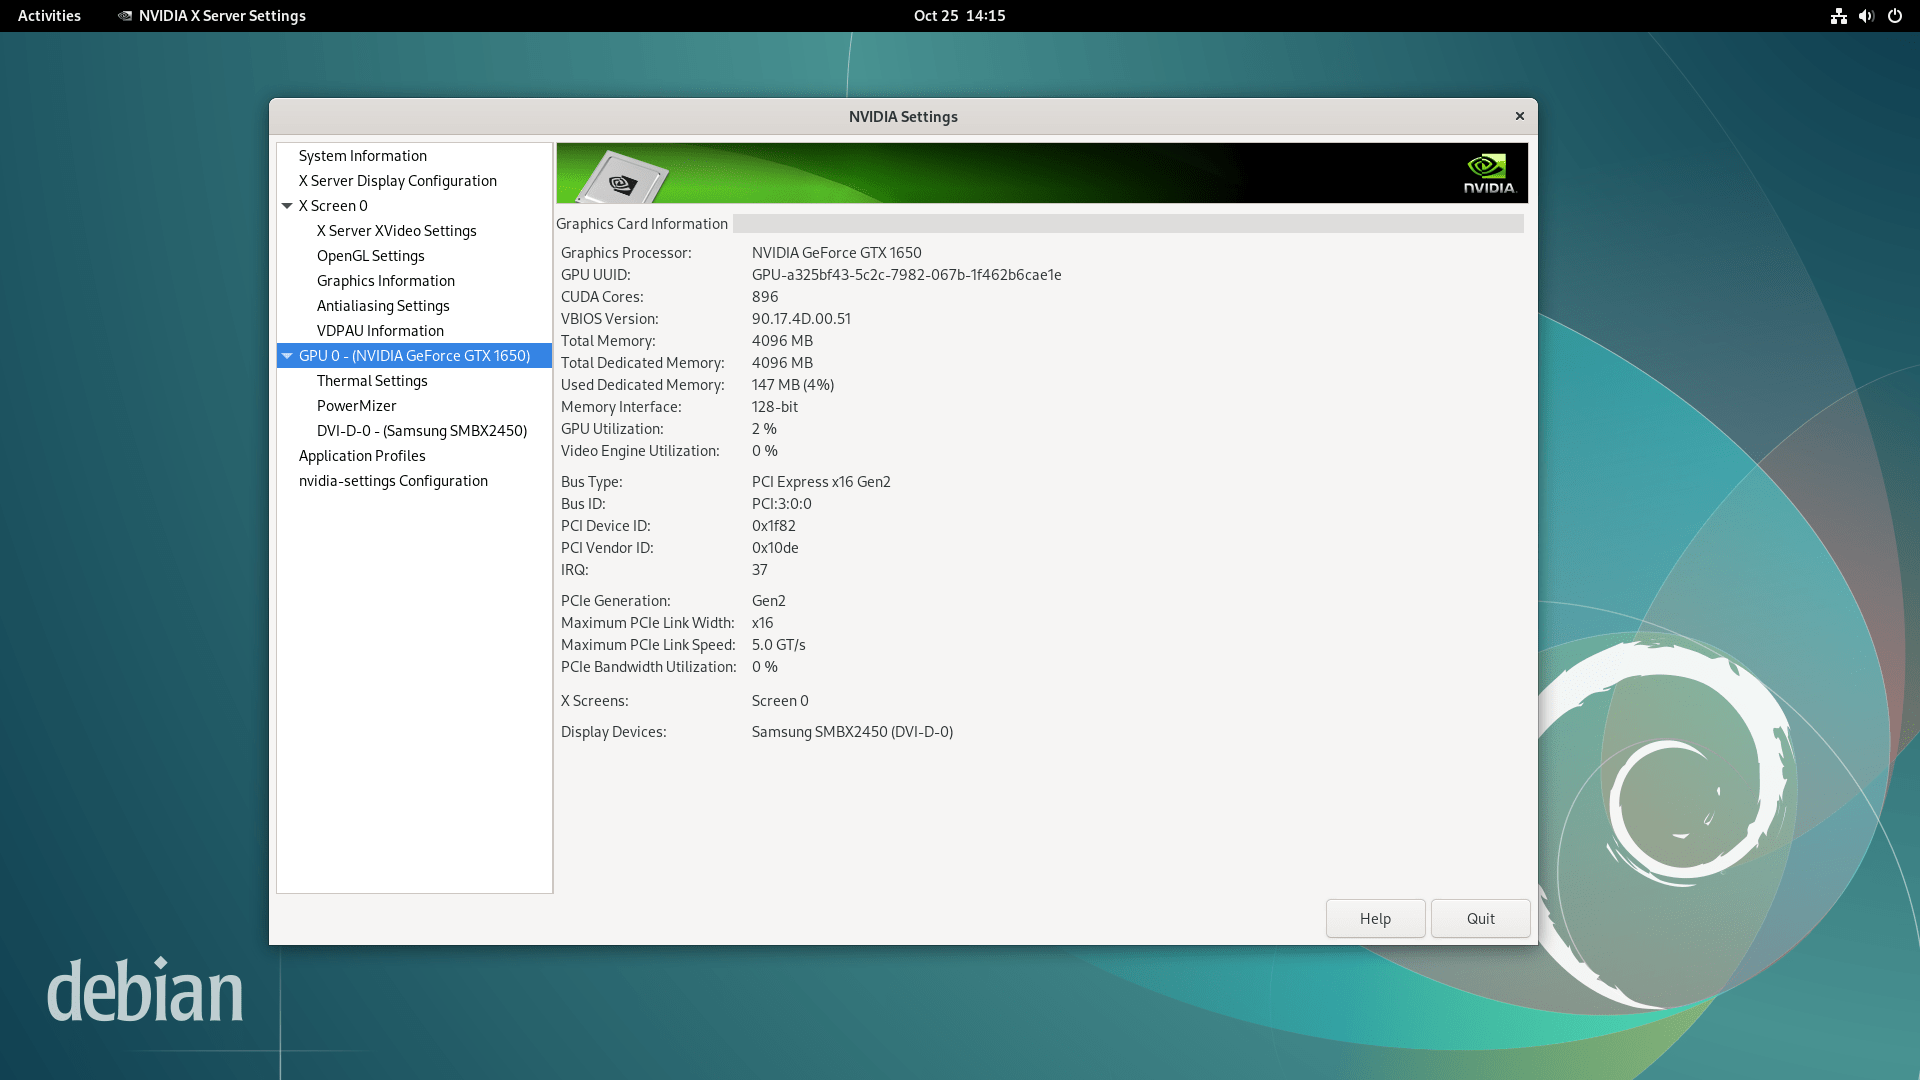
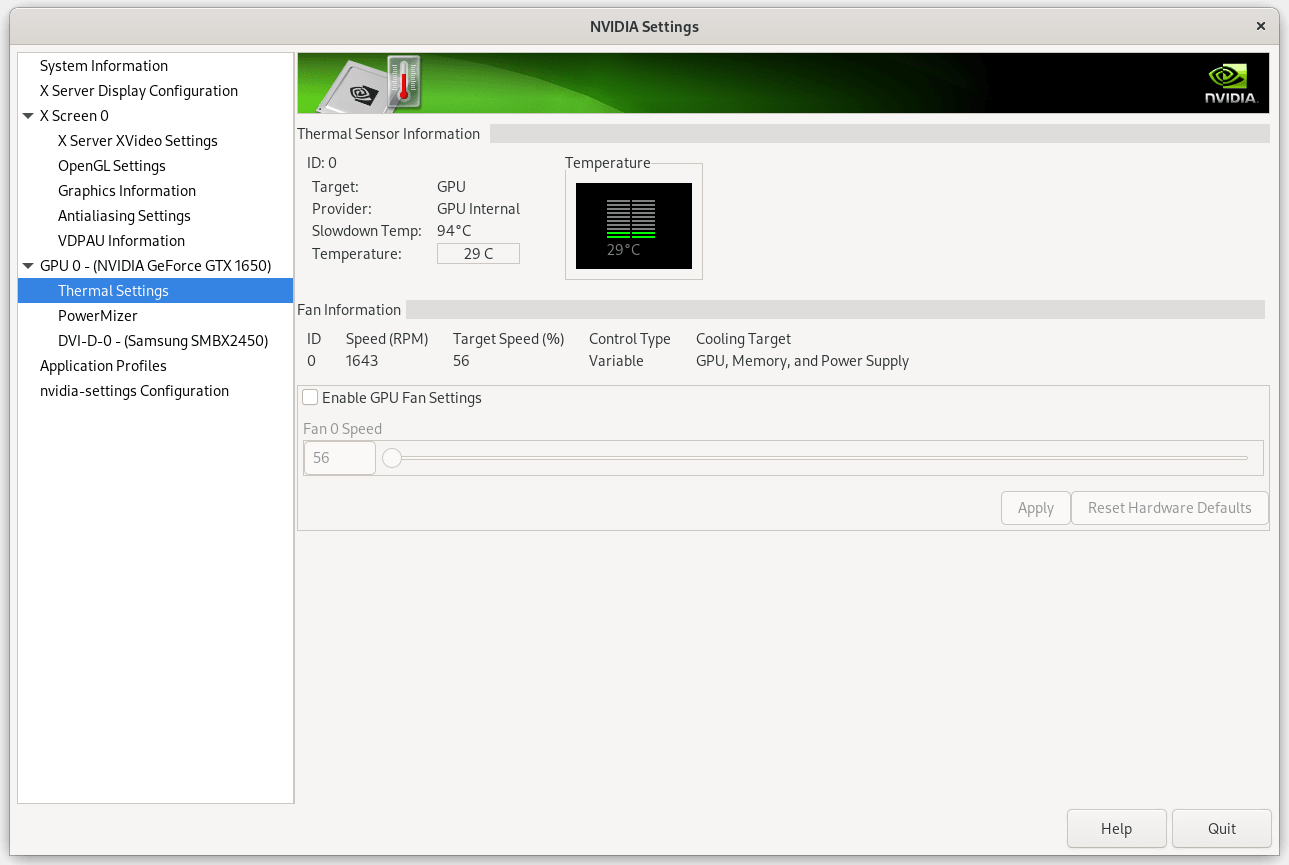
Here, you should see a panel with all your Nvidia Driver settings available and system information. At this stage, for most, you have successfully installed the Nvidia Drivers of your choice on Debian.
Below are additional screenshots of the Nvidia Settings GUI Example Screenshots for users new to Linux and utilizing Nvidia Drivers:
Conclusion and Recap
Throughout this guide, we’ve demonstrated the steps to install Nvidia drivers on Debian 12 Bookworm, Debian 11 Bullseye, and Debian 10 Buster. We covered the standard method using Debian’s default repository and the advanced approach of obtaining the latest drivers directly from Nvidia’s apt repository. Following this guide, users can optimize their Debian system’s graphics performance with the most suitable Nvidia driver option. We hope this tutorial proves valuable in enhancing your Debian computing experience.


How do I remove the NVIDIA APT so that I can install the default one?
Never mind. I figured it out.
Thanks, got me up to 545.23.08 on debain 12 sadly I think 550.40+ is required for the new 6GB 3050
Detected NVIDIA GPUs:
01:00.0 VGA compatible controller [0300]: NVIDIA Corporation GA107 [GeForce RTX 3050 6GB] [10de:2584] (rev a1)
Checking card: NVIDIA Corporation GA107 [GeForce RTX 3050 6GB] (rev a1)
Uh oh. Your card is not supported by any driver version up to 545.23.08.
A newer driver may add support for your card.
Newer driver releases may be available in backports, unstable or experimental.
Guess I am risking the vendor run/installer
Just in case anyone with the same card finds this comment.
I can confirm I got the 550.40.x drivers directly from the nvidia run script on the nvidia website installed and they work fine so far on Debian 12
Thanks, Billy, for posting the feedback.
Currently I have this as a method for Fedora Nvidia Drivers installation, as currently Nvidia and Fedora from 38 onwards is a complete mess. I will add the same method for Debian as well as an optional back up method if all else fails.
What driver version from Nvidia APT PPA will work with the latest stable Debian kernel 6.1.0-18 ?
For example version 535.104.12 does not work.
It worked perfectly. I’ve chosen the option “Install NVIDIA Drivers Without Cuda Support (Proprietary)”.
Normally I would never leave comment on a website/blog/forum. You’ve helped me we with a problem that I have been struggling for over 5 years, now I can finally connect to a monitor with HDMI. None of the other solutions provided on the internet worked for me (Connect Debian to external monitors, while having a hybrid GPU (Nvidia/Intel)). The only resort I had, was to choose Linux Mint.
Many thanks, keep this good work alive!
Thanks Anon for the feedback, glad it worked out. 🙂
Thank you for the tutorial. It helps a lot. The only thing missing is the fact that nvidia driver may not work properly if you have secure boot enabled in your bios settings.
Thank you very much. Now everything working good. Because nvidia-driver from Debian repository not working good.
Thank you again!