

This guide will demonstrate how to install Neovim on Ubuntu 24.04, 22.04, or 20.04 LTS utilizing the command-line terminal with four different methods that will suit most users’ preferred method of installation.
Neovim stands as an innovative text editor that builds upon the foundational excellence of Vim, aiming to improve user experience and add new features without compromising the core benefits Vim users have come to appreciate. Its design philosophy emphasizes extensibility and usability, making it an attractive option for developers, writers, and anyone in between who spends a significant amount of time manipulating text. Unlike traditional text editors, Neovim integrates seamlessly with modern development tools and workflows, offering a robust platform for coding, configuration, and customization. Its lightweight nature and compatibility with Vim plugins mean that transitioning to Neovim is smooth, and users can immediately take advantage of its improved interface and features.
To understand why Neovim has rapidly become a favored tool among tech enthusiasts, consider the following highlights:
- Efficient Editing: Offers powerful text manipulation capabilities that can significantly speed up coding and writing.
- Highly Customizable: Users can tailor the editor to their preferences with extensive configuration options.
- Plugin Ecosystem: Access to a wide range of plugins for added functionality, from autocompletion to git integration.
- Asynchronous I/O Support: Allows for smoother workflow with non-blocking UI operations.
- Embedded Terminal: Enables running shell commands directly within the editor.
- Improved GUI Support: Works with various graphical interfaces, enhancing usability.
- Open Source: Supported by a vibrant community, ensuring continual development and support.
- Cross-platform compatibility: It is available on multiple operating systems, making it accessible to a broader audience.
Transitioning into the practical side, let’s delve into the methods to install Neovim on your Ubuntu system.
Update Ubuntu Before Neovim Installation
Before installing, updating your Ubuntu system to ensure optimal performance and compatibility is crucial. To update your system, execute the following command in the terminal:
sudo apt update && sudo apt upgradeThis command updates your package list and installs any available updates.
Install Neovim on Ubuntu via APT, PPA, Snap or Flatpak with Flathub
Method 1: Install Neovim with Ubuntu Repository
For many users, the most straightforward and convenient method to install Neovim is through the standard repository. To install this version, run the following command:
sudo apt install neovimPlease note that this method installs the version of Neovim available in the official Ubuntu repository, which may not be the most recent version. For users seeking the latest updates and features, consider using one of the Neovim team’s PPA versions as an alternative installation method.
Method 2: Install Neovim with Neovim Team PPA on Ubuntu
The second method for installation of Neovim is to import either the stable or unstable (nightly) version directly from the Neovim LaunchPAD PPA. Use one of the following commands based on the version you want to install:
Import Neovim stable PPA:
sudo add-apt-repository ppa:neovim-ppa/stable -yImport Neovim unstable PPA:
sudo add-apt-repository ppa:neovim-ppa/unstable -yNext, update your package index to include the newly added PPA:
sudo apt updateNow, you can proceed to install Neovim using the following command:
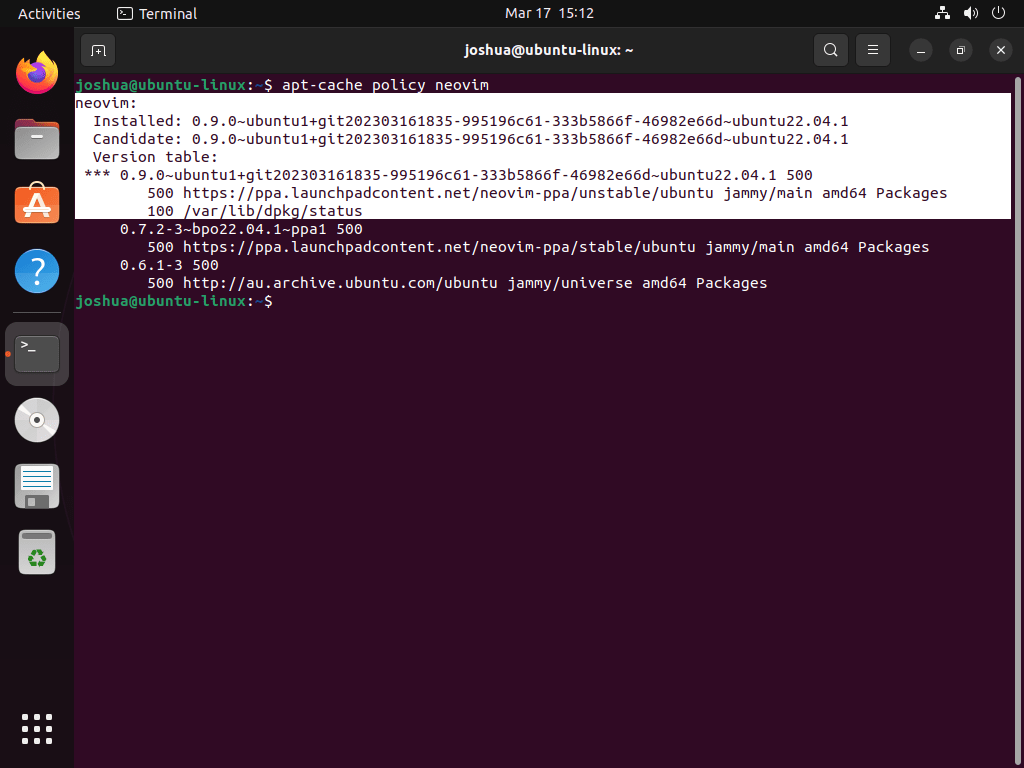
sudo apt install neovimOnce completed, the Neovim Team PPA will have installed Neovim on your system. Verify the installation of the PPA version by running the following command:
apt-cache policy neovimExample output shows the Neovim PPA installed on Ubuntu, using the unstable version for this guide.
Method 3: Install Neovim with Snapcraft on Ubuntu
The Snapcraft package manager can be your third option for installing Neovim on Ubuntu. Your Ubuntu desktop should already have Snap installed unless you removed it.
Snapcraft, although not as popular as Flatpak, comes from the same developers behind Ubuntu. Flatpak enjoys broader adoption across different Linux distributions, leading package maintainers to update Flatpak versions faster than Snapcraft versions. However, update speed ultimately relies on the specific package maintainer.
If you’ve uninstalled snapd from your system, use the following command to reinstall it:
sudo apt install snapdSome packages require classic snap support. To enable this, create a symlink with the following command for optimal snap compatibility:
sudo ln -s /var/lib/snapd/snap /snapInstall the core files to prevent conflicts:
sudo snap install coreFinally, install the snap version of Neovim:
sudo snap install nvim --classicAfter completing these steps, you have successfully installed Neovim on your system with the Snapcraft package manager.
Method 4: Install Neovim with Flatpak via Flathub on Ubuntu
An alternative method for installing Neovim is Flatpak, a versatile package management system that provides a sandboxed application environment. To install Neovim via Flatpak, you must add the Flathub repository containing the Neovim package.
Note: If Flatpak isn’t installed on your system, please refer to How to Install Flatpak on Ubuntu with the Flatpak Team Official LaunchPAD PPA. This guide offers instructions for obtaining the latest supported version using the Flatpak Team Official LaunchPAD PPA.
Begin by opening the terminal and entering the following command to integrate the Flathub repository:
sudo flatpak remote-add --if-not-exists flathub https://flathub.org/repo/flathub.flatpakrepoNow, run the Neovim installation using the following flatpak command:
flatpak install flathub io.neovim.nvimUpon completing these steps, you have installed Neovim on your system with Flatpak and Flathub package manager.
Launch Neovim on Ubuntu via CLI or GUI
There are several methods for launching Neovim, depending on your installation method and preference.
CLI Methods to Launch Neovim on Ubuntu
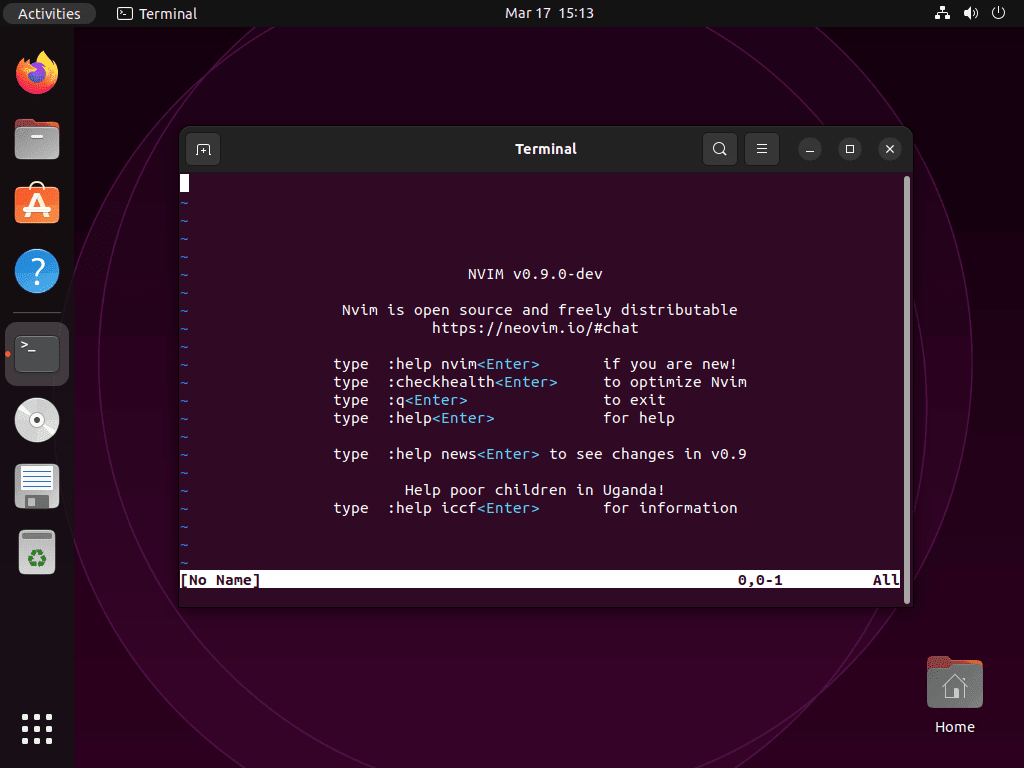
Standard Installation: If you installed Neovim using the default repository, PPA, or built it from source, launch Neovim by entering the following command in your terminal:
neovimSnapcraft: If you installed Neovim using Snapcraft, launch it from the terminal with the following command:
sudo snap run neovimFlatpak: If you installed Neovim using Flatpak, run the following command in the terminal:
flatpak run io.neovim.nvimGUI Method to Launch Neovim on Ubuntu
Desktop Application: For desktop users, locate the Neovim application icon by navigating to Activities > Show Applications > Neovim. You can also add Neovim to your favorites for easy access.
First-Time Tips with Neovim on Ubuntu
Now that you have successfully installed Neovim on Ubuntu Linux, here are some first-time tips on getting started with the software:
General Tips for Neovim Users on Ubuntu
Understanding the Basics:
- Familiarize Yourself with Vim Commands: Since Neovim builds on Vim, knowing basic Vim commands can significantly enhance your efficiency.
- Explore
:helpCommand: Use:helpfor accessing Neovim’s comprehensive documentation. It’s your go-to for learning about functionalities, commands, and settings. - Leverage the
init.vimFile: Customize Neovim by editing yourinit.vimfile, located in~/.config/nvim/. This is akin to Vim’s.vimrc.
Customizations for Enhanced Productivity:
- Install Plugin Manager: Consider using a plugin manager like
vim-plug. It simplifies adding, updating, and removing plugins. Install it with
curl -fLo ~/.local/share/nvim/site/autoload/plug.vim --create-dirs \
     https://raw.githubusercontent.com/junegunn/vim-plug/master/plug.vim
- Theme Your Neovim: Change the appearance of Neovim by installing themes. Add theme plugins through your plugin manager and set your preferred theme in
init.vim. - Key Mappings: Customize key mappings to streamline your workflow. Define these in your
init.vimto make commands more accessible. - Autocompletion Plugins: Boost productivity by integrating autocompletion plugins. Popular options include
coc.nvimfor a powerful, Intellisense-like experience.
Performance Optimization Tips
Using Neovim Efficiently on Ubuntu:
- Lazy Loading Plugins: Use your plugin manager’s lazy loading feature to speed up Neovim’s startup time by loading plugins only when needed.
- Asynchronous Linting and Formatting: Implement asynchronous linting and formatting tools to ensure that your editing is not interrupted, enhancing your coding experience.
- File Navigation Tools: Integrate file navigation plugins like
nerdtreeorfzffor quick file access and enhanced project navigation. - Language-Specific Plugins: Install language-specific plugins to get syntax highlighting, linting, and formatting for the programming languages you use.
Community and Learning Resources
Engaging with the Neovim Community:
- Join the Neovim Community: Participate in forums and discussions on platforms like Reddit or Neovim’s GitHub to stay updated and get support.
- Follow Neovim Blogs and Tutorials: Look for blogs and tutorials tailored to Neovim usage on Ubuntu. They can offer valuable tips and tricks.
- Experiment with Configurations Shared by Others: Learn by exploring
init.vimconfigurations shared by the community. It’s a great way to discover new plugins and customizations. - Contribute to Neovim: If you’re inclined, contributing to Neovim can be a rewarding way to give back and improve the software for everyone.
Security and Best Practices
Maintaining a Secure and Efficient Neovim Environment:
- Vet Plugins Carefully: Only install plugins from reputable sources to avoid security risks. Review the plugin’s code and community feedback before installation.
- Backup Your
init.vim: Regularly back up yourinit.vimfile and any custom scripts you use. This ensures you can quickly recover your environment if needed. - Keep Plugins Updated: While this guide doesn’t cover updating, it’s essential to keep your plugins current to benefit from security patches and new features.
- Use Version Control: Manage your Neovim configuration files with a version control system like Git. This practice allows you to track changes and revert if necessary.
With these tips, you’ll enhance your Neovim experience on Ubuntu, making your development workflow more efficient and enjoyable.
Additional Commands For Neovim on Ubuntu
Update Neovim
To ensure that you are using the latest version of Neovim, it’s crucial to check for updates regularly. While update notifications may appear automatically, verifying updates’ availability manually is good practice. Depending on your installation method, use one of the following commands in the terminal to check and apply updates for Neovim:
APT Neovim Update Method
To update Neovim installed via the APT method, first update the package list and then upgrade the packages:
sudo apt update && sudo apt upgradeFlatpak Neovim Update Method
To update Neovim installed via Flatpak, execute the following command:
flatpak updateSnap Neovim Update Method for Ubuntu
To update Neovim installed via Snap, run the following command:
sudo snap refreshBy regularly updating Neovim, you can benefit from the latest features, improvements, and bug fixes, ensuring a smooth and efficient experience.
Remove Neovim
If you no longer need Neovim on your system, follow the instructions below to uninstall it, depending on the original installation method. Additionally, these steps will help you clean up any leftover files and data to maintain a clutter-free system.
APT Neovim Remove Method
To uninstall Neovim installed via the APT method, execute the following command:
sudo apt remove neovimIf you installed Neovim using one of the PPAs, remove them with these commands:
Remove Neovim Stable PPA:
sudo add-apt-repository --remove ppa:neovim-ppa/stable -yRemove Neovim Unstable PPA:
sudo add-apt-repository --remove ppa:neovim-ppa/unstable -yFlatpak Neovim Remove Method
To uninstall Neovim installed via Flatpak, run the following command:
flatpak remove --delete-data io.neovim.nvim -ySnap Neovim Remove Method
To uninstall Neovim installed via Snapcraft, use the following command:
sudo snap remove neovimConclusion
In wrapping up our guide, we’ve navigated through the essentials of installing Neovim on Ubuntu, tailored advice for first-timers, and dipped our toes into customizations and optimizations to elevate your coding journey. The key takeaway? Dive into Neovim with curiosity and openness to tweak it to your liking. Whether you’re customizing your editor, streamlining your workflow with plugins, or engaging with the vibrant Neovim community, remember that every step is an opportunity to make Neovim truly yours. As you continue, keep experimenting, keep learning, and most importantly, enjoy the process. Neovim isn’t just a tool; it’s a companion on your coding adventures. Happy coding!