
Visual Studio Code (VS Code) is a lightweight source code editor that supports debugging, embedded Git on Debian, syntax highlighting, intelligent code completion, and an extensive library of extensions. This guide walks through how to install Visual Studio Code on Debian using three methods: the Debian-curated extrepo tool, the official Microsoft APT repository, and Flatpak. Whether you are building web applications with JavaScript, writing Python scripts, developing PHP on Debian backends, or managing Docker containers on Debian, VS Code provides integrated tools that streamline your workflow. By the end, you will have VS Code installed with automatic updates configured and ready for development work.
Looking for an open-source alternative? VSCodium on Debian provides the same editor without Microsoft telemetry.
Update Debian Before Installing Visual Studio Code
Refresh your package index and upgrade existing packages to prevent dependency conflicts during the VS Code installation:
sudo apt update && sudo apt upgradeIf your user account does not have
sudoprivileges, see how to add a user to sudoers on Debian before continuing.
Install the packages required for downloading GPG keys and configuring repositories:
sudo apt install curl gpg ca-certificates -yThe curl command handles file downloads, gpg converts GPG keys for secure repository verification, and ca-certificates provides SSL certificate validation.
Install Visual Studio Code on Debian
Three installation methods are available for VS Code on Debian. Each provides the same application but differs in repository setup and update management:
| Method | Channel | Version | Updates | Best For |
|---|---|---|---|---|
| extrepo (Recommended) | Debian extrepo | Latest stable | Automatic via apt upgrade | Most users; Debian-curated repository with automatic GPG handling |
| Microsoft APT Repository | Official Repo | Latest stable | Automatic via apt upgrade | Users wanting direct Microsoft repository control |
| Flatpak | Flathub | Latest stable | Automatic via flatpak update | Users wanting sandboxed installation |
For most users, the extrepo method is recommended because it simplifies repository setup with a single command, handles GPG key management automatically, and uses Debian-curated repository definitions. The Microsoft APT method offers more direct control over the repository configuration, while Flatpak provides sandboxing at the cost of some system integration features.
These steps support Debian 13 (Trixie), 12 (Bookworm), and 11 (Bullseye) while LTS support remains active. All three installation methods work identically across supported releases.
Method 1: Install Visual Studio Code Using extrepo (Recommended)
The extrepo tool manages third-party repositories using Debian-curated definitions. It handles GPG keys and source file creation automatically, making this the simplest setup option.
Install extrepo
Install the extrepo package if it is not already on your system:
sudo apt install extrepo -yEnable Non-Free Policy
VS Code falls under extrepo’s non-free policy category because it contains proprietary Microsoft code. By default, extrepo only enables main (free software), so you must enable the non-free policy before adding the VS Code repository.
Open the extrepo configuration file:
sudo nano /etc/extrepo/config.yamlFind the enabled_policies section and uncomment - non-free so it looks like this:
enabled_policies:
- main
# - contrib
- non-free
Save and close the file. Alternatively, use sed to make the change automatically:
sudo sed -i 's/# - non-free/- non-free/' /etc/extrepo/config.yamlEnable the VS Code Repository
With the non-free policy enabled, add the VS Code repository:
sudo extrepo enable vscodeThis command creates /etc/apt/sources.list.d/extrepo_vscode.sources and downloads the GPG key to /var/lib/extrepo/keys/vscode.asc.
Update your package cache and verify the repository is active:
sudo apt update
apt-cache policy code
code:
Installed: (none)
Candidate: 1.x.x-xxxxxxxxxx
Version table:
1.x.x-xxxxxxxxxx 500
500 https://packages.microsoft.com/repos/code stable/main amd64 Packages
The output confirms extrepo successfully configured the Microsoft repository. Proceed to the Install VS Code section below.
Method 2: Install Visual Studio Code from Microsoft APT Repository
The official Microsoft repository provides the latest stable and Insiders builds with automatic updates through APT. This method gives you direct access to VS Code releases as Microsoft publishes them, with full control over the repository configuration.
Import Microsoft GPG Key
Download and convert the Microsoft GPG key to your system’s keyring. This key verifies that packages originate from Microsoft:
curl -fsSL https://packages.microsoft.com/keys/microsoft.asc | sudo gpg --dearmor -o /usr/share/keyrings/vscode.gpgAdd Microsoft VS Code Repository
Add the Visual Studio Code repository using the modern DEB822 format, which provides cleaner syntax and better maintainability than legacy .list files:
The DEB822
.sourcesformat works on Debian 11, 12, and 13. Debian 12+ uses this format by default, while Debian 11 fully supports it even though legacy.listfiles remain common on older installations.
cat <<EOF | sudo tee /etc/apt/sources.list.d/vscode.sources
Types: deb
URIs: https://packages.microsoft.com/repos/code
Suites: stable
Components: main
Architectures: amd64 arm64 armhf
Signed-By: /usr/share/keyrings/vscode.gpg
EOF
Update your package cache to include packages from the new repository, then verify APT recognizes it:
sudo apt update
apt-cache policy code
code:
Installed: (none)
Candidate: 1.x.x-xxxxxxxxxx
Version table:
1.x.x-xxxxxxxxxx 500
500 https://packages.microsoft.com/repos/code stable/main amd64 Packages
The output confirms the repository is active and VS Code is available. Proceed to the Install VS Code section below.
Method 3: Install Visual Studio Code Using Flatpak
Flatpak provides VS Code in a sandboxed environment with isolated dependencies. This method works well if you prefer application isolation or want to avoid adding external APT repositories.
Some VS Code features (integrated terminal, certain extensions) require additional Flatpak permissions. Review the Flathub documentation for details on permission management.
Install Flatpak and Flathub
If Flatpak is not installed on your system, set it up with Flathub. For complete instructions, see Flatpak on Debian. The quick setup commands are:
sudo apt install flatpak -y
sudo flatpak remote-add --if-not-exists flathub https://flathub.org/repo/flathub.flatpakrepo
Install VS Code via Flatpak
Install the official VS Code Flatpak from Flathub:
sudo flatpak install flathub com.visualstudio.code -yVerify the installation completed:
flatpak info com.visualstudio.codeVisual Studio Code - Code editing. Redefined.
ID: com.visualstudio.code
Ref: app/com.visualstudio.code/x86_64/stable
Arch: x86_64
Branch: stable
Origin: flathub
Version: 1.x.x
Launch VS Code via Flatpak:
flatpak run com.visualstudio.codeThe Flatpak installation creates a desktop entry, so you can also launch VS Code from your application menu after the first run.
Install VS Code with APT (Methods 1 and 2)
If you used Method 1 or Method 2 (APT repository methods), VS Code is available in two builds. You can install both simultaneously on the same system:
- Stable (recommended): Monthly updates with thoroughly tested features. Best for production development work.
- Insiders: Daily updates with the latest features and bug fixes. Choose this for early access to new functionality.
For most users, install the stable build for reliable daily development:
sudo apt install code -yAlternatively, install the Insiders build if you want early access to new features and are comfortable reporting issues:
sudo apt install code-insiders -yYou can install both builds on the same system. The stable version uses the
codecommand while Insiders usescode-insiders, so they operate independently without conflicts.
Verify Visual Studio Code Installation
Confirm VS Code installed correctly by checking the package status:
apt-cache policy codecode:
Installed: 1.x.x-xxxxxxxxxx
Candidate: 1.x.x-xxxxxxxxxx
Version table:
*** 1.x.x-xxxxxxxxxx 500
500 https://packages.microsoft.com/repos/code stable/main amd64 Packages
100 /var/lib/dpkg/status
The Installed: line shows VS Code is on your system. The 100 /var/lib/dpkg/status line confirms the package is locally installed. Verify the binary works by checking its version:
code --version1.x.x commit-hash x64
This output confirms VS Code works correctly and APT will deliver automatic updates.
Launch Visual Studio Code on Debian
Launch from Terminal
Open VS Code by running:
codeFor the Insiders build:
code-insidersTo open a specific project directory:
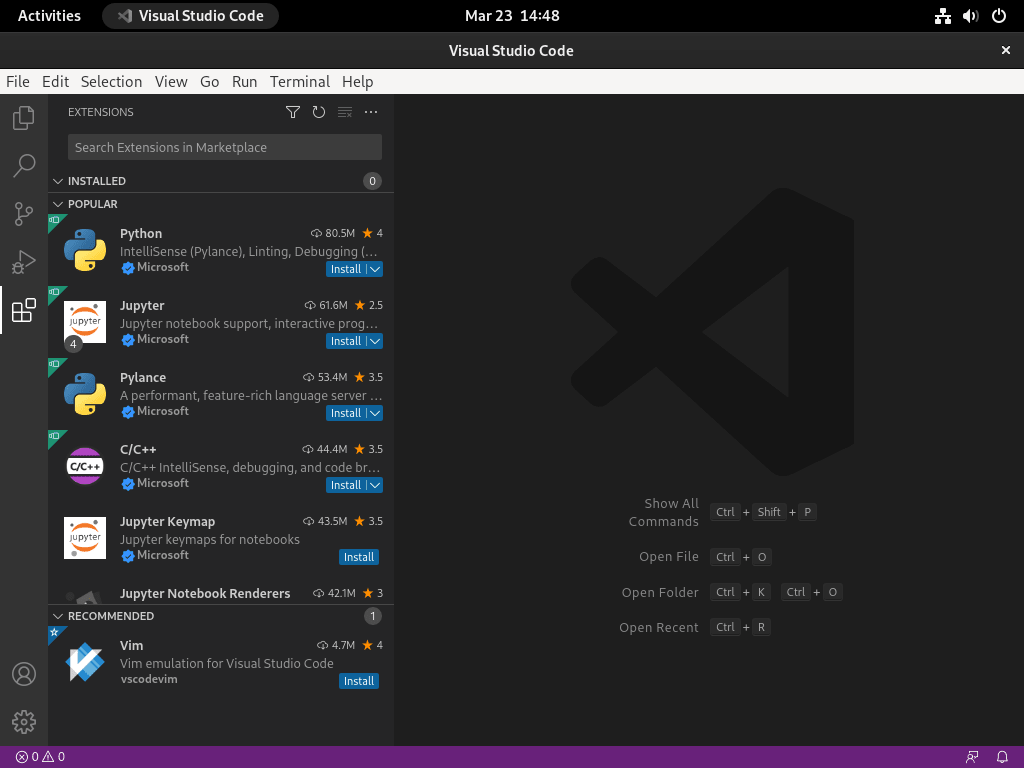
code /path/to/projectLaunch from Applications Menu
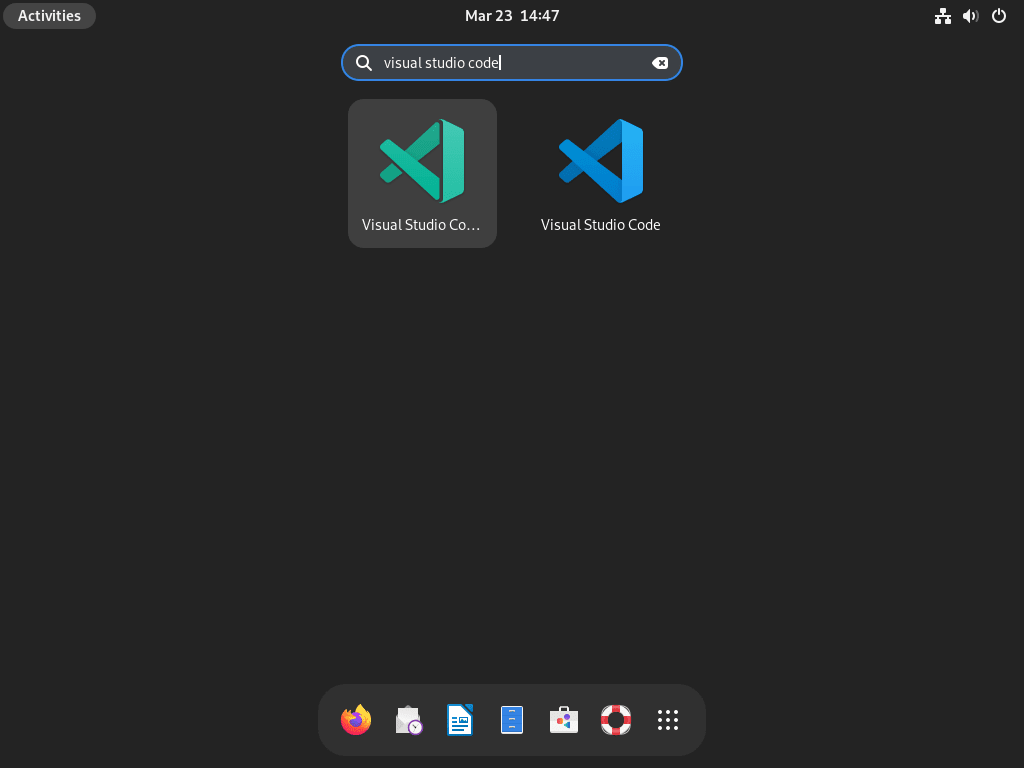
Access VS Code through your desktop environment:
- Open Activities (GNOME) or your application launcher.
- Search for “Visual Studio Code” or “Code”.
- Click the VS Code icon to launch the application.
Manage Visual Studio Code on Debian
Update Visual Studio Code
VS Code updates automatically through APT when you run system updates:
sudo apt update && sudo apt upgradeTo update only VS Code without upgrading other packages:
sudo apt update && sudo apt install --only-upgrade codeFor Flatpak installations, update using:
sudo flatpak update com.visualstudio.codeTroubleshoot Visual Studio Code on Debian
GPG Key Errors
If you see signature verification errors during apt update, the system cannot find or read the GPG key:
Err:1 https://packages.microsoft.com/repos/code stable InRelease
  The following signatures couldn't be verified because the public key is not available: NO_PUBKEY EB3E94ADBE1229CF
This error occurs when APT cannot find the keyring file at /usr/share/keyrings/vscode.gpg, when the file has incorrect permissions, or when corruption occurred during download. Re-download and reinstall the GPG key to resolve the issue:
sudo rm -f /usr/share/keyrings/vscode.gpg
curl -fsSL https://packages.microsoft.com/keys/microsoft.asc | sudo gpg --dearmor -o /usr/share/keyrings/vscode.gpg
sudo apt update
Verify the fix by confirming APT can read the repository without errors:
apt-cache policy codeIf successful, the output should show version information from the Microsoft repository rather than error messages.
Repository Not Found
If APT reports that the VS Code package cannot be located:
E: Unable to locate package code
This error means the Microsoft repository is not configured or APT has not refreshed its package cache. Verify the sources file exists and contains the correct configuration:
cat /etc/apt/sources.list.d/vscode.sourcesA correctly configured file should display:
Types: deb
URIs: https://packages.microsoft.com/repos/code
Suites: stable
Components: main
Architectures: amd64 arm64 armhf
Signed-By: /usr/share/keyrings/vscode.gpg
If the file is missing or incorrect, recreate it using the commands in the repository setup section, then run sudo apt update before attempting installation again.
extrepo Non-Free Policy Not Enabled
If extrepo enable vscode displays a message about license policies not being enabled:
None of the license inclusion policies in vscode were enabled. Please edit /etc/extrepo/config.yaml and enable the required policies
VS Code requires the non-free policy. Enable it by editing the configuration file:
sudo sed -i 's/# - non-free/- non-free/' /etc/extrepo/config.yamlRetry the enable command:
sudo extrepo enable vscodeRemove Visual Studio Code from Debian
The removal process depends on which installation method you used.
Remove APT Installation (Method 2)
Remove the VS Code package:
sudo apt remove codeFor the Insiders build:
sudo apt remove code-insidersRemove the repository configuration and GPG key:
sudo rm /etc/apt/sources.list.d/vscode.sources
sudo rm /usr/share/keyrings/vscode.gpg
Refresh the package cache and remove orphaned dependencies:
sudo apt update
sudo apt autoremove
Remove extrepo Installation (Method 1)
Remove the VS Code package:
sudo apt remove codeDisable the extrepo repository:
sudo extrepo disable vscodeThis adds Enabled: no to the sources file rather than deleting it. To completely remove the repository files:
sudo rm /etc/apt/sources.list.d/extrepo_vscode.sources
sudo rm /var/lib/extrepo/keys/vscode.asc
Refresh the package cache and remove orphaned dependencies:
sudo apt update
sudo apt autoremove
Remove Flatpak Installation (Method 3)
Remove the VS Code Flatpak:
sudo flatpak uninstall com.visualstudio.codeRemove unused runtimes:
sudo flatpak uninstall --unusedFlatpak user data is stored in ~/.var/app/com.visualstudio.code/. Remove this directory if you want to delete all Flatpak VS Code settings and extensions.
Remove User Configuration Data
VS Code stores user settings, extensions, and cache in your home directory. These files persist after package removal.
The following commands permanently delete your VS Code settings, keybindings, snippets, installed extensions, workspace history, and cached data. Export any settings you want to keep before proceeding using the Settings Sync feature or by copying your configuration files.
Remove stable build user data:
rm -rf ~/.config/Code ~/.vscode ~/.cache/Code ~/.local/share/CodeRemove Insiders build user data:
rm -rf ~/.config/Code\ -\ Insiders ~/.vscode-insiders ~/.cache/Code\ -\ Insiders ~/.local/share/Code\ -\ InsidersIf you installed via Flatpak, remove user data with:
rm -rf ~/.var/app/com.visualstudio.codeVerify Removal
Verify that VS Code and its repository are no longer active:
apt-cache policy codeN: Unable to locate package code
This output confirms you removed both VS Code and its repository from your system.
Yes. All three installation methods (extrepo, Microsoft APT repository, and Flatpak) work on Debian 13 Trixie. The extrepo tool and DEB822 .sources format are fully supported on Debian 13, 12, and 11.
VS Code is Microsoft’s official build that includes telemetry, branding, and some proprietary extensions like Remote-SSH. VSCodium is a community-maintained build compiled from the same open-source codebase with telemetry disabled and Microsoft branding removed. Both use the same editor core, but some marketplace extensions are only available in the official VS Code build.
APT (via extrepo or the Microsoft repository) is recommended for most users because it provides better system integration, lower disk usage, and direct access to the Insiders build. Flatpak is a better choice if you want application sandboxing or prefer to avoid adding third-party APT repositories, though some features like the integrated terminal may require additional Flatpak permissions.
Debian does not ship Snap by default, and Snap is not a standard package management tool on Debian systems. While Snap can technically be installed on Debian, the recommended methods are extrepo, the Microsoft APT repository, or Flatpak. These integrate with Debian’s package management and provide reliable automatic updates.
Conclusion
You now have Visual Studio Code installed on Debian with automatic updates configured. Whether you chose extrepo for Debian-curated repository management, the Microsoft APT repository for direct updates, or Flatpak for sandboxed installation, VS Code is ready for development work. The Remote-SSH extension lets you edit files on remote servers directly after you configure SSH on Debian. To expand your development environment, explore the Nginx on Debian or MariaDB on Debian guides for web application backends.

Hi, this does not appear to work on Debian 12 aarch64 (Raspberry Pi), because only the amd64 version is available from the Microsoft repos.
As a work-around, can get the aarch64 .deb file from https://code.visualstudio.com/Download# and install using `sudo dpkg -i code_1.97.0-1738712383_arm64.deb` or similar.
Thanks for flagging this, mj1911. You were absolutely right. The previous version of this guide only specified
arch=amd64in the repository configuration, which excluded arm64 devices like the Raspberry Pi.The article has since been rewritten using the modern DEB822 repository format, and now includes both architectures:
Microsoft does provide arm64 packages in their VS Code repository, so Raspberry Pi users running Debian aarch64 can now install directly from the APT repository without needing the manual .deb workaround. Your feedback helped identify the gap. Thanks for documenting the workaround for others who encountered this before the update.