

MakeMKV stands as a versatile tool for DVD and Blu-ray conversion, bridging the gap between physical media and digital formats. This guide will demonstrate how to install MakeMKV on Linux Mint 21 or 20, opening a world of digital media management to Linux users. Renowned for its simplicity and effectiveness, MakeMKV is a go-to choice for converting video without losing quality.
Key Features of MakeMKV:
- Effortless Conversion: Transforms DVD and Blu-ray discs into MKV files with ease.
- Preservation of Quality: Maintains all video and audio tracks, including HD audio.
- No Additional Software Needed: Works independently without the need for codecs.
- Fast Processing: Swift conversion process, saving valuable time.
- Cross-Platform Compatibility: Available for Windows, macOS, and Linux.
Delving into the technical aspects, the upcoming sections will guide you through the installation process on Linux Mint, ensuring you can leverage MakeMKV’s capabilities on your system.
Install MakeMKV on Linux Mint 21 or 20 via APT
Step 1: Update Linux Mint Before MakeMKV Installation
Before starting the installation process, ensuring your Linux Mint system is up-to-date with the latest packages is essential. This action minimizes potential conflicts and ensures a smoother installation process. To update the system, execute the following command:
sudo apt updateNext, upgrade any outdated packages with the following command:
sudo apt upgradeStep 2: Import HJMooses’s PPA
The recommended method for installing MakeMKV is importing HJMooses’s PPA, which contains the latest software version. Adding the PPA lets your system fetch MakeMKV directly from the designated repository. To import this PPA, run the following command:
The -y flag automatically confirms the addition of the PPA to your system.
sudo add-apt-repository ppa:heyarje/makemkv-beta -yStep 3: Install MakeMKV via APT Install Command
After importing the PPA, proceed to install MakeMKV by executing the following command:
sudo apt install makemkv-oss makemkv-bin -yThis command installs both makemkv-oss and makemkv-bin packages, which are required to run MakeMKV on your Linux Mint system. The -y flag automatically confirms the installation process.
Install MakeMKV with Flatpak and Flathub
In this section, we will guide you through the process of installing MakeMKV using the Flatpak package manager and its third-party repository, Flathub. This option is popular among Linux Mint users and offers an easy way to install the application without importing the MakeMKV APT repository or for other reasons.
Step 1: Enable Flathub for MakeMKV Installation
To enable Flatpak on your system, open the terminal and enter the following command:
sudo flatpak remote-add --if-not-exists flathub https://flathub.org/repo/flathub.flatpakrepoThis command checks if the Flathub repository is already added to your system. If not, it adds the repository to the list of available Flatpak sources.
Step 2: Install MakeMKV via Flatpak Command
Now that Flatpak and Flathub are enabled, you can install MakeMKV. To install the software, use the following command in your terminal:
flatpak install flathub com.makemkv.MakeMKVThis command fetches the MakeMKV package from the Flathub repository and installs it on your system in a containerized format, which ensures that the application runs in isolation from the rest of your system.
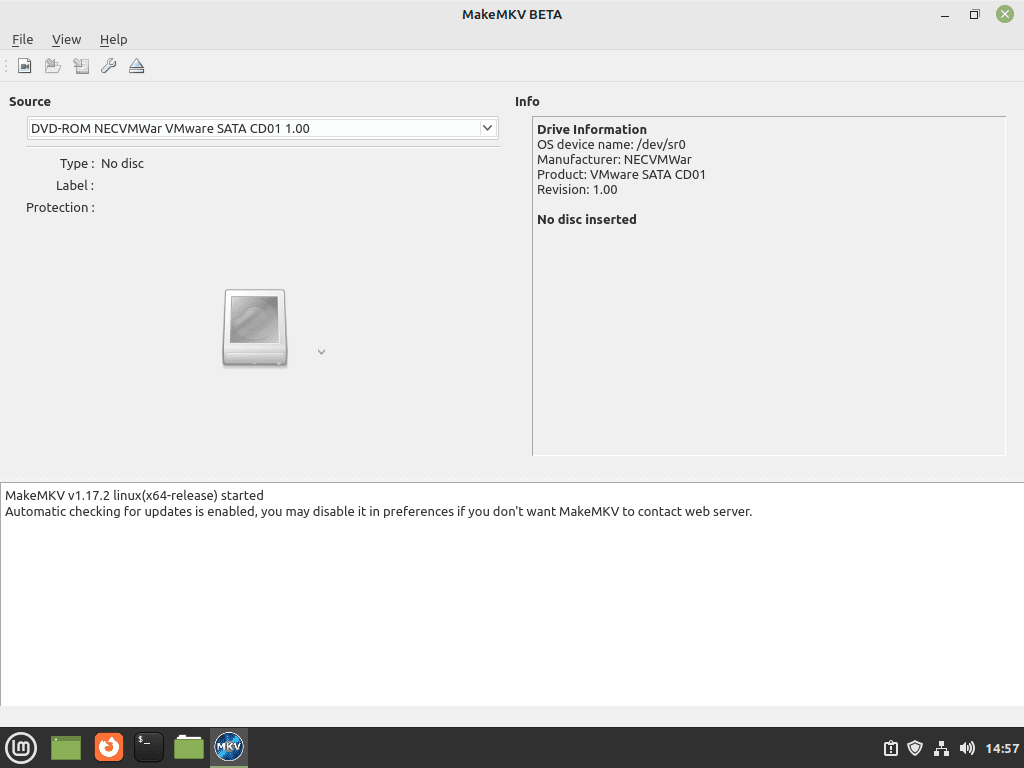
Launch MakeMKV on Linux Mint 21 or 20
To launch MakeMKV using the terminal. The command to open MakeMKV depends on the installation method you choose.
CLI Commands to Launch MakeMKV
If you installed MakeMKV using the APT method, open the terminal and enter the following command:
makemkvIf you installed MakeMKV using the Flatpak method, open the terminal and enter the following command:
flatpak run com.makemkv.MakeMKVLaunch MakeMKV Using the Application Menu
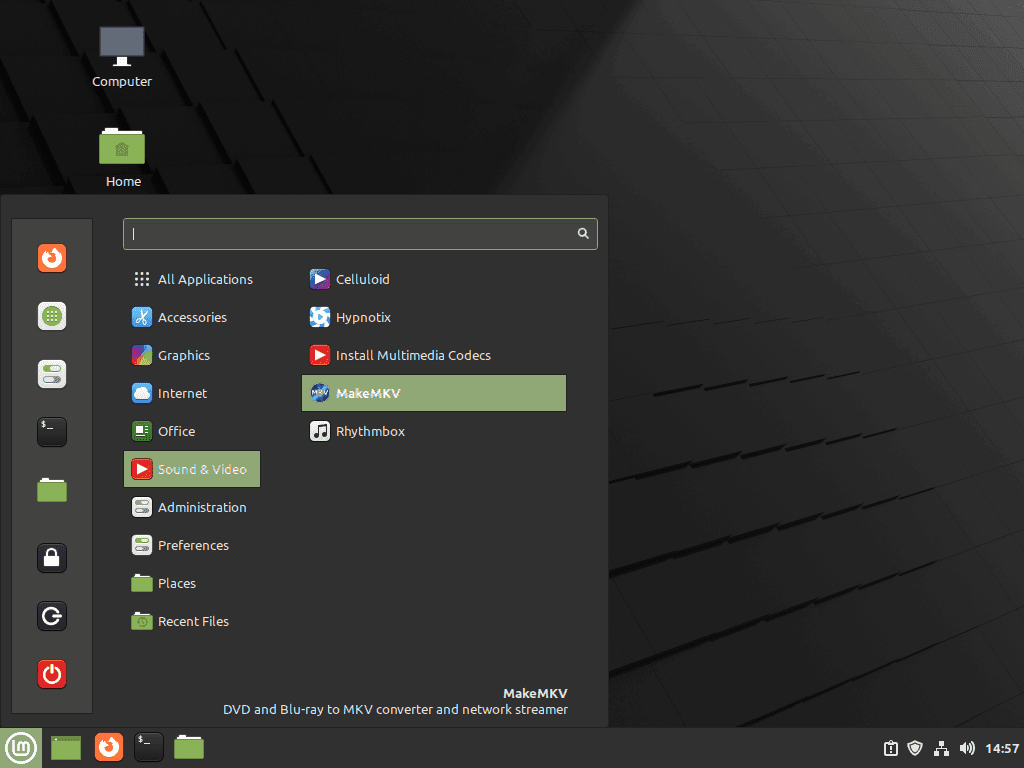
Alternatively, to open MakeMKV, navigate through the application menu on your desktop:
Taskbar > Sound & Video > MakeMKVThis method will launch MakeMKV using the graphical interface, allowing you to access its features easily.
First-Time Tips with MakeMKV on Linux Mint 21 or 20
After successfully installing and launching MakeMKV on your Linux Mint system, you may want to explore its features and capabilities. In this section, we will provide some tips and tricks to help you get started with MakeMKV on Linux Mint.
General MakeMKV Tips on Linux Mint
- Backup Your Discs: Before converting your DVDs, Blu-rays, or Ultra HD Blu-rays, it is always a good idea to make a backup of your original discs. This practice ensures that you have a safety net in case anything goes wrong during the conversion process.
- Preserve Chapters: MakeMKV allows you to maintain the original chapters of your source material. Keeping chapters intact can be useful for navigating through your converted videos.
- Select Audio Tracks: MakeMKV enables you to choose specific audio tracks from your source material. This feature is beneficial for users who want to include multiple languages or director’s commentary in their converted files.
MakeMKV Customizations on Linux Mint
- Change Output Directory: By default, MakeMKV saves your converted files in your
/homedirectory. To change the output directory, go toFile>Preferences>Output folderin the MakeMKV interface, and select a new folder for your converted files. - Adjust Quality Settings: MakeMKV provides various settings to fine-tune the quality of your converted videos. Access these settings by navigating to
File>Preferences>Videowithin the MakeMKV interface. Experiment with different settings to achieve the desired balance between file size and quality.
Other MakeMKV Tips on Linux Mint
- Monitor Conversion Progress: Keep an eye on the conversion progress within the MakeMKV interface. The progress bar and estimated time remaining provide useful feedback on the status of your current conversion task.
- Explore Advanced Options: MakeMKV offers advanced options for users seeking more control over the conversion process. Access these options by navigating to
File>Preferences>Advancedwithin the MakeMKV interface. Note that modifying advanced settings requires a good understanding of video encoding and can impact the quality of your converted files. - Seek Community Support: If you encounter any issues or require assistance with MakeMKV on Linux Mint, consider seeking help from the Linux Mint and MakeMKV communities. These communities are often responsive and can provide valuable insights and guidance.
Managing MakeMKV on Linux Mint 21 or 20
This section will cover some useful commands and tips for managing MakeMKV on your Linux Mint system, including updating and removing the software.
Update MakeMKV
When installed using the APT package manager, MakeMKV should update itself automatically with your system packages. However, if you want to check for updates manually, use the following command in your terminal:
sudo apt update && sudo apt upgradeThis command updates your system’s package list and upgrades any outdated packages, including MakeMKV.
Remove MakeMKV
When removing MakeMKV, cleaning up its dependencies is essential to avoid leaving unnecessary files on your system. Use the following command to remove MakeMKV and its dependencies:
sudo apt remove makemkv-oss makemkv-bin Next, if you no longer plan to use MakeMKV and wish to remove the imported PPA, execute the following command:
sudo add-apt-repository --remove ppa:heyarje/makemkv-beta -yConclusion: Installing MakeMKV on Linux Mint
This guide demonstrated how to install MakeMKV on Linux Mint 21 or 20 using various methods, from the dedicated APT package manager with a Launchpad PPA to Flatpak with Flathub. Following the instructions, you can enjoy MakeMKV’s powerful video conversion capabilities on your Linux Mint system.