
A spare Ubuntu server can turn a folder full of movies, music, photos, and shows into a private streaming library without tying the workflow to a paid account. When you install Jellyfin Media Server on Ubuntu, the official APT repository gives you a native systemd service, normal package updates, and the web setup wizard for building libraries, users, metadata, and remote access.
The steps below use Jellyfin’s upstream Ubuntu repository on Ubuntu 26.04 LTS, 24.04 LTS, and 22.04 LTS. After the package install, the article covers media-directory permissions, the first-run wizard, SSH tunnel access, UFW rules, and optional Apache or Nginx reverse proxy setup for HTTPS access.
Install Jellyfin Media Server on Ubuntu
This article covers the native APT repository path because it installs Jellyfin as a normal Ubuntu service and keeps updates inside your package-manager workflow.
Use one APT setup path on a given server. If you use Jellyfin’s official install script, do not also create the manual APT source below on the same host unless you intentionally remove the earlier source first.
Jellyfin’s interactive install script is available for readers who want the upstream one-command path. It creates the Jellyfin APT source, installs the package, and prompts before continuing. The manual DEB822 steps below are easier to audit and remove later, so use the script only instead of the manual repository section:
curl -fsSL https://repo.jellyfin.org/install-debuntu.sh | sudo bashImport the Jellyfin APT Repository
Update Ubuntu System Packages
Start by refreshing package metadata and applying pending upgrades. This reduces avoidable dependency problems before you add the Jellyfin repository:
sudo apt update && sudo apt upgrade -yIf your account cannot use
sudoyet, follow the Ubuntu walkthrough to add a user to sudoers on Ubuntu, then return to these commands.
Install Required Packages
Install the tools needed to fetch the Jellyfin signing key and write the APT source. Minimal Ubuntu systems may not include curl by default, so keep this prerequisite step even when it looks familiar:
sudo apt install ca-certificates curl gpg -yAdd the Jellyfin Signing Key
Ubuntu’s default repositories do not ship Jellyfin, so APT needs Jellyfin’s signing key before it can trust packages from repo.jellyfin.org. Store the key in a dedicated keyring instead of using the deprecated global apt-key store:
sudo install -m 0755 -d /etc/apt/keyrings
curl -fsSL https://repo.jellyfin.org/jellyfin_team.gpg.key | sudo gpg --dearmor --yes -o /etc/apt/keyrings/jellyfin.gpg
sudo chmod 644 /etc/apt/keyrings/jellyfin.gpg
The --yes flag keeps the command rerun-safe if the keyring already exists. Confirm that the saved file is a binary OpenPGP keyring, not an empty file or ASCII text:
file /etc/apt/keyrings/jellyfin.gpg/etc/apt/keyrings/jellyfin.gpg: OpenPGP Public Key Version 4
Add the Jellyfin Source File
Add Jellyfin’s stable repository as a DEB822 source file. The commands read your Ubuntu codename and CPU architecture from the system, so the same block works for resolute, noble, and jammy:
. /etc/os-release
arch=$(dpkg --print-architecture)

cat <<EOF | sudo tee /etc/apt/sources.list.d/jellyfin.sources > /dev/null
Types: deb
URIs: https://repo.jellyfin.org/ubuntu
Suites: ${VERSION_CODENAME}
Components: main
Architectures: ${arch}
Signed-By: /etc/apt/keyrings/jellyfin.gpg
EOF
Refresh APT after writing the source file:
sudo apt updateRelevant output should include the Jellyfin repository for your Ubuntu release:
Get:1 https://repo.jellyfin.org/ubuntu resolute InRelease
Get:2 https://repo.jellyfin.org/ubuntu resolute/main amd64 Packages
Verify that APT recognizes the Jellyfin repository by checking the package policy:
apt-cache policy jellyfinRelevant output includes:
jellyfin:
Installed: (none)
Candidate: 10.11.x+ubu2604
Version table:
10.11.x+ubu2604 500
500 https://repo.jellyfin.org/ubuntu resolute/main amd64 Packages
The exact version suffix changes by Ubuntu release, such as +ubu2604, +ubu2404, or +ubu2204. If APT still cannot locate jellyfin, rerun sudo apt update after checking the source file and keyring path.
Install Jellyfin Media Server Package
Install the Jellyfin meta package. APT will also install the server, web interface, and Jellyfin FFmpeg package required by the media server:
sudo apt install jellyfin -yThe package enables and starts jellyfin.service automatically. Verify the enabled and running states with narrow systemd checks:
systemctl is-enabled jellyfin
systemctl is-active jellyfin
enabled active
If either check fails, start the service manually and then recheck it:
sudo systemctl start jellyfin
systemctl is-active jellyfin
If the service is running but not enabled, enable it for future boots:
sudo systemctl enable jellyfinOnce jellyfin.service is active, the web interface listens on port 8096. Keep that port local, LAN-only, tunneled, or reverse-proxied depending on how you plan to access the server.
Complete the Jellyfin Setup Wizard
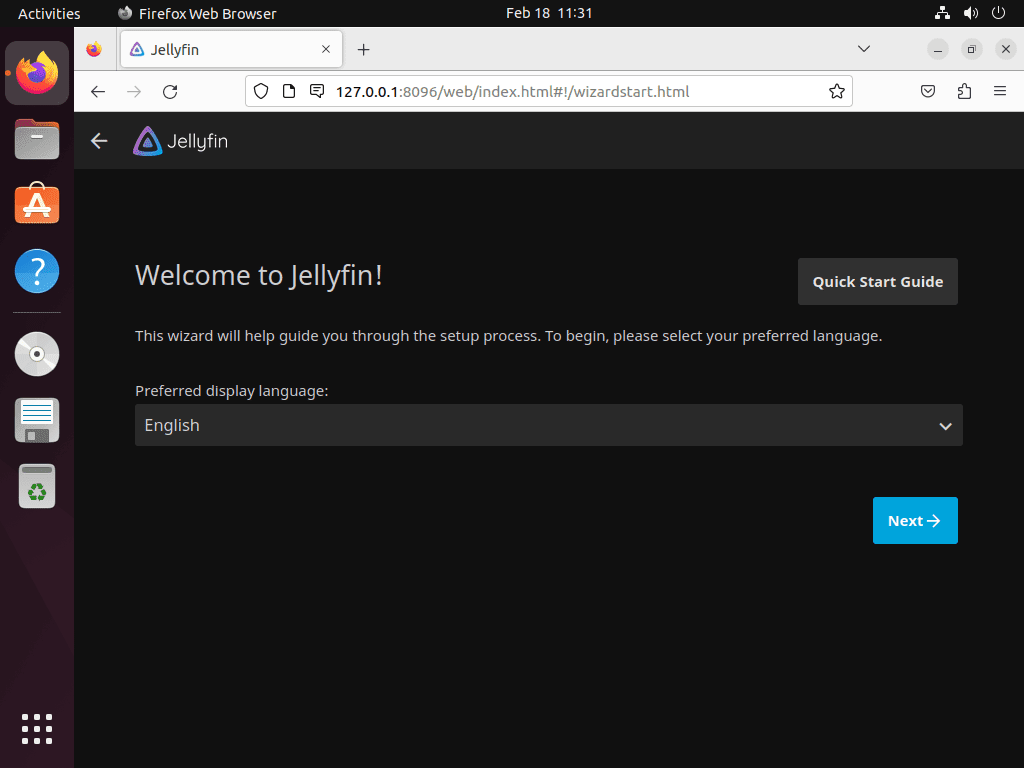
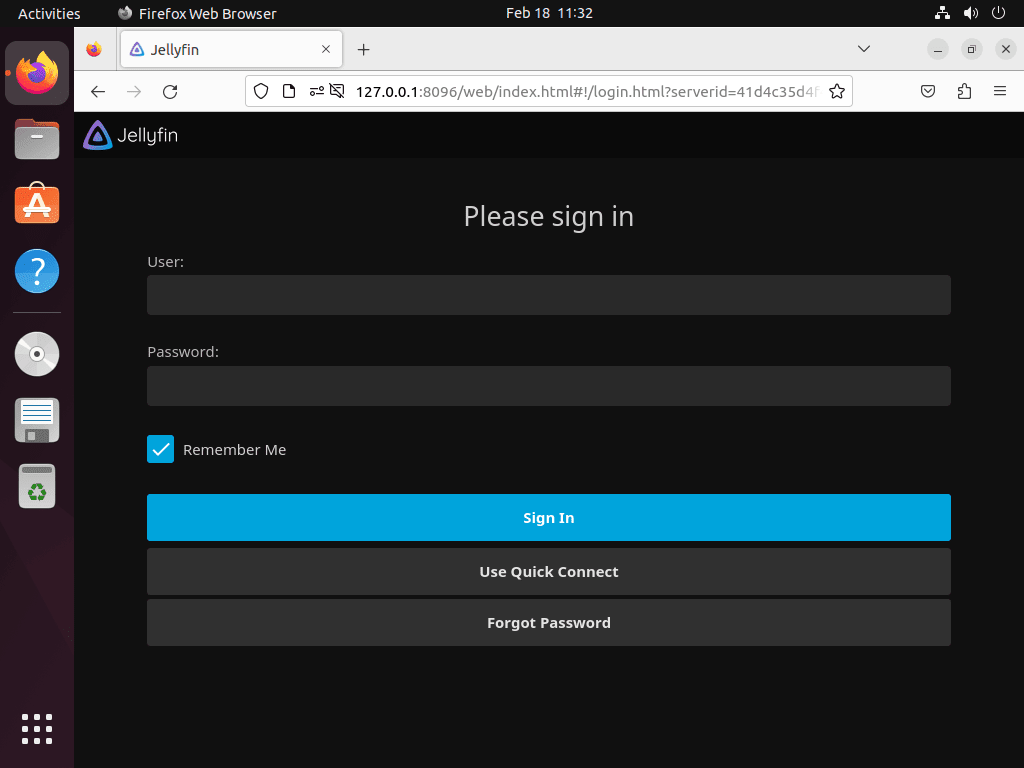
With Jellyfin installed and running, open http://127.0.0.1:8096 in a browser on the server. From another device on the same LAN, replace 127.0.0.1 with the server’s local IP address. The welcome screen for initial server setup appears.
Select Your Preferred Language and Region
During your first-time setup, follow these steps to configure your Jellyfin server:
- Choose Display Language: Select your preferred display language, then click the “Next ->” button to continue.
- Create User Account: Set a username and password for administrative access. Choose a strong, unique password with uppercase and lowercase letters, numbers, and symbols. Click “Next ->” after setting up.
- Add Media Libraries: Click the “+” or “Add Media Library” button to select media folders for movies, TV shows, or music. Click “Next ->” once added.
- Set Metadata Language: Choose the language for media metadata to enrich your collection with details like cast and plot summaries. Proceed by clicking “Next ->”.
- Choose Remote Access: Decide whether Jellyfin should accept remote connections. Leave automatic port mapping disabled unless you intentionally want the server to request router port forwarding. Click “Next ->” to continue.
- Finish Setup: Confirm setup completion and click “Finish” to reach the login screen. Sign in with your created credentials.
Create Your Administrator Account
After choosing the language, create your username and password, then click the “Next ->” button. You can add more users after completing the initial setup.

Setting up your media libraries is a key part of the process when you install Jellyfin Media Server on Ubuntu. Jellyfin uses these libraries to organize and display your media. To get the most out of your installation, create separate libraries for movies, TV shows, and music.
Add Your Media Libraries
After creating the administrator account, add media content to Jellyfin by clicking the “+” or “Add Media Library” button. Jellyfin opens the Media Library setup screen, where you can select your media folder.
Once you’ve added your media libraries, click the “Next ->” button. You’ll land on the Metadata Language screen, where you can pick the language for your media content’s metadata, enriching your collection with details like cast, plot summaries, and reviews.
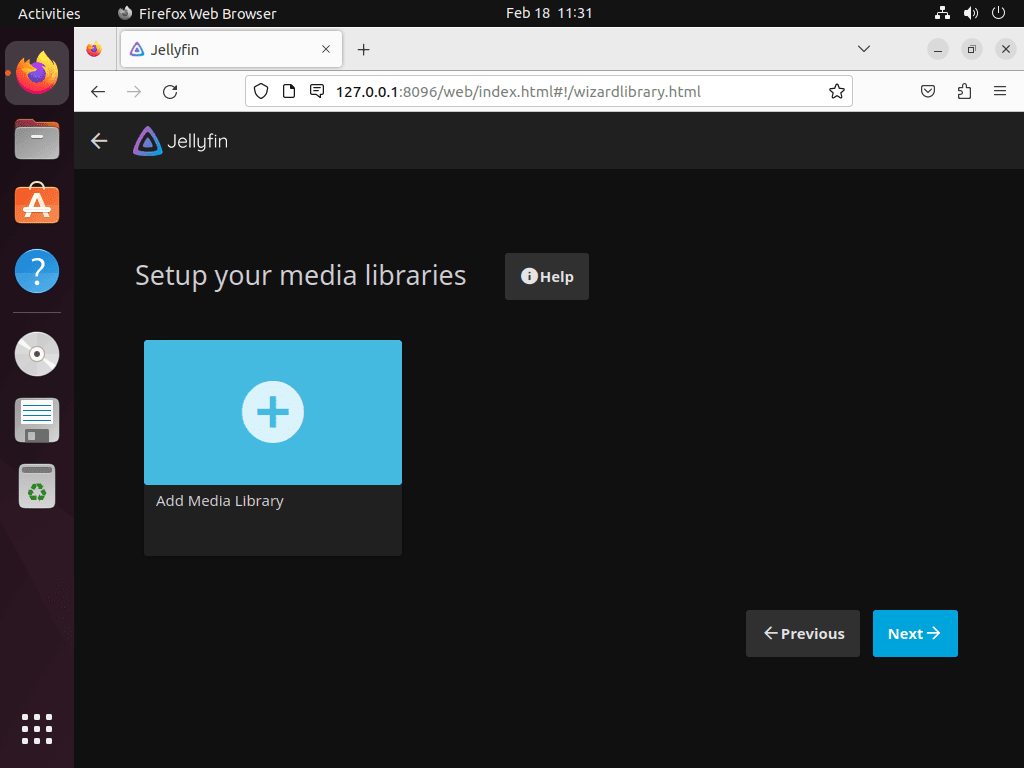
If you have used Plex before, the library setup process works similarly. Click Add Media Library, select the content type (Movies, Shows, Music, etc.), then browse to the folder containing your media files.
Once you’ve set up your media libraries and chosen your metadata language, Jellyfin asks about remote access. For public access, the SSH tunnel or reverse proxy sections later in this article are safer than automatic router port mapping.
Choose Remote Access Settings
For a LAN-only server, leave remote access and automatic port mapping disabled. If you enable remote connections, make that choice deliberately and pair it with firewall rules, an SSH tunnel, or a reverse proxy instead of relying on router automation alone.
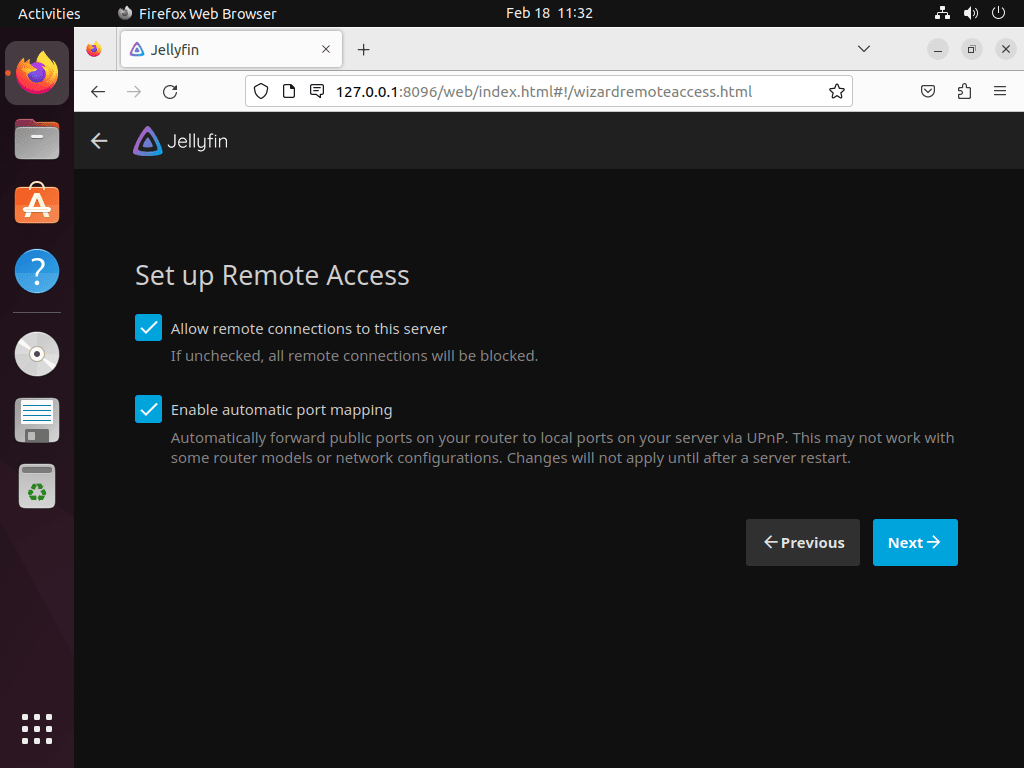
After choosing the remote access settings, continue to the final setup screen.
Complete Initial Configuration
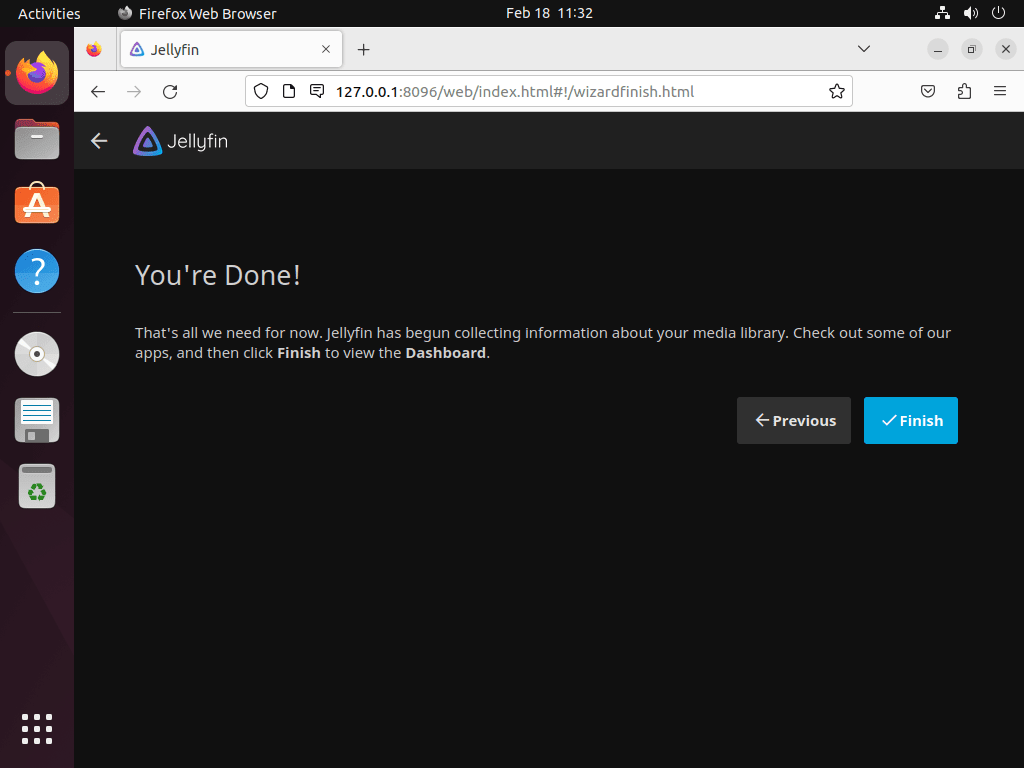
Click the “Finish” button to complete the setup. Jellyfin then opens the login screen, where you can sign in with the user account and password you created during the initial setup.
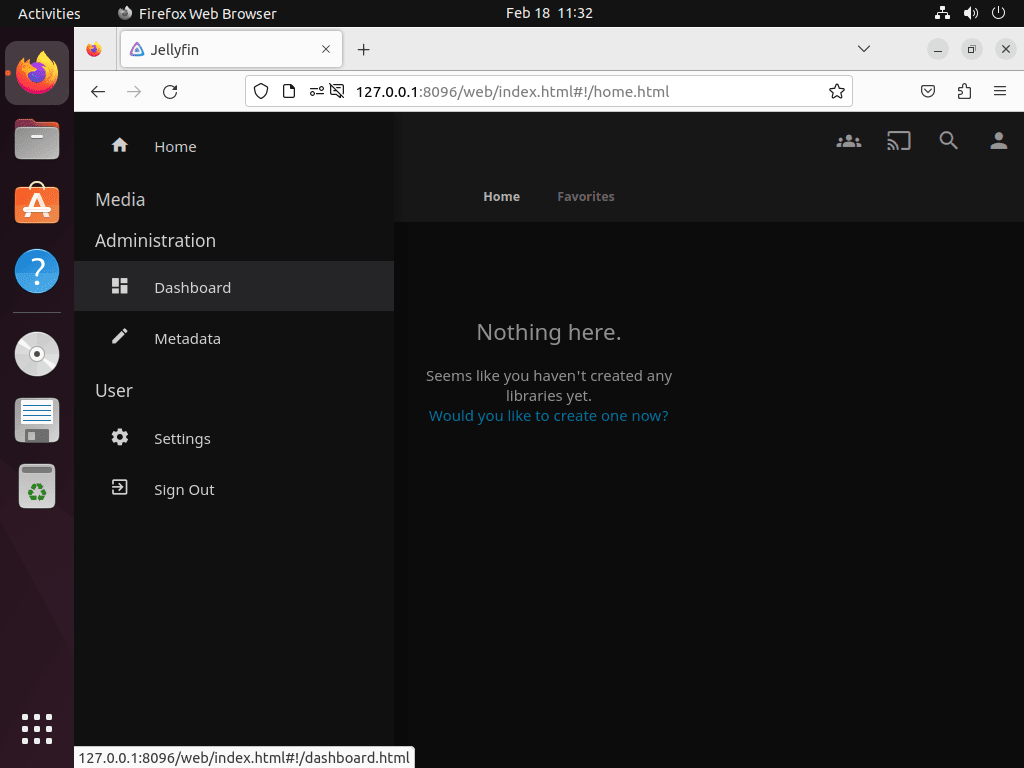
Access the Jellyfin Dashboard
To access the dashboard, enter your username and password to sign in to your Jellyfin media server, then click the “Sign in” button.
Grant Jellyfin Access to Media Directories
Jellyfin runs as the dedicated jellyfin system user, so files in your personal home directory, external drive, or NAS mount may not appear until that account can read the path. Access Control Lists (ACLs) let you grant read and execute access without changing the owner of your media collection.
First, install the ACL package if it’s not already present:
sudo apt install acl -yGrant Jellyfin access to your media directory and all subdirectories using the recursive flag. Replace /path/to/your/media with your real library path:
sudo setfacl -R -m u:jellyfin:rx /path/to/your/mediaAlternatively, for individual files or directories, specify the exact path:
sudo setfacl -m u:jellyfin:rx /path/to/your/media/specific-file-or-folderAfter setting permissions, verify they were applied correctly by checking the ACL entries. This confirmation ensures Jellyfin can access your media:
getfacl /path/to/your/mediagetfacl: Removing leading '/' from absolute path names # file: path/to/your/media # owner: username # group: username user::rwx user:jellyfin:r-x group::r-x mask::r-x other::r-x
The output should show user:jellyfin:r-x in the ACL entries, confirming Jellyfin has read and execute access to the specified path. With these permissions configured, Jellyfin can now access your media files.
For USB or external drives, avoid relying on desktop auto-mount paths that change between sessions, such as /media/username/drive-name. Use a stable mount point in /mnt or /srv, add the drive to /etc/fstab, then apply the ACL to that mounted path so Jellyfin can still read the library after a reboot.
Configure Optional Jellyfin Transcoding
Jellyfin can stream many files directly, but some devices need the server to transcode video or audio. The Ubuntu package installs Jellyfin FFmpeg automatically, while hardware acceleration still depends on your GPU, driver, and Jellyfin dashboard settings.
For Intel and AMD systems, verify that VA-API works before enabling it in Dashboard > Playback > Transcoding. Older Intel hardware, including some Haswell-era systems, may need a different VA-API driver than newer hardware. For NVIDIA systems, install the appropriate Ubuntu NVIDIA driver first, then follow Jellyfin’s hardware acceleration documentation for the matching accelerator.
If transcoding fails, disable hardware acceleration temporarily and confirm that normal playback still works. That separates media-library permissions from GPU-driver or codec problems.
Configure Remote Access and Security
Configure SSH Tunnel for Remote Access
When you need remote access without exposing Jellyfin directly to the internet, use an SSH tunnel on Ubuntu. This keeps the Jellyfin web UI reachable through your SSH connection while port 8096 remains closed to the public network.
If OpenSSH server is not installed yet, add it first:
sudo apt install openssh-server -yVerify that SSH is accepting connections. Ubuntu 24.04 and newer releases may use socket activation, while 22.04 commonly reports the service directly:
systemctl is-active ssh.socket 2>/dev/null || systemctl is-active sshactive
From your local computer, establish an SSH tunnel to forward port 8096. Make sure to replace username with your Ubuntu username and server-ip-address with your server’s actual IP address:
ssh -L 8096:localhost:8096 username@server-ip-addressThis command creates a secure tunnel that forwards port 8096 on your local machine to port 8096 on the remote server. As long as the SSH session remains active, access Jellyfin at http://localhost:8096 in your web browser.
The SSH tunnel directs your browser’s HTTP request through the encrypted connection to the remote server’s Jellyfin instance. Keep the SSH terminal window open while using Jellyfin; closing it terminates the tunnel and disconnects your access.
Configure UFW Firewall Rules
The UFW firewall on Ubuntu manages local firewall rules. Decide whether clients should reach Jellyfin directly on port 8096, or whether only Apache/Nginx should be public on ports 80 and 443.
If UFW isn’t installed, add it with this command:
sudo apt install ufw -yBefore enabling the firewall, allow SSH so you do not lock yourself out:
sudo ufw allow OpenSSHIf devices on your LAN should connect directly to Jellyfin, allow the Jellyfin web port:
sudo ufw allow 8096/tcpIf you will publish Jellyfin through Apache or Nginx instead, open HTTP and HTTPS for the reverse proxy. In that setup, you can leave port 8096 closed to the internet:
sudo ufw allow 80/tcp
sudo ufw allow 443/tcp
Once the needed allow rules exist, enable UFW without the interactive confirmation prompt:
sudo ufw --force enableFirewall is active and enabled on system startup
Use direct port access for trusted LAN clients or private networks. For public remote access, prefer the reverse proxy path so Jellyfin stays behind your web server and HTTPS certificate.
Set Up a Reverse Proxy with Apache or Nginx
You can set up a reverse proxy to access Jellyfin from a remote computer or network. Additionally, this method provides secure HTTPS access and simplifies domain-based routing.
Configure Apache as Reverse Proxy
First, set up Apache as a reverse proxy by installing the Apache web server:
sudo apt install apache2Apache should be enabled by default. However, if it’s not running, start it with this command:
sudo systemctl start apache2Enable Apache to start automatically on boot:
sudo systemctl enable apache2Next, enable the necessary Apache modules for reverse proxy functionality. These modules handle proxy requests and WebSocket connections:
sudo a2enmod proxy proxy_http headers proxy_wstunnelAfter enabling modules, create a new virtual host configuration file for Jellyfin using the following command. This file will define how Apache routes traffic to Jellyfin:
sudo nano /etc/apache2/sites-available/jellyfin.confBefore continuing, make sure your domain has an A (or AAAA) record such as jellyfin.example.com pointing to your server’s public IP address so Apache can serve requests for the hostname you define below.
Once you’ve created your subdomain, add the following HTTP-only virtual host. It proxies traffic to Jellyfin immediately, and Certbot will layer HTTPS on top of this configuration after you request the certificate:
    ServerName jellyfin.example.com

    ProxyPreserveHost On
    ProxyTimeout 3600
    TimeOut 3600

    # WebSocket proxy
    ProxyPass "/socket" "ws://127.0.0.1:8096/socket"
    ProxyPassReverse "/socket" "ws://127.0.0.1:8096/socket"

    # Main Jellyfin proxy
    ProxyPass "/" "http://127.0.0.1:8096/"
    ProxyPassReverse "/" "http://127.0.0.1:8096/"

    ErrorLog /var/log/apache2/jellyfin-error.log
    CustomLog /var/log/apache2/jellyfin-access.log combined
Save the file (CTRL+O), then exit (CTRL+X).
Before enabling the virtual host, you can check whether there are any errors in the Apache configuration or virtual host file by performing a “dry run” using the following command:
sudo apache2ctl configtestSyntax OK
A successful test returns “Syntax OK,” confirming the configuration has no errors. This check prevents Apache crashes during the reload process.
If the test passes, enable the virtual host:
sudo a2ensite jellyfin.confEnabling site jellyfin. To activate the new configuration, you need to run: systemctl reload apache2
Enabling the site creates a symbolic link between sites-available and sites-enabled directories. Restart Apache to apply the changes:
sudo systemctl restart apache2Apache reloads with the new virtual host settings, making your Jellyfin reverse proxy active over HTTP. Use the Let’s Encrypt section to secure the site with HTTPS.
Configure Nginx as Reverse Proxy
Nginx is a good fit when you want a small reverse proxy in front of Jellyfin instead of exposing port 8096 directly.
To install Nginx, use this command:
sudo apt install nginxNginx should be enabled by default. However, if it’s not running, start it with this command:
sudo systemctl start nginxEnable Nginx to start automatically on boot:
sudo systemctl enable nginxVerify Nginx is running correctly. This check confirms the service started successfully:
sudo systemctl status nginxnginx.service - A high performance web server and a reverse proxy server
Loaded: loaded (/lib/systemd/system/nginx.service; enabled; preset: enabled)
Active: active (running)
After confirming Nginx is active, create a new server block file for Jellyfin:
sudo nano /etc/nginx/conf.d/jellyfin.confConfigure the server block with the following directives. Each directive controls a specific aspect of how Nginx handles requests:
- listen: Specifies the port and address for Nginx (port 80 in this example)
- server_name: Your domain name (replace jellyfin.example.com)
- access_log and error_log: Locations for log files
- location: Handles different URL paths and request types
- proxy_pass: Forwards requests to Jellyfin on port 8096
Here is an example server block configuration. Initially, this configuration only uses HTTP (port 80). After you create an SSL certificate with certbot, it will automatically add the HTTPS (port 443) configuration and redirect all HTTP traffic to HTTPS:
server {
    listen 80;
    server_name jellyfin.example.com;

    access_log /var/log/nginx/jellyfin.access.log;
    error_log /var/log/nginx/jellyfin.error.log;

    # Security / XSS Mitigation Headers
    add_header X-Frame-Options "SAMEORIGIN";
    add_header X-XSS-Protection "1; mode=block";
    add_header X-Content-Type-Options "nosniff";

    location / {
        proxy_pass http://127.0.0.1:8096;
        proxy_set_header Host $host;
        proxy_set_header X-Real-IP $remote_addr;
        proxy_set_header X-Forwarded-For $proxy_add_x_forwarded_for;
        proxy_set_header X-Forwarded-Proto $scheme;
        proxy_set_header X-Forwarded-Protocol $scheme;
        proxy_set_header X-Forwarded-Host $http_host;
        proxy_buffering off;
        proxy_connect_timeout 60s;
        proxy_send_timeout 60s;
        proxy_read_timeout 60s;
    }

    location = /web/ {
        proxy_pass http://127.0.0.1:8096/web/index.html;
        proxy_set_header Host $host;
        proxy_set_header X-Real-IP $remote_addr;
        proxy_set_header X-Forwarded-For $proxy_add_x_forwarded_for;
        proxy_set_header X-Forwarded-Proto $scheme;
        proxy_set_header X-Forwarded-Protocol $scheme;
        proxy_set_header X-Forwarded-Host $http_host;
    }

    location /socket {
        proxy_pass http://127.0.0.1:8096/socket;
        proxy_http_version 1.1;
        proxy_set_header Upgrade $http_upgrade;
        proxy_set_header Connection "upgrade";
        proxy_set_header Host $host;
        proxy_set_header X-Real-IP $remote_addr;
        proxy_set_header X-Forwarded-For $proxy_add_x_forwarded_for;
        proxy_set_header X-Forwarded-Proto $scheme;
        proxy_set_header X-Forwarded-Protocol $scheme;
        proxy_set_header X-Forwarded-Host $http_host;
        proxy_connect_timeout 60s;
        proxy_send_timeout 60s;
        proxy_read_timeout 60s;
    }
}
Save the file (CTRL+O), then exit (CTRL+X).
Test the Nginx configuration for syntax errors before applying it:
sudo nginx -tnginx: the configuration file /etc/nginx/nginx.conf syntax is ok nginx: configuration file /etc/nginx/nginx.conf test is successful
A successful test displays confirmation that the configuration file syntax is valid. Then, reload Nginx to activate the new configuration:
sudo systemctl reload nginxWith your domain and DNS records pointing to your server IP, you can now access Jellyfin at jellyfin.example.com. Nginx forwards requests to Jellyfin’s web interface, enabling remote access through your domain.
Secure Jellyfin with Let’s Encrypt SSL
Securing your reverse proxy with an SSL certificate enables HTTPS connections, encrypting traffic between users and your Jellyfin server. In addition, Let’s Encrypt provides free SSL certificates that renew automatically.
Install the appropriate certbot package for your reverse proxy. For Apache:
sudo apt install python3-certbot-apacheFor Nginx:
sudo apt install python3-certbot-nginxCreate an SSL certificate with certbot. The --redirect option lets Certbot redirect HTTP traffic to HTTPS after issuance. Replace YOUR-EMAIL@example.com and jellyfin.example.com with your real email address and domain:
For Apache:
sudo certbot --apache --agree-tos --redirect --email YOUR-EMAIL@example.com -d jellyfin.example.comFor Nginx:
sudo certbot --nginx --agree-tos --redirect --email YOUR-EMAIL@example.com -d jellyfin.example.comAfter certificate creation, your Jellyfin URL changes to https://jellyfin.example.com. Furthermore, Certbot automatically configures your web server to redirect HTTP requests to HTTPS.
Test the automatic renewal process with a dry run:
sudo certbot renew --dry-runSaving debug log to /var/log/letsencrypt/letsencrypt.log Processing /etc/letsencrypt/renewal/jellyfin.example.com.conf Congratulations, all renewals succeeded.
If the dry run succeeds, certbot has already configured a systemd timer for automatic renewal. Verify the timer is active:
systemctl status certbot.timercertbot.timer - Run certbot twice daily
Loaded: loaded (/lib/systemd/system/certbot.timer; enabled; preset: enabled)
Active: active (waiting)
The systemd timer handles automatic certificate renewal, checking twice daily and renewing certificates within 30 days of expiration. Your SSL certificate stays valid without manual intervention.
Update Jellyfin Media Server
Jellyfin updates arrive through the same APT repository you configured during installation. Regular system updates will include Jellyfin when new versions are available. To check for and apply updates, refresh the package list and upgrade:
sudo apt update && sudo apt upgradeIf you want to update only Jellyfin without upgrading other packages, use the --only-upgrade flag. This is useful when you want to apply a Jellyfin security fix without affecting other software:
sudo apt install --only-upgrade jellyfinAfter updating, Jellyfin restarts automatically. Verify the new version is running by checking the version in the Jellyfin dashboard under Dashboard > Server > General, or by checking the package version:
apt-cache policy jellyfin | grep InstalledRemove Jellyfin Media Server
If you no longer need Jellyfin, purge the meta package and the packages it installs for the server, web interface, and Jellyfin FFmpeg. Purging only the jellyfin meta package leaves the main components behind until autoremove handles them:
sudo apt remove --purge jellyfin jellyfin-server jellyfin-web jellyfin-ffmpeg7 -yPreview any remaining automatically installed dependencies before removing them:
sudo apt autoremove --dry-runIf the preview only lists packages you no longer need, run autoremove without --dry-run:
sudo apt autoremoveRemove the Jellyfin repository and GPG key from your system. The following commands safely clean up all possible repository files:
sudo rm -f /etc/apt/sources.list.d/jellyfin.sources
sudo rm -f /etc/apt/sources.list.d/jellyfin-unstable.sources
sudo rm -f /etc/apt/sources.list.d/jellyfin.list
sudo rm -f /etc/apt/sources.list.d/jellyfin-unstable.list
sudo rm -f /etc/apt/keyrings/jellyfin.gpg
The next cleanup is optional and permanent. It deletes Jellyfin metadata, user accounts, watch history, logs, cache files, and server configuration. Back up
/var/lib/jellyfinfirst if you may reinstall later.
sudo cp -a /var/lib/jellyfin "$HOME/jellyfin-backup"To completely remove all Jellyfin data directories (optional):
sudo rm -rf /var/lib/jellyfin
sudo rm -rf /etc/jellyfin
sudo rm -rf /var/log/jellyfin
sudo rm -rf /var/cache/jellyfin
Finally, refresh the package list to confirm the repository has been removed:
sudo apt updateTroubleshoot Common Jellyfin Issues
Reset the Initial Setup Wizard
If you make a mistake during first-run setup, reset the wizard by editing Jellyfin’s system configuration and restarting the service.
Open the system configuration file:
sudo nano /etc/jellyfin/system.xmlChange the startup wizard value to false:
<IsStartupWizardCompleted>false</IsStartupWizardCompleted>Save the file, then restart Jellyfin:
sudo systemctl restart jellyfinOpen http://127.0.0.1:8096 again to restart the setup wizard.
Nginx Fails to Start After Configuration
If Nginx fails to start after creating the Jellyfin server block, the error typically stems from a configuration syntax issue or port conflict. First, check the detailed error message:
sudo journalctl -xeu nginx.service --no-pagerTest the Nginx configuration to identify syntax errors:
sudo nginx -tCommon causes and fixes include:
Port 80 already in use: Another service (often Apache) may be using port 80. Check which process is using the port:
sudo ss -tlnp | grep :80If Apache is running, stop and disable it before using Nginx:
sudo systemctl stop apache2
sudo systemctl disable apache2
Configuration syntax error: If nginx -t reports an error, the output will indicate the file and line number. Open the file and correct the issue. Common mistakes include missing semicolons, mismatched braces, or typos in directive names.
Default site conflict: The default Nginx site may conflict with your Jellyfin configuration. Disable it:
sudo rm /etc/nginx/sites-enabled/defaultAfter resolving the issue, test the configuration again and start Nginx:
sudo nginx -t && sudo systemctl start nginxnginx: the configuration file /etc/nginx/nginx.conf syntax is ok nginx: configuration file /etc/nginx/nginx.conf test is successful
Jellyfin Service Fails to Start
If Jellyfin fails to start after installation, check the service logs for error details:
sudo journalctl -u jellyfin -n 50 --no-pagerCommon causes include port conflicts (another service using port 8096) or permission issues with the data directory. To check if port 8096 is in use:
sudo ss -tlnp | grep 8096If another process is using the port, either stop that service or configure Jellyfin to use a different port in /etc/jellyfin/network.xml.
Real-Time Monitoring Stops on Large Libraries
Very large libraries can exhaust Linux inotify watches, which can stop Jellyfin’s real-time monitoring from detecting file changes. Check the current limit first:
sysctl fs.inotify.max_user_watchesIf Jellyfin logs mention inotify watch limits, raise the value with an article-owned sysctl drop-in:
printf 'fs.inotify.max_user_watches=524288\n' | sudo tee /etc/sysctl.d/99-jellyfin-inotify.conf > /dev/null
sudo sysctl --system
To undo this change later, remove that drop-in and reload sysctl settings:
sudo rm -f /etc/sysctl.d/99-jellyfin-inotify.conf
sudo sysctl --system
Media Files Not Appearing in Library
If Jellyfin cannot see your media files, the issue is typically file permissions. Verify Jellyfin has access:
sudo -u jellyfin ls /path/to/your/mediaIf this command returns “Permission denied,” apply ACL permissions as described in the permissions section above. After setting permissions, trigger a library scan from the Jellyfin dashboard under Dashboard > Libraries > Scan All Libraries.
Repository Import Errors
If apt update fails after adding the Jellyfin repository, verify the GPG key was imported correctly:
file /etc/apt/keyrings/jellyfin.gpg/etc/apt/keyrings/jellyfin.gpg: OpenPGP Public Key Version 4
If the file is missing or shows an error, re-run the GPG key import commands from the installation section. Next, verify your Ubuntu codename matches a supported release:
. /etc/os-release
printf '%s\n' "$VERSION_CODENAME"
resolute
The Jellyfin repository currently publishes Ubuntu packages for resolute (26.04), noble (24.04), and jammy (22.04). If your system returns another codename, the manual APT source in this article is not the right path for that release. Use one of these alternatives instead:
- Use Docker: Install Docker on Ubuntu, then run Jellyfin in a container using the official Docker image. This path does not depend on Jellyfin publishing an APT suite for your Ubuntu codename.
- Use Flatpak: Install Flatpak on Ubuntu, then install Jellyfin from Flathub using
flatpak install flathub org.jellyfin.JellyfinServer. - Check upstream support: Review the Jellyfin downloads page if you are using a release or derivative that does not report one of the supported LTS codenames.
Conclusion
Jellyfin is ready to index your libraries once the service is active and the media paths are readable by the jellyfin user. Keep the APT repository enabled for updates, use SSH tunneling or a reverse proxy for remote access, and revisit UFW firewall rules on Ubuntu before exposing the server beyond your LAN.

I came to a complete dead end at the reverse proxy setup. Cannot get past this:
eric@[xxxxx]:~$ sudo systemctl start nginx
Job for nginx.service failed because the control process exited with error code.
See “systemctl status nginx.service” and “journalctl -xeu nginx.service” for details.
Thanks for reporting this, EP. This error typically means a port conflict or configuration syntax issue. Run these commands to diagnose:
The first command shows syntax errors with the exact file and line number. The second checks if Apache or another service is using port 80. If Apache is running, stop it with
sudo systemctl stop apache2. I added a troubleshooting section to the article covering these scenarios.