
GitLab Community Edition (CE) provides self-hosted Git repositories, issue tracking, merge requests, and CI/CD pipelines for software development teams. Common use cases include hosting private project repositories, automating build and deployment workflows, and managing code reviews within your organization. By the end of this guide, you will have a working GitLab instance with configured email notifications, firewall rules, and automated backup scheduling.
System Requirements: GitLab requires at least 4 GB RAM and 2 CPU cores for small teams (10-20 users). For larger teams or heavy CI/CD usage, allocate 8 GB RAM and 4 CPU cores. Check the official GitLab hardware requirements if you expect high concurrent usage.
Update System Packages
First, update system packages before installation to ensure compatibility and security:
sudo apt update && sudo apt upgrade Install Prerequisite Packages
Additionally, minimal Debian installations may not include all required packages. Therefore, install these prerequisites to ensure GitLab’s repository setup script runs successfully:
sudo apt update
sudo apt install curl ca-certificates tzdata perl -y
Specifically, these packages provide SSL certificate validation (ca-certificates), file downloading (curl), timezone data (tzdata), and Perl runtime (perl) required for GitLab’s installation scripts.
Minimal Installation Note: Debian server minimal installs typically include
curlandca-certificatesby default, but netinstall or container-based minimal images may lack them. Running the installation command above ensures all dependencies are present regardless of your base installation type.
Choose Your GitLab Installation Method
Debian offers two methods to configure the GitLab repository. The extrepo tool provides simpler setup with automatic GPG key management, while manual configuration offers more control over repository settings.
| Method | Channel | GPG Key Management | Best For |
|---|---|---|---|
| extrepo (Recommended) | GitLab Official | Automatic | Most users; quick setup with minimal configuration |
| Manual Repository | GitLab Official | Manual via script | Scripted deployments or users who prefer explicit control |
For most users, the extrepo method is recommended because it simplifies repository management and handles GPG key updates automatically. Only use the manual method if you need explicit control over repository configuration or are working with scripted deployments.
Method 1: Configure GitLab Repository with extrepo (Recommended)
The extrepo tool is Debian’s official solution for managing external repositories. It handles GPG key downloads, version detection, and repository configuration automatically.
Install extrepo
First, install the extrepo package:
sudo apt install extrepo -yEnable GitLab CE Repository
Next, enable the GitLab Community Edition repository:
sudo extrepo enable gitlab_ceThis command creates the repository configuration file at /etc/apt/sources.list.d/extrepo_gitlab_ce.sources and downloads the required GPG key to /var/lib/extrepo/keys/.
Update Package Index
After enabling the repository, refresh the package index:
sudo apt updateVerify Repository Configuration
Confirm the GitLab package is available from the new repository:
apt-cache policy gitlab-ceExpected output showing the GitLab repository:
gitlab-ce:
  Installed: (none)
  Candidate: 18.x.x-ce.0
  Version table:
     18.x.x-ce.0 500
        500 https://packages.gitlab.com/gitlab/gitlab-ce/debian trixie/main amd64 Packages
The version numbers and release codename (trixie, bookworm, or bullseye) will reflect your Debian version and the current GitLab release.
After verifying the repository, skip to the Install GitLab CE section below.
Method 2: Configure GitLab Repository Manually
If you prefer manual repository configuration or need explicit control over the setup process, GitLab provides a repository setup script.
curl -s https://packages.gitlab.com/install/repositories/gitlab/gitlab-ce/script.deb.sh | sudo bashSecurity Note: This command pipes the repository setup script directly to bash. For security-conscious users, download the script first with
curl -O https://packages.gitlab.com/install/repositories/gitlab/gitlab-ce/script.deb.sh, review its contents, then execute withsudo bash script.deb.sh.
Once executed, the script adds the GitLab repository configuration and updates the package index automatically. The script creates a legacy .list file at /etc/apt/sources.list.d/gitlab_gitlab-ce.list rather than the modern DEB822 .sources format. This works correctly but differs from Debian’s recommended repository format.
Install GitLab CE
With the repository configured using either method above, install the GitLab Community Edition package:
sudo apt install gitlab-ce -yThe installation downloads approximately 1 GB of packages and may take 5-10 minutes depending on your connection speed. During this process, the installer automatically configures PostgreSQL, Redis, and Nginx as bundled components. GitLab includes its own managed PostgreSQL database and Redis cache, so you do not need separate installations. If you are interested in standalone Redis for other projects, see our Redis installation guide for Debian.
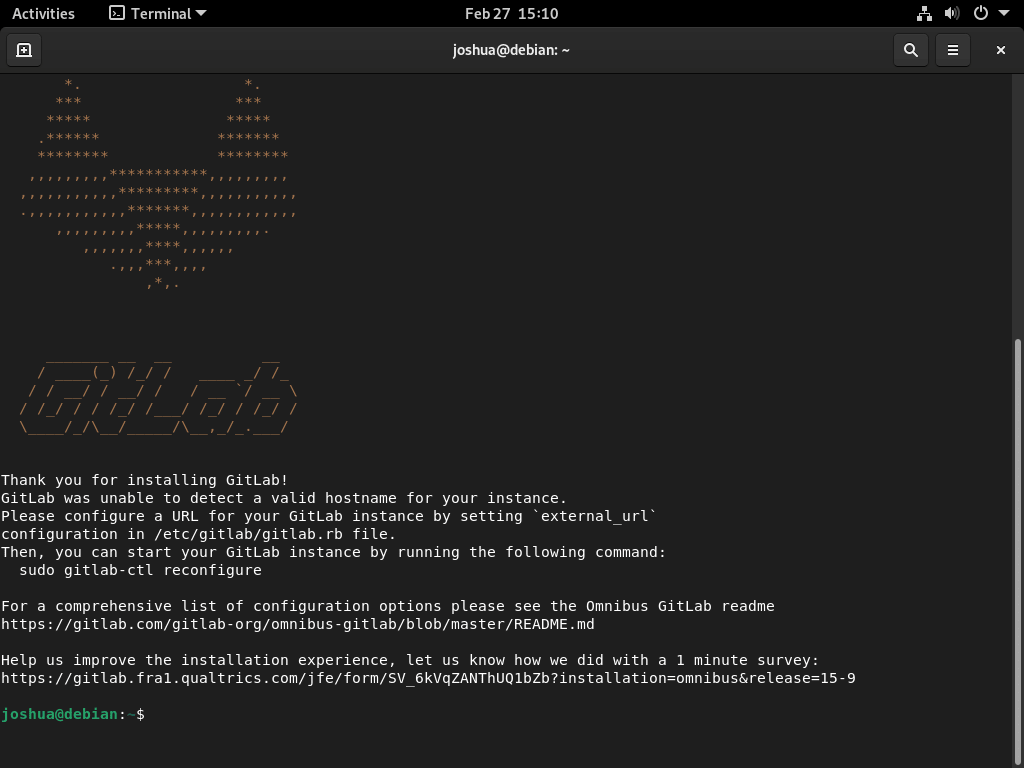
Upon completion, successful installation displays this message:
gitlab Reconfigured!

Notes:
Default admin account has been configured with following details:
Username: root
Password: You didn't opt-in to print initial root password to STDOUT.
Password stored to /etc/gitlab/initial_root_password. This file will be cleaned up in first reconfigure run after 24 hours.
Configure GitLab
Configure the hostname, email notifications, and firewall access to make GitLab accessible and functional. For detailed reverse proxy and SSL configuration, see our guide on securing Nginx with Let’s Encrypt on Debian.
Configure the Hostname
To access your GitLab instance, configure the hostname for your GitLab server by choosing a name that is easy to remember and access. Follow these steps to configure the hostname:
First, open the GitLab configuration file using a text editor:
sudo nano /etc/gitlab/gitlab.rbNext, locate the external_url setting and replace the example URL with your desired hostname:
external_url 'https://gitlab.example.com'After making this change, save the file and exit the text editor.
Now reconfigure GitLab to apply the changes:
sudo gitlab-ctl reconfigureExpected output showing successful reconfiguration:
Starting Chef Infra Client, version 18.x.x
resolving cookbooks for run list: ["gitlab::default"]
Converging 500 resources
...
Running handlers:
Running handlers complete
Chef Infra Client finished, 150/500 resources updated in 02 minutes 30 seconds
gitlab Reconfigured!
Built-in SSL Support: GitLab includes automatic Let’s Encrypt certificate provisioning. When you use an
https://URL forexternal_urland your domain’s DNS points to this server, GitLab can automatically request and renew SSL certificates. To enable this, addletsencrypt['enable'] = trueto/etc/gitlab/gitlab.rband runsudo gitlab-ctl reconfigure. See the GitLab SSL documentation for advanced certificate options.
Configure UFW Firewall
Next, GitLab uses port 80 for HTTP and port 443 for HTTPS by default. Consequently, it is crucial to configure your firewall to allow traffic on these ports and ensure that your GitLab instance is accessible.
To begin, follow these steps to set up the firewall:
First, install UFW if not already present:
sudo apt install ufw -yCritical: If you are connected via SSH, allow SSH access before enabling UFW to prevent lockout. Run
sudo ufw allow OpenSSHbeforesudo ufw enable. See our UFW installation guide and SSH setup guide for Debian for complete firewall and remote access configuration.
Next, create a UFW application profile for GitLab:
sudo nano /etc/ufw/applications.d/gitlabThen, add the following profile definition:
[GitLab]
title=GitLab
description=GitLab application
ports=80,443/tcp
After entering the profile definition, save the file and exit the text editor.
Now, enable the GitLab application in the firewall:
sudo ufw app update GitLab
sudo ufw allow GitLab
sudo ufw enable
Finally, verify the firewall status:
sudo ufw statusExpected output showing GitLab ports allowed:
Status: active

To                         Action      From
--                         ------      ----
GitLab                     ALLOW       Anywhere
GitLab (v6)                ALLOW       Anywhere (v6)
Configure Email Settings
Furthermore, GitLab uses email notifications to inform users about project activities, such as new issues, merge requests, and comments.
Follow these steps to configure email settings:
First, open the GitLab configuration file using a text editor:
sudo nano /etc/gitlab/gitlab.rbNext, locate the gitlab_rails['smtp_enable'] setting and configure your SMTP server. Example for Gmail:
gitlab_rails['smtp_enable'] = true
gitlab_rails['smtp_address'] = "smtp.gmail.com"
gitlab_rails['smtp_port'] = 587
gitlab_rails['smtp_user_name'] = "example@gmail.com"
gitlab_rails['smtp_password'] = "your_password"
gitlab_rails['smtp_domain'] = "smtp.gmail.com"
gitlab_rails['smtp_authentication'] = "login"
gitlab_rails['smtp_enable_starttls_auto'] = true
gitlab_rails['gitlab_email_from'] = "gitlab@example.com"
Replace
example@gmail.comwith your actual Gmail address andyour_passwordwith an app-specific password (not your regular Gmail password). For other email providers, adjustsmtp_addressandsmtp_portaccordingly.
After updating the SMTP settings, reconfigure GitLab to apply the changes:
sudo gitlab-ctl reconfigureOnce the reconfiguration completes, test email configuration by sending a test notification:
sudo gitlab-rails console -e productionWhen the console opens, run this command:
Notify.test_email('your-email@example.com', 'Test Subject', 'Test Body').deliver_nowExpected output showing successful email delivery:
Delivered mail 63f8a2b3c4d5e@gitlab.example.com (2504.3ms)
=> #<Mail::Message:0x00007f8a9c123456, Multipart: false, Headers: <From: gitlab@example.com>, <To: your-email@example.com>, <Subject: Test Subject>>
Exit the console with exit. Then, check your inbox for the test email.
Retrieve the Initial Root Password
The initial root password was saved during installation. To view it, execute the following command:
sudo cat /etc/gitlab/initial_root_passwordExpected output showing the temporary root password:
# WARNING: This value is valid only in the following conditions
#          1. If provided manually (either via `GITLAB_ROOT_PASSWORD` environment variable or via `gitlab_rails['initial_root_password']` setting in `gitlab.rb`, it was provided before database was seeded for the first time (usually, the first reconfigure run).
#          2. Password hasn't been changed manually, either via UI or via command line.
#
#          If the password shown here doesn't work, you must reset the admin password following https://docs.gitlab.com/ee/security/reset_user_password.html#reset-your-root-password.

Password: 4zB2mbBLCcRLRAkv3qHfmSZULJ/6ocJNe2XK8zNx9nU=

# NOTE: This file will be automatically deleted in the first reconfigure run after 24 hours.
Security Critical: Change the root password immediately after first login. The temporary password expires automatically after 24 hours. Never use the default password in production.
Alternatively, to reset the root password manually from the command line, use:
sudo gitlab-rake "gitlab:password:reset[root]"After executing this command, the root password will be reset to a random string displayed in the terminal output. However, keep in mind that resetting the root password invalidates all existing personal access tokens, so users must create new ones afterward.
In any case, regardless of the method used, change the root password immediately after first login through the GitLab web interface: navigate to User Settings → Account → Change Password.
Access GitLab User Interface
Open your configured GitLab domain in a web browser:
https://gitlab.example.comLog in using username “root” and the temporary password from /etc/gitlab/initial_root_password.
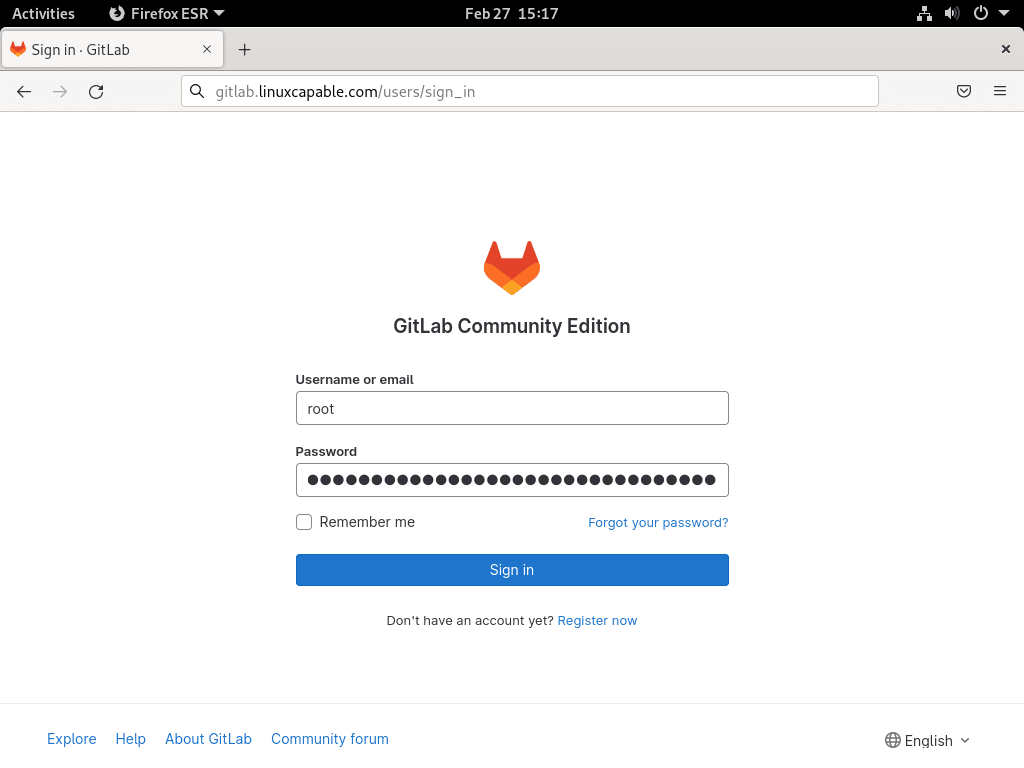
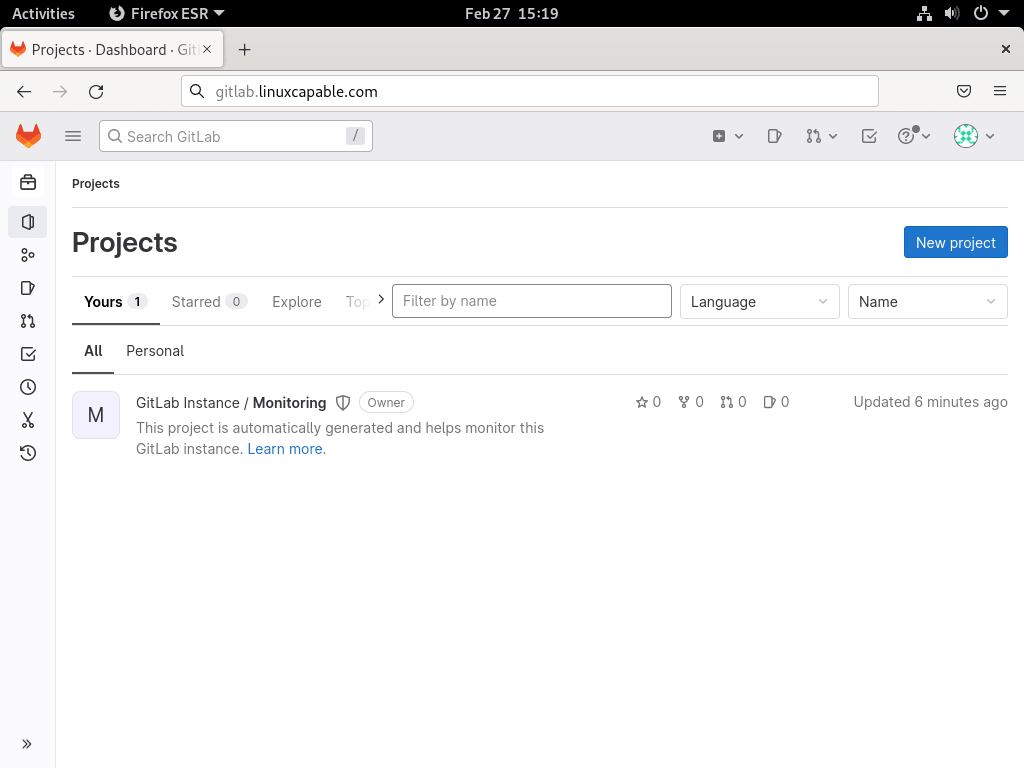
Subsequently, after successful authentication, you will reach the GitLab welcome page.
Secure and Customize GitLab
After first login, implement these security and configuration steps:
- Change the default password: Change the root user’s default password immediately after first login. Navigate to User Settings → Password and enter your new password.
- Set up two-factor authentication (2FA): Enable 2FA for additional security by navigating to User Settings → Account → Two-Factor Authentication and following the instructions.
- Create a project: Create a new project by clicking New Project on the Projects page. You can create an empty project or import an existing repository from Git.
- Customize the user interface: Change the theme, add a custom logo, and configure the navigation bar by navigating to Admin Area → Settings.
- Configure access control: Control who can access your projects and their permissions by navigating to Project Settings → Members. Add or remove members with different access levels.
- Use GitLab CI/CD: GitLab’s CI/CD capabilities automate testing and deployment. Configure pipelines by creating a
.gitlab-ci.ymlfile in your project’s root directory. For containerized builds, see our Docker installation guide for Debian.
Additional Security and Backup Configuration
Moreover, beyond the initial setup, implement these additional security measures and backup strategies:
- Set up GitLab Runner: GitLab Runner executes CI/CD jobs and returns results to GitLab. Install Docker first for container-based builds, then follow the official GitLab Runner installation documentation.
- Back up your GitLab instance: Regular backups prevent data loss from hardware failure or security incidents. Run
sudo gitlab-rake gitlab:backup:createto create backups manually, or automate with the cronjob shown in the next section. - Install Fail2ban for brute-force protection: Protect GitLab from authentication attacks by installing Fail2ban. See our Fail2ban installation guide for Debian and configure it to monitor
/var/log/gitlab/gitlab-rails/production.logfor failed login attempts. - Enable automatic security updates: Keep your GitLab server secure with automated package updates. Configure unattended-upgrades on Debian to automatically install security patches without manual intervention.
- Create system snapshots with Timeshift: Beyond GitLab’s built-in backups, protect your entire system configuration with Timeshift for Debian. Schedule regular snapshots so you can quickly restore the server if a system update causes issues.
Create Cronjob for GitLab Auto Backup
Setting up a cronjob for GitLab auto-backup on Debian is vital to ensure the safety and security of your data. Essentially, a cronjob is a scheduled task that automatically runs at specific intervals to perform a backup of your GitLab instance. Therefore, follow these steps to create a cronjob for GitLab auto-backup on Debian.
Create a Gitlab Backup Script
Initially, the first step is to create a backup script to carry out your GitLab instance’s backup. Specifically, follow these steps:
Using a text editor, create a new file for your backup script:
sudo nano /usr/local/bin/gitlab-backup.shPaste the following code into the file:
#!/bin/bash
set -e

BACKUP_DIR=/var/opt/gitlab/backups
TIMESTAMP=$(date +%s)
LOG_FILE="${BACKUP_DIR}/backup.log"

echo "$(date): Starting GitLab backup" >> "${LOG_FILE}"

# Create backup
sudo gitlab-rake gitlab:backup:create

# Copy latest backup with timestamp
LATEST_BACKUP=$(ls -t "${BACKUP_DIR}"/*.tar 2>/dev/null | head -1)

if [ -n "${LATEST_BACKUP}" ]; then
    sudo cp "${LATEST_BACKUP}" "${BACKUP_DIR}/gitlab_backup_${TIMESTAMP}.tar"
    echo "$(date): Backup completed: gitlab_backup_${TIMESTAMP}.tar" >> "${LOG_FILE}"
else
    echo "$(date): ERROR: No backup file found" >> "${LOG_FILE}"
    exit 1
fi- Save the file and exit the text editor.
This script creates a GitLab backup using the built-in gitlab-rake gitlab:backup:create command. The script logs the backup timestamp and copies the latest backup file with a dated filename for easier identification. Consider implementing a retention policy to delete backups older than a certain number of days to manage disk space.
Setting Permissions and Ownership
After creating the script, the subsequent step is establishing the appropriate permissions and ownership for the backup script to ensure the cronjob can execute it. Therefore, follow these steps:
First, set the owner of the backup script to the user associated with GitLab:
sudo chown git:git /usr/local/bin/gitlab-backup.shNext, set the permissions of the backup script to enable execution:
sudo chmod +x /usr/local/bin/gitlab-backup.shFinally, verify the script is executable:
ls -lh /usr/local/bin/gitlab-backup.shExpected output showing executable permissions:
-rwxr-xr-x 1 git git 245 Dec 6 10:30 /usr/local/bin/gitlab-backup.sh
Creating a Cronjob
Once permissions are set, the next step is creating a cronjob to schedule the backup script to run regularly. To accomplish this, follow these steps:
First, open the crontab configuration file for the GitLab user:
sudo crontab -u git -eThen, to schedule the backup script to run every day at 1:00 AM, add the following line to the crontab configuration file:
0 1 * * * /usr/local/bin/gitlab-backup.shSave the file and exit the text editor.
Consequently, this cronjob will automatically execute the backup script every day at 1:00 AM, resulting in a new backup file with a timestamp in the file name.
Testing the Cronjob
Before relying on the automated schedule, you can verify the cronjob functions correctly by manually executing the backup script and ensuring the backup file is generated without errors. To perform this test, enter the following command in your terminal:
sudo /usr/local/bin/gitlab-backup.shThis command will generate a new backup file in the directory”/var/opt/gitlab/backups”. As expected, the filename will include a timestamp to indicate when the backup was created.
GitLab Terminal Commands
GitLab-ctl is a command-line tool for managing GitLab on Debian. Specifically, it provides a set of terminal commands for starting, stopping, restarting, and managing GitLab services, among other things. Below is a detailed section on GitLab-ctl terminal commands, along with example commands and outputs with explanations.
Starting and stopping GitLab services
To start and stop GitLab services, use the following commands:
To start all GitLab services:
sudo gitlab-ctl startAlternatively, to stop all services:
sudo gitlab-ctl stopFor a complete restart of all services:
sudo gitlab-ctl restartTo reload configuration without restarting:
sudo gitlab-ctl reloadChecking the status of GitLab services
To check the status of GitLab services, use the following command:
sudo gitlab-ctl statusExpected output showing all running services:
run: alertmanager: (pid 12345) 3600s; run: log: (pid 12344) 3600s
run: gitaly: (pid 12346) 3600s; run: log: (pid 12345) 3600s
run: gitlab-exporter: (pid 12347) 3600s; run: log: (pid 12346) 3600s
run: gitlab-workhorse: (pid 12348) 3600s; run: log: (pid 12347) 3600s
run: logrotate: (pid 12349) 3600s; run: log: (pid 12348) 3600s
run: nginx: (pid 12350) 3600s; run: log: (pid 12349) 3600s
run: node-exporter: (pid 12351) 3600s; run: log: (pid 12350) 3600s
run: postgres-exporter: (pid 12352) 3600s; run: log: (pid 12351) 3600s
run: postgresql: (pid 12353) 3600s; run: log: (pid 12352) 3600s
run: prometheus: (pid 12354) 3600s; run: log: (pid 12353) 3600s
run: puma: (pid 12355) 3600s; run: log: (pid 12354) 3600s
run: redis: (pid 12356) 3600s; run: log: (pid 12355) 3600s
run: redis-exporter: (pid 12357) 3600s; run: log: (pid 12356) 3600s
run: sidekiq: (pid 12358) 3600s; run: log: (pid 12357) 3600s
Backing up and restoring GitLab data
You can create a backup of GitLab data by using the following command:
Create a backup of GitLab data:
sudo gitlab-rake gitlab:backup:createThe provided command will create a backup file that contains all the GitLab data, such as repositories, user data, and configuration files. By default, the backup file will be stored in the directory: “/var/opt/gitlab/backups”.
Restore a backup of GitLab data:
sudo gitlab-rake gitlab:backup:restore BACKUP=<backup_file>Using this command, you can restore a backup of GitLab data from a specific backup file. Importantly, the backup file must be in the “var/opt/gitlab/backups” directory, or alternatively, you can indicate the full path to the backup file.
Checking the GitLab configuration
Check the GitLab configuration and system health:
sudo gitlab-rake gitlab:checkExpected output showing successful validation:
Checking GitLab subtasks ...

Checking GitLab Shell ...

GitLab Shell: ... OK

Checking GitLab Shell ... Finished

Checking Gitaly ...

Gitaly: ... OK

Checking Gitaly ... Finished

Checking Sidekiq ...

Sidekiq: ... OK

Checking Sidekiq ... Finished

Checking GitLab App ...

Git configured correctly? ... yes
Database config exists? ... yes
All migrations up? ... yes
Database contains orphaned GroupMembers? ... no
GitLab config exists? ... yes
GitLab config up to date? ... yes
Log directory writable? ... yes
Tmp directory writable? ... yes
Uploads directory exists? ... yes
Uploads directory has correct permissions? ... yes
Uploads directory tmp has correct permissions? ... yes
Init script exists? ... skipped (omnibus-gitlab has no init script)

Checking GitLab App ... Finished

Checking GitLab subtasks ... Finished
Notably, this command scans for errors or warnings in the GitLab configuration, including outdated versions, missing dependencies, and misconfigured settings.
Checking GitLab logs
Here is how to check GitLab logs using the following commands:
View the GitLab logs:
sudo gitlab-ctl tail gitlab-rails/production.logThis command continuously streams the GitLab production log, which details user actions, warnings, and errors. Press Ctrl+C to stop following the log.
View the GitLab Nginx logs:
sudo gitlab-ctl tail nginx/gitlab_access.logLikewise, this command continuously streams the GitLab Nginx access log that contains details regarding HTTP requests and responses.
View the GitLab PostgreSQL logs:
sudo gitlab-ctl tail postgresql/currentThis command continuously streams the GitLab PostgreSQL log, which contains information about database queries and transactions.
Remove GitLab CE
If you eventually need to uninstall GitLab completely, follow these steps to remove the package, repository, and data.
Stop GitLab Services
First, stop all GitLab services before removal:
sudo gitlab-ctl stopRemove GitLab Package
Next, uninstall the GitLab CE package:
sudo apt remove --purge gitlab-ce -y
sudo apt autoremove -y
Remove Repository Configuration
After that, remove the GitLab repository configuration based on which installation method you used.
If you installed using extrepo:
sudo extrepo disable gitlab_ce
sudo apt update
If you installed using the manual method:
sudo rm /etc/apt/sources.list.d/gitlab_gitlab-ce.list
sudo rm /etc/apt/keyrings/gitlab_gitlab-ce-archive-keyring.gpg
sudo apt update
Then, verify the repository was removed successfully:
apt-cache policy gitlab-ceExpected output showing no repository available:
gitlab-ce:
  Installed: (none)
  Candidate: (none)
  Version table:
Remove Data Directories (Optional)
Warning: The following commands permanently delete all GitLab data including repositories, user accounts, issues, merge requests, CI/CD pipelines, and backups. This action cannot be undone. Only proceed if you no longer need your GitLab data.
Remove GitLab data directories:
sudo rm -rf /var/opt/gitlab
sudo rm -rf /opt/gitlab
sudo rm -rf /etc/gitlab
Finally, remove UFW application profile:
sudo rm /etc/ufw/applications.d/gitlab
sudo ufw app updateUpdate GitLab CE
GitLab releases updates regularly with new features, security patches, and bug fixes. To update GitLab to the latest version, first check for available updates:
sudo apt update
apt-cache policy gitlab-ce
If a newer version is available, upgrade GitLab with the following command:
sudo apt install --only-upgrade gitlab-ce -yAfter the upgrade completes, GitLab automatically runs gitlab-ctl reconfigure to apply any configuration changes. Verify the new version is running:
sudo gitlab-rake gitlab:env:info | grep -i "gitlab information" -A 3Expected output showing the installed version:
GitLab information
Version:          18.x.x
Revision:         xxxxxxxx
Directory:        /opt/gitlab/embedded/service/gitlab-rails
For major version upgrades, review the GitLab upgrade documentation for version-specific requirements and recommended upgrade paths.
Troubleshooting Common GitLab Issues
In some cases, resolve common GitLab installation and configuration problems with these troubleshooting steps.
GitLab Services Fail to Start
If GitLab fails to start after installation or reconfiguration, first check the service status for error details:
sudo gitlab-ctl statusFor example, a common error shows services in down state:
down: postgresql: 0s, normally up; run: log: (pid 12345) 100s
down: puma: 1s, normally up; run: log: (pid 12346) 100s
This typically means insufficient system resources. Therefore, to diagnose this, check available memory:
free -hYou should see output similar to this showing memory usage:
               total        used        free      shared  buff/cache   available
Mem:           7.8Gi       2.1Gi       4.2Gi        50Mi       1.5Gi       5.4Gi
Swap:          2.0Gi          0B       2.0Gi
GitLab requires at least 4GB RAM. Consequently, if available memory (the “available” column) is below 2.5GB, add swap space before restarting GitLab:
sudo fallocate -l 2G /swapfile
sudo chmod 600 /swapfile
sudo mkswap /swapfile
sudo swapon /swapfile
Additionally, to ensure the swap remains active after reboot, make it persistent:
echo '/swapfile none swap sw 0 0' | sudo tee -a /etc/fstabOnce you’ve added swap or upgraded server memory, restart GitLab:
sudo gitlab-ctl restartCannot Access GitLab Web Interface
If your browser shows “connection refused” or “unable to connect,” first verify the GitLab nginx service is running:
sudo gitlab-ctl status nginxIf nginx is down, next check for port conflicts:
sudo lsof -i :80If another service uses port 80, either stop it or change GitLab’s port in /etc/gitlab/gitlab.rb. Alternatively, for firewall issues, verify UFW allows HTTP/HTTPS:
sudo ufw statusWhen GitLab ports are not allowed, enable them:
sudo ufw allow 80/tcp
sudo ufw allow 443/tcp
Email Notifications Not Sending
If test emails fail to deliver, first check the GitLab mail logs for SMTP errors:
sudo gitlab-ctl tail gitlab-rails/production.log | grep -i mailWatch for common error patterns like this:
Net::SMTPAuthenticationError: 535-5.7.8 Username and Password not accepted
This error indicates incorrect SMTP credentials. For Gmail specifically, ensure you are using an app-specific password, not your account password. Generate one at Google App Passwords. Then, once generated, update /etc/gitlab/gitlab.rb with the correct credentials and reconfigure:
sudo gitlab-ctl reconfigure
sudo gitlab-ctl restart
Backup Script Fails with Permission Errors
If the backup script returns permission denied errors:
/usr/local/bin/gitlab-backup.sh: line 10: /var/opt/gitlab/backups/backup.log: Permission denied
First, check the backup directory ownership:
ls -ld /var/opt/gitlab/backupsThe directory should be owned by the git user. Otherwise, if not, fix ownership:
sudo chown -R git:git /var/opt/gitlab/backupsAfter correcting ownership, verify the script can write to the backup directory:
sudo -u git touch /var/opt/gitlab/backups/test.txt
ls -l /var/opt/gitlab/backups/test.txt
502 Bad Gateway After Reconfigure
If GitLab shows a 502 error after reconfiguration, the Puma application server may not have started. Therefore, check Puma status:
sudo gitlab-ctl status pumaIf Puma is down, check its logs:
sudo gitlab-ctl tail pumaA common cause is PostgreSQL not being ready. Therefore, to rule this out, wait 30 seconds and check if Puma automatically recovers:
sudo gitlab-ctl status pumaHowever, if Puma remains down, then check PostgreSQL status:
sudo gitlab-ctl status postgresqlYou should see output similar to this showing PostgreSQL running:
run: postgresql: (pid 12353) 3600s; run: log: (pid 12352) 3600s
On the other hand, if PostgreSQL is down, restart GitLab services in the correct order:
sudo gitlab-ctl restart postgresql
sleep 10
sudo gitlab-ctl restart puma
sudo gitlab-ctl status
After completing these steps, verify GitLab is accessible by opening your configured URL in a browser.
Conclusion
You now have GitLab CE configured with email notifications, firewall rules, and automated backup scheduling. The hostname configuration makes your instance accessible via a custom domain, while the UFW firewall restricts access to HTTP and HTTPS ports only. The extrepo method simplifies future repository management, though both installation approaches provide the same GitLab functionality. For production environments, additionally configure SSL certificates using Let’s Encrypt, implement Fail2ban protection against brute-force attacks, and enable automatic security updates. If you are new to Git version control, review our Git installation guide for Debian to learn the fundamentals before creating your first GitLab repository. Finally, review GitLab’s official documentation for advanced CI/CD pipeline configuration, runner setup, and integrations with your development workflow.

Formatting tips for your comment
You can use basic HTML to format your comment. Useful tags currently allowed:
<code>command</code>command<strong>bold</strong><em>italic</em><blockquote>quote</blockquote>