
FileZilla, a renowned open-source FTP solution, stands out for its cross-platform compatibility and ease of use. This guide will demonstrate how to install FileZilla on Linux Mint 21 or 20, ensuring you can seamlessly manage files across your server and local machine. Known for its user-friendly interface, FileZilla caters to both beginners and advanced users. Let’s explore some of its key features:
- Cross-Platform Support: FileZilla runs smoothly on Windows, Linux, and macOS.
- User-Friendly Interface: Offers an intuitive graphical user interface for efficient navigation and operation.
- Secure File Transfer: Supports FTP, FTPS (FTP over SSL/TLS), and SFTP (SSH File Transfer Protocol).
- Large File Support: Capable of handling files larger than 4GB, making it suitable for various data sizes.
- Drag-and-Drop Support: Simplifies file transfers with a convenient drag-and-drop feature.
- Remote File Editing: Allows for editing files directly on the server, enhancing workflow efficiency.
- Directory Comparison: Enables easy comparison of directories between local and server systems.
- Bookmarking: Offers the ability to bookmark frequently accessed directories or servers.
As we delve into the installation process on Linux Mint, these features become readily accessible, streamlining your file management tasks and enhancing your overall productivity. Stay tuned as we walk through the steps, ensuring a smooth setup experience.
Install FileZilla on Linux Mint 21 or 20 via APT
Step 1: Update Linux Mint Before FileZilla Installation
To ensure a smooth installation of FileZilla, start by updating your Linux Mint system. This step is crucial as it aligns your system with the latest package versions, minimizing potential conflicts.
Open the terminal and input the following command:
sudo apt update && sudo apt upgradeThis command first updates the list of available packages and their versions (sudo apt update) and then upgrades all the installed packages to their latest versions (sudo apt upgrade).
Step 2: Select APT Installation Method for FileZilla
Option 1: Install FileZilla via Default APT Repository
For most users, the simplest way to install FileZilla is through the default APT repository available in Linux Mint. This method installs the version tested and approved for your distribution.
Execute the following command in the terminal:
sudo apt install filezillaThis command will download and install the FileZilla package along with any required dependencies.
Option 2: Install FileZilla via PPA
For those who prefer the latest version of FileZilla, consider using the Personal Package Archive (PPA) maintained by the “xtradeb packaging” team. This PPA provides updated versions of FileZilla and other software packages.
First, add the PPA to your system using:
sudo add-apt-repository ppa:xtradeb/apps -yAfter adding the PPA, create an APT pin for FileZilla. This ensures that updates for FileZilla come from the PPA, while other packages use the primary Linux Mint sources.
Create a pin file using a text editor like nano:
sudo nano /etc/apt/preferences.d/filezillaAdd the following lines to the file:
Package: filezilla
Pin: release o=LP-PPA-xtradeb-apps
Pin-Priority: 990
Save and exit the text editor CTRL+O and CTRL+X.
You can additionally, instead of copying and pasting with a text editor like Nano, use a single command that should work to create the file and add the text with the following command:
echo -e "Package: filezilla\nPin: release o=LP-PPA-xtradeb-apps\nPin-Priority: 990" | sudo tee /etc/apt/preferences.d/filezilla > /dev/null
To sum up, either way, you completed APT Pinning for FileZilla; the configuration sets a higher priority for FileZilla packages from the specified PPA.
Now update your system’s package list to recognize the new PPA:
sudo apt updateFinally, install or upgrade to the latest version of FileZilla using the following command:
sudo apt install filezillaInstall FileZilla on Linux Mint 21 or 20 via Flatpak and Flathub
Step 1: Verify Flatpak Installation
Before proceeding with FileZilla installation, confirm that Flatpak is installed on your Linux Mint system. Flatpak is a next-generation technology for building and distributing desktop applications on Linux.
To check the Flatpak version, use the following command in the terminal:
flatpak --versionThis command displays the installed version of Flatpak, confirming its presence on your system. If Flatpak is not installed, you must install it before continuing.
Step 2: Enable Flathub for FileZilla Installation
Flathub, a widely-used Flatpak repository, hosts a vast array of applications, including FileZilla. Enabling Flathub integrates it with your system’s software sources.
To add Flathub to your system, execute:
sudo flatpak remote-add --if-not-exists flathub https://flathub.org/repo/flathub.flatpakrepoThis command sets up Flathub as a source for Flatpak applications, ensuring you can access FileZilla and other applications.
Step 3: Install FileZilla via Flatpak Command
With Flathub enabled, you can now install FileZilla using Flatpak. Flatpak simplifies software management by providing a universal package format compatible across various Linux distributions.
To install FileZilla with Flatpak and Flathub, run:
flatpak install flathub org.filezillaproject.Filezilla -yThe -y flag automatically confirms the installation, streamlining the process. This command fetches FileZilla from Flathub, ensuring you get the latest stable version compatible with your Linux Mint system.
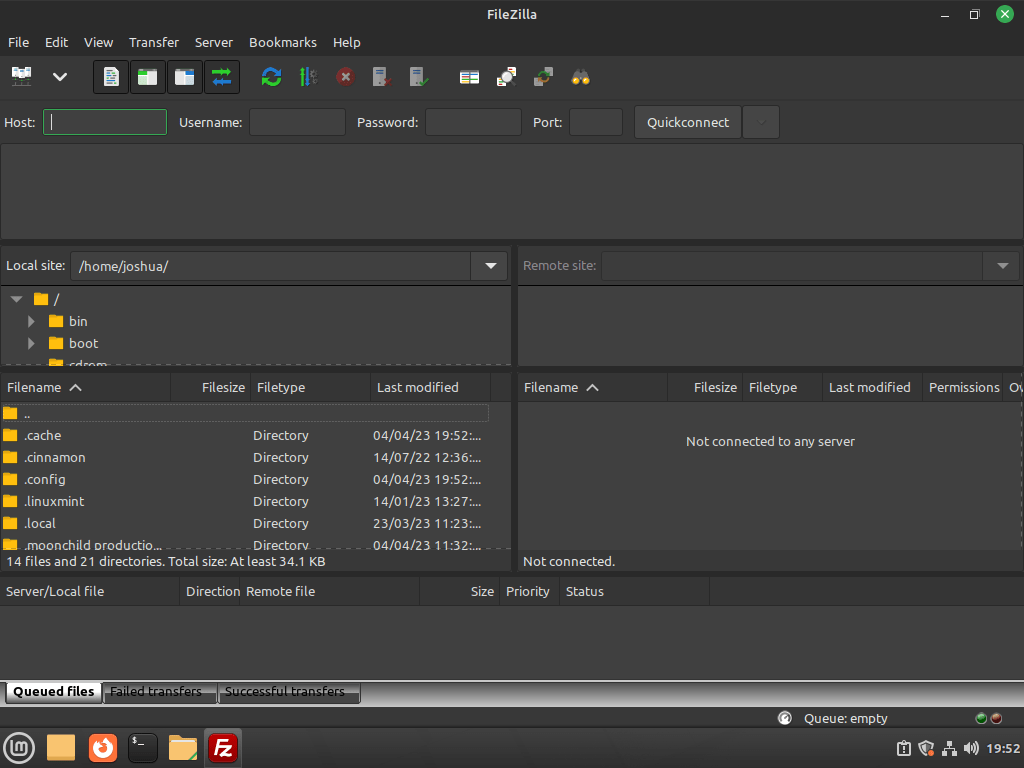
Launch FileZilla on Linux Mint 21 or 20
With FileZilla successfully installed, there are several ways to launch the FTP client.
CLI Commands to Launch FileZilla
You can launch FileZilla immediately from the terminal by entering the following command:
filezillaFor Flatpak users, use this command instead:
flatpak run org.filezillaproject.FilezillaGUI Method to Launch FileZilla
You can launch FileZilla through the desktop interface for a more practical approach for desktop users. To do this, follow this path:
Taskbar > Internet > FileZilla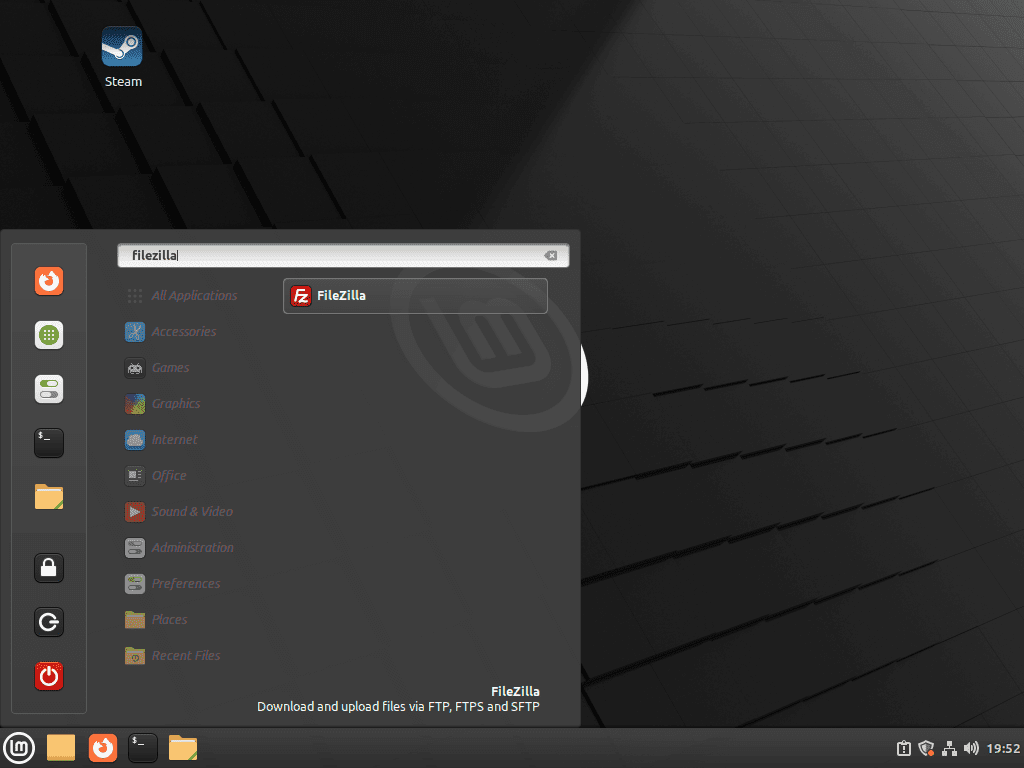
First-Time Tips with FileZilla on Linux Mint 21 or 20
Now that you have FileZilla installed on your Linux Mint system, it’s time to explore some tips and tricks to help you get the most out of this powerful FTP client. This section will cover general tips, customization options, and other helpful information to enhance your FileZilla experience.
General FileZilla Tips on Linux Mint
- Connecting to a server: To connect to a server, click on the “Site Manager” button (the leftmost icon on the toolbar) or press
Ctrl+S. In the Site Manager, you can add, edit, and manage your server connections. Enter the server’s hostname or IP address, port number, and authentication details. Select the appropriate protocol (FTP, SFTP, or FTPS) and click “Connect.” - Transfer modes: FileZilla offers two transfer modes: Active and Passive. Active mode is selected by default, but if you experience issues with connections or transfers, try switching to Passive mode. To change the mode, navigate to
Edit > Settings > FTP > Transfer Modeand choose the desired mode. - Using bookmarks: If you frequently access specific directories on a remote server, consider creating bookmarks for quicker navigation. To create a bookmark, navigate to the desired directory, then click
Bookmarks > Add bookmarkor pressCtrl+B. Provide a name for the bookmark, which will be saved for future use.
FileZilla Customization on Linux Mint
- Changing the appearance: FileZilla allows you to customize its appearance to suit your preferences. You can modify the layout, font size, and color scheme by navigating to
Edit > Settings > Interface. Experiment with different settings to find the look that works best for you. - Adjusting the number of simultaneous transfers: By default, FileZilla allows two simultaneous file transfers. You can increase or decrease this number according to your needs. To adjust the number of transfers, navigate to
Edit > Settings > Transfersand set the desired value for “Maximum simultaneous transfers.”
Other FileZilla Tips on Linux Mint
- Resume interrupted transfers: If a transfer is interrupted, FileZilla can automatically resume the transfer from where it left off. To enable this feature, navigate to
Edit > Settings > Transfers > File Exists Actionand select “Resume” for both “Uploads” and “Downloads.” - Filtering files and directories: FileZilla allows you to filter files and directories based on their names or extensions. This can be particularly helpful when you need to locate specific files within a large directory. To access the filtering options, click on the “Filter directory listing” button (the funnel icon) on the toolbar or press
Ctrl+I. - Directory comparison: FileZilla offers a directory comparison feature, which can help you identify differences between local and remote directories. To enable directory comparison, click
View > Directory Comparisonand choose “Enable” or pressCtrl+D. You can also select the comparison mode (by file size or modification time) from the same menu.
Managing FileZilla on Linux Mint 21 or 20
In this section, we’ll cover how to update and uninstall FileZilla on your Linux Mint system and some additional tips to ensure a smooth experience.
Update FileZilla on Linux Mint
Regularly updating FileZilla ensures you have the latest features and security updates. The update process varies slightly based on your installation method.
APT Update Method for FileZilla
For FileZilla installed via APT, use the following commands to update:
sudo apt update && sudo apt upgradeThis command sequence first updates the package list (sudo apt update) and then upgrades FileZilla along with any other outdated packages on your system (sudo apt upgrade).
Flatpak Update Method for FileZilla
If FileZilla was installed using Flatpak, execute this command to update:
flatpak updateThis command checks for updates for all Flatpak applications, including FileZilla, and applies them as needed.
Remove FileZilla from Linux Mint
There are times when you might need to uninstall FileZilla. The uninstallation method depends on how FileZilla was originally installed.
APT Remove Method for FileZilla
To remove FileZilla installed via APT, input:
sudo apt remove filezillaThis command uninstalls FileZilla from your system. If you added a PPA for FileZilla installation and no longer need it, remove the PPA with:
sudo add-apt-repository ppa:xtradeb/apps -yRemoving the PPA ensures that it no longer influences package updates or installations on your system.
Flatpak Remove Method for FileZilla
For FileZilla installed with Flatpak, use this command for removal:
flatpak remove --delete-data org.filezillaproject.Filezilla -yThis command not only uninstalls FileZilla but also deletes associated data. The -y flag confirms the action without additional prompts.
Conclusion on Installing FileZilla on Linux Mint
In summary, our guide has efficiently navigated you through the installation, management, and removal of FileZilla on Linux Mint, whether via APT or Flatpak. We’ve highlighted the ease of updating FileZilla to ensure optimal performance and security and provided straightforward methods for uninstalling it, should the need arise. As a final recommendation, routinely check for updates and explore FileZilla’s extensive features to enhance your file management experience. Remember, keeping your software updated is key to maintaining a secure and efficient workflow.