
For those prioritizing security on their Rocky Linux systems, FirewallD stands out as an essential tool. It offers intricate control over ports, services, and protocols, ensuring a fortified defense against potential threats. To enhance user experience, especially for those less familiar with command-line operations, the FirewallD GUI offers a visual approach to firewall management. If you aim to install Firewalld GUI on Rocky Linux 9 or the older stable Enterprise Linux release of Rocky Linux 8, this guide is tailored for you.
Key Benefits of FirewallD GUI:
- Intuitive Interface: FirewallD GUI provides a clear and user-friendly platform, making firewall configuration and management straightforward.
- Visual Insights: Users can quickly view and adjust settings, monitor traffic, and detect anomalies through the graphical interface.
- Unified Control: The GUI consolidates all firewall settings in one place, streamlining the process of making changes or updates.
By integrating FirewallD GUI, users can effortlessly navigate the complexities of firewall management, ensuring optimal security settings for their Rocky Linux system. This guide will walk you through the installation process, ensuring a seamless setup and efficient utilization of FirewallD GUI on Rocky Linux 9 and its older stable release, Rocky Linux 8.
Install Firewalld on Rocky Linux 9 or 8 via DNF
Step 1: Update Rocky Linux System Packages Before Firewalld GUI Installation
Before proceeding, make sure to update your system with the latest packages. Neglecting to do so could potentially lead to problems during the installation process or with the overall functioning of your system.
sudo dnf upgrade --refreshAfter successfully updating and upgrading your packages, proceed with installing FirewallD.
Step 2: Install Firewalld via DNF Command
FirewallD is typically pre-installed on Rocky Linux by default. To verify its presence, run the following command.
sudo firewall-cmd --versionThe command result should display a version number indicating the successful installation of FirewallD on your system.
For users who either do not have FirewallD installed or have previously uninstalled the package, the following command can be executed to install it.
sudo dnf install firewalldStep 3: Enable Firewalld on Rocky Linux 9 or 8
Enabling the service is crucial upon verifying or re-installing FirewallD on your system. The recommended approach is automatically activating the firewall software during system boot and starting it immediately. This can be done using a single, all-encompassing command, as shown below.
sudo systemctl enable firewalld --nowAfter enabling the firewall service, it’s essential to check its status to confirm that everything is functioning correctly and there are no errors.
systemctl status firewalld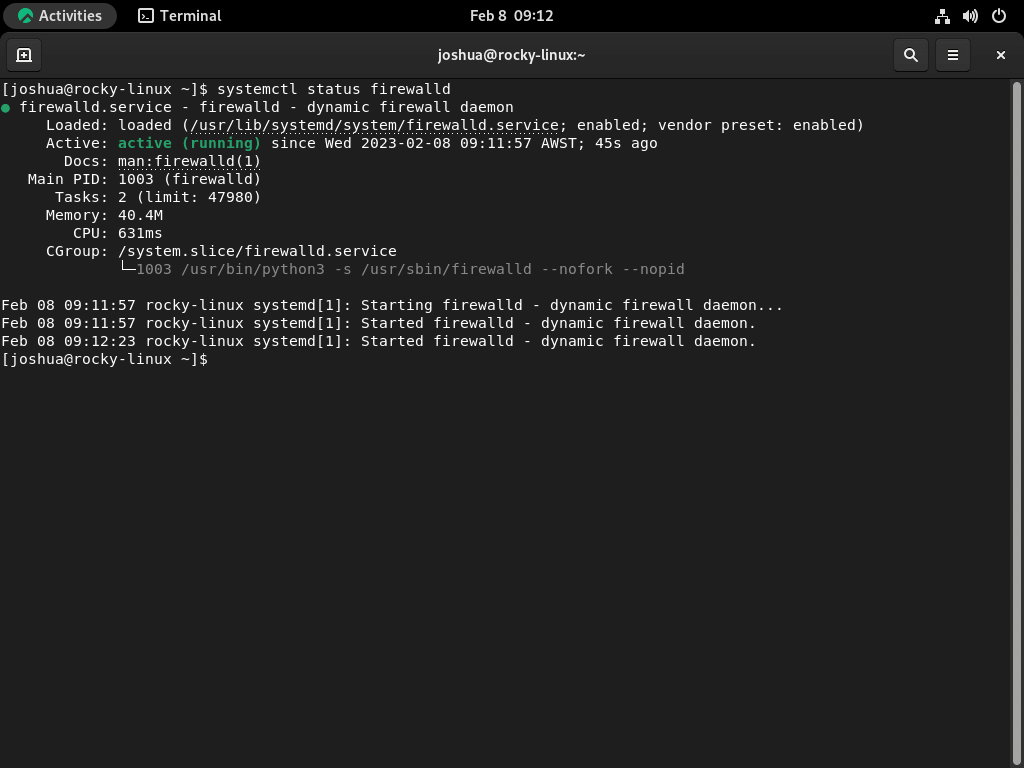
As previously mentioned, the backend of FirewallD should now be active and functioning correctly.
Install Firewalld GUI on Rocky Linux 9 or 8
Install Firewalld GUI standard
The next step is to install the graphical user interface (GUI) for FirewallD. This can be initiated by using the following command.
sudo dnf install firewall-configInstall Firewalld GUI Plasma
For those using the KDE desktop environment, installing the KDE control panel specifically for FirewallD is possible.
sudo dnf install plasma-firewall-firewalldLaunch FirewallD GUI on Rocky Linux 9 or 8
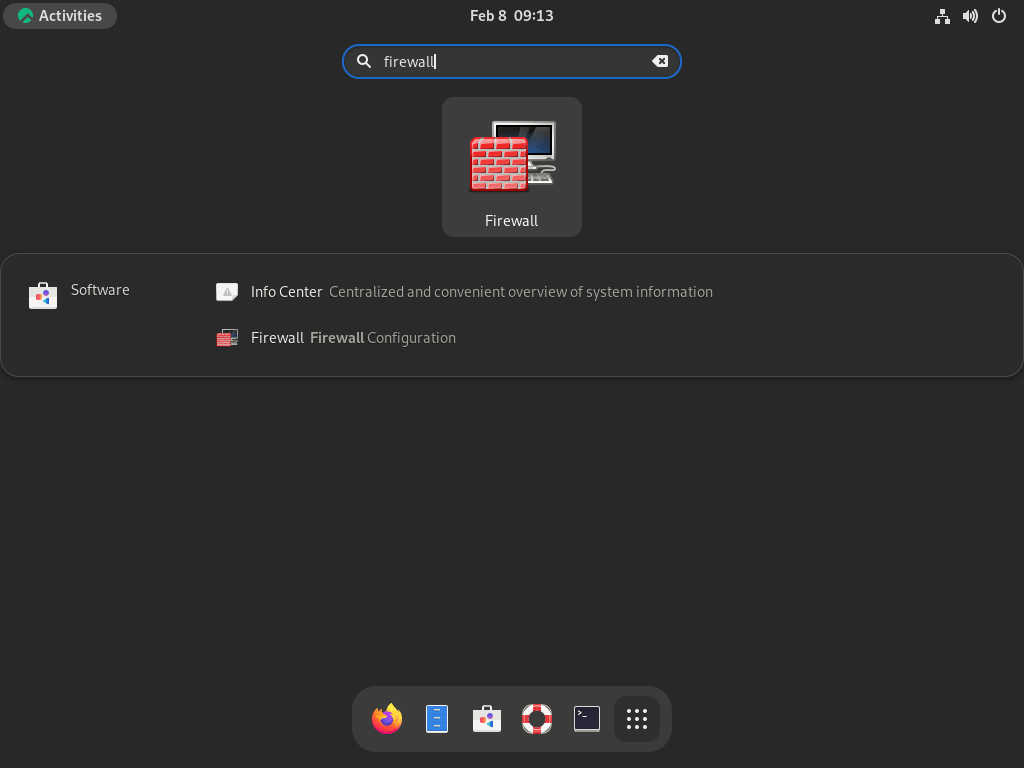
After completing the installation, you can launch the GUI by accessing the following application path.
Activities > Show Applications > Firewall
Example:
Tips on Getting Started with Firewalld GUI on Rocky Linux
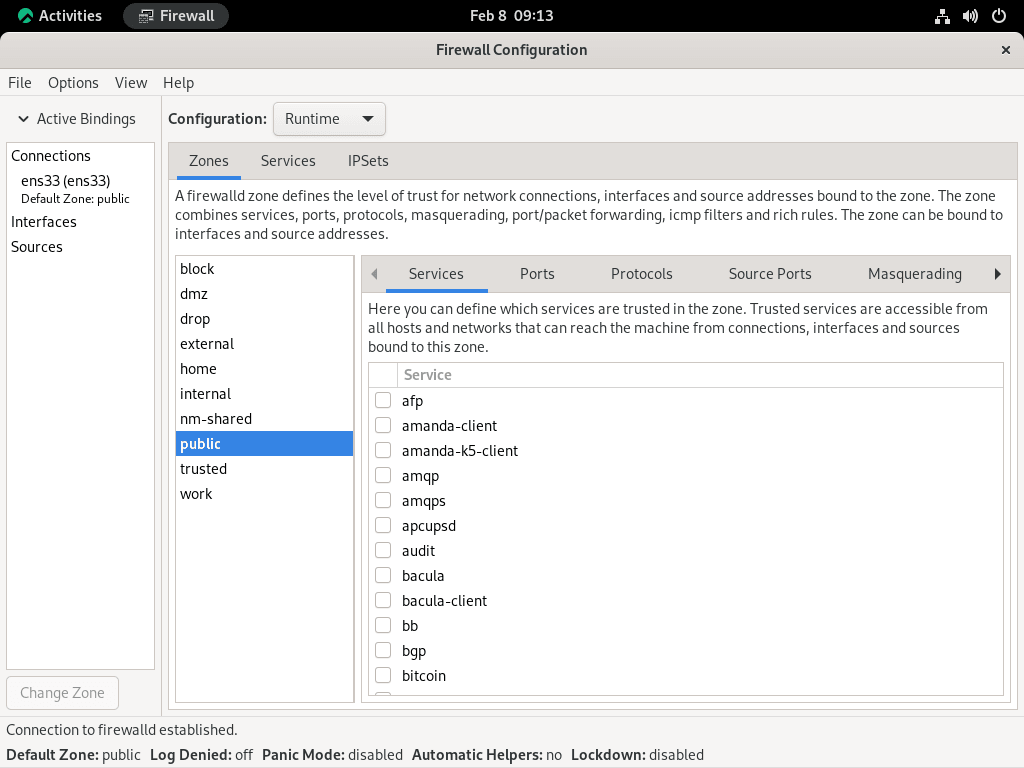
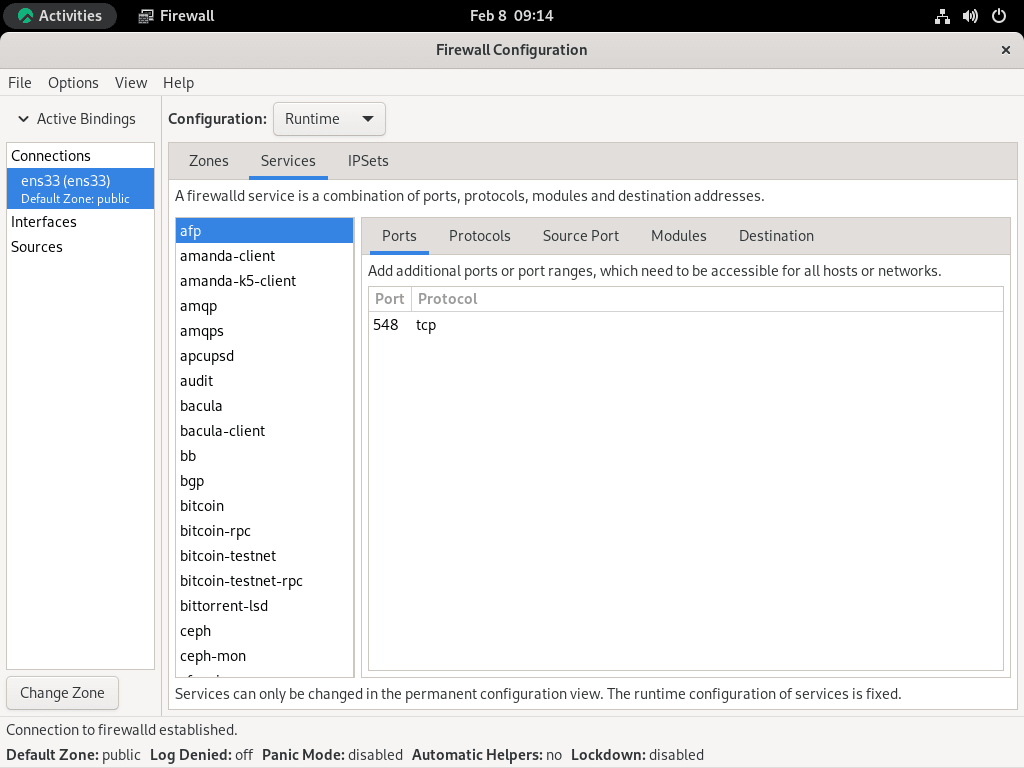
Once you have launched the FirewallD GUI, you can start experimenting with its firewall settings. The main view presents you with different zones, such as “public,” and various sections to manage services, ports, and protocols. To fine-tune your firewall configuration, you can utilize the “View” and “Options” menus. These menus offer additional settings and selections, allowing you to adjust the firewall to your needs.
Below is a list of recommended settings to change or set when getting started with the FirewallD GUI:
- Zones: You can set the firewall to different zones (e.g., public, trusted, dmz, etc.) based on the level of trust you have in the network. For example, you may set your home network as “trusted” and public networks as “public.”
- Services: You can specify which services (e.g., http, ssh, ftp, etc.) are allowed or denied access through the firewall. For example, you may allow access to the http service and deny access to the telnet service.
- Ports: You can configure which ports (e.g., 80, 22, 21, etc.) are open or closed on the firewall. For example, you may open port 80 for HTTP traffic and close port 23 for Telnet traffic.
- Protocols: You can select which protocols (e.g., tcp, udp, icmp, etc.) are allowed or denied access through the firewall. For example, you may allow access to the tcp protocol and deny access to the udp protocol.
Additional Firewalld GUI Commands on Rocky Linux
Update Firewalld GUI on Rocky Linux 9 or 8
Updating the Firewalld GUI is a straightforward process; you only have to run the standard system update command as you would when checking for updates in your system. This is because you installed the GUI using the DNF package manager.
sudo dnf upgrade --refreshRemove Firewalld GUI on Rocky Linux 9 or 8
Those who no longer wish to use the FirewallD GUI can utilize the following command to remove it from their system.
sudo dnf remove firewall-configThe following steps can be followed for those using the KDE desktop environment who wish to remove the FirewallD control panel.
sudo dnf remove plasma-firewall-firewalldConclusion
In conclusion, installing Firewalld GUI on Rocky Linux is a straightforward process. By updating your system, re-installing Firewalld, enabling the service, installing the GUI, and using it to manage your firewall, you can secure your online presence efficiently. The process involves using the command line and graphical interface to manage firewall rules and settings. Whether you’re a beginner or an experienced user, FirewallD GUI provides a visual and user-friendly interface for managing your firewall on Rocky Linux. With regular updates and proper maintenance, you can be sure that your system remains secure and protected.