

This guide will demonstrate how to install Memcached on AlmaLinux 9 or 8 using the command-line terminal. There are two methods: the first employs the default AlmaLinux appstream, and the second involves importing the Remi RPM to install the latest stable release of Memcached, suitable for those needing newer versions for compatibility or performance enhancements.
Memcached is a high-performance, distributed memory object caching system primarily used for speeding up dynamic web applications by alleviating database load. It’s an essential tool in server environments, especially for websites with heavy data traffic or those requiring fast data retrieval. The key features of Memcached include:
- Efficient Caching: It temporarily stores frequently accessed data, such as database queries or page renders, in memory for quick access.
- Distributed Nature: Allows for object caching across multiple servers, enhancing scalability and reliability.
- Simplicity and Ease of Use: Memcached is straightforward to set up and integrates seamlessly with popular programming languages.
- High Performance: It significantly reduces the time taken to access data, thus improving website and application speed.
- Customizable Expiry: Memcached objects can be set to expire automatically, ensuring that data is refreshed periodically.
- Compatibility: Works well with a wide range of technologies and platforms, making it a versatile choice for various applications.
With its ability to manage large volumes of data efficiently, Memcached is a valuable tool for both developers and administrators seeking to enhance the performance of web applications. Its distributed nature not only aids in load balancing but also ensures data is readily available, contributing to a smoother user experience.
Now, let’s delve into the technical aspects of installing Memcached on AlmaLinux.
Install Memcached on AlmaLinux via Appstream
Refresh AlmaLinux Before Memcached Installation
Begin by updating all system packages on AlmaLinux. This step ensures that you have the latest updates and security patches before installing Memcached.
Use the following command to refresh and upgrade your system:
sudo dnf upgrade --refreshInstall Memcached via DNF Command with AlmaLinux Appstream
To install Memcached, execute the command below. This command uses the AlmaLinux Appstream, a default repository, to install the standard Memcached package. Remember, while the version in Appstream is stable, it may not always be the latest.
Depending on your specific requirements for Memcached, such as compatibility with newer technologies or performance optimization, you might need a more recent version.
sudo dnf install memcached libmemcached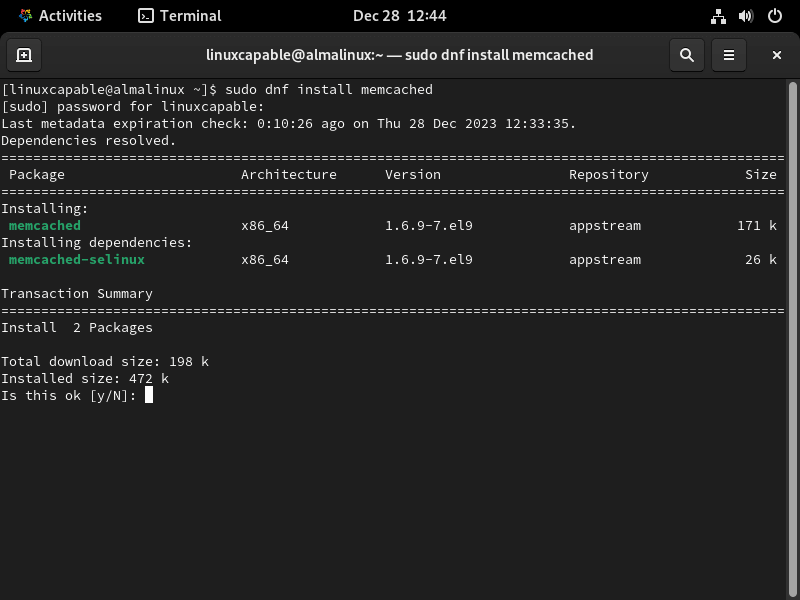
Verify Memcached Installation via AlmaLinux Appstream
After installing Memcached, it’s important to verify the installation. This step confirms that Memcached is installed and also displays the version number. Knowing the version helps understand the features and limitations of your installed Memcached.
Run the following command to check the installed version of Memcached:
memcached -vThis completes the process of installing and verifying Memcached using the default AlmaLinux Appstream.
Install Memcached on AlmaLinux via Remi RPM
Import Remi RPM on AlmaLinux
Setting up EPEL Repository
The first step in importing the Remi repository on AlmaLinux involves installing the EPEL (Extra Packages for Enterprise Linux) repository. EPEL is a valuable resource for additional software packages in AlmaLinux, stemming from its RHEL roots.
For AlmaLinux 9
To accommodate AlmaLinux 9, activate the Code Ready Builder (CRB) and install EPEL:
sudo dnf config-manager --set-enabled crb
sudo dnf install \
    https://dl.fedoraproject.org/pub/epel/epel-release-latest-9.noarch.rpm \
    https://dl.fedoraproject.org/pub/epel/epel-next-release-latest-9.noarch.rpm

For AlmaLinux 8
For AlmaLinux 8, the process remains similar:
sudo dnf config-manager --set-enabled powertools
sudo dnf install \
    https://dl.fedoraproject.org/pub/epel/epel-release-latest-8.noarch.rpm \
    https://dl.fedoraproject.org/pub/epel/epel-next-release-latest-8.noarch.rpm
Adding Remi Repository
After setting up EPEL, the next step is to add the Remi repository. Remi is a trusted source for the latest Memcached versions.
For AlmaLinux 9
Install the Remi repository for AlmaLinux 9:
sudo dnf install dnf-utils http://rpms.remirepo.net/enterprise/remi-release-9.rpm -y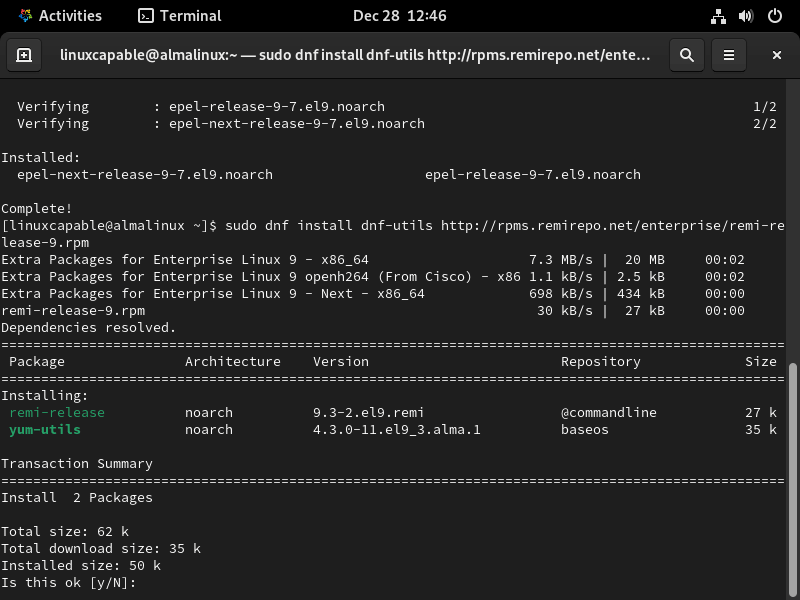
For AlmaLinux 8
For AlmaLinux 8, add the Remi Enterprise Linux 8 repository:
sudo dnf install dnf-utils http://rpms.remirepo.net/enterprise/remi-release-8.rpm -y
Enable Memcached with Remi RPM
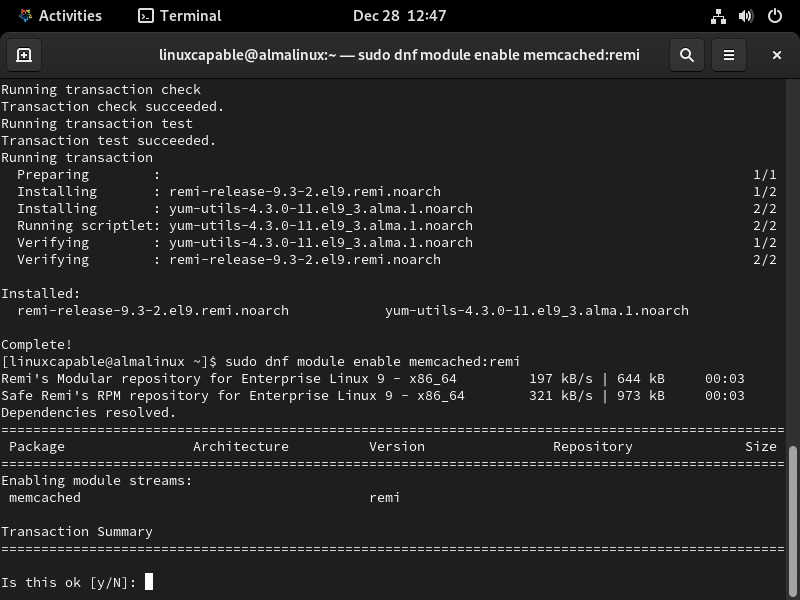
Enable the Memcached module from the Remi repository:
sudo dnf module enable memcached:remiThis step prepares your system to use the Memcached version from Remi.
Install Memcached via DNF Command with Remi RPM
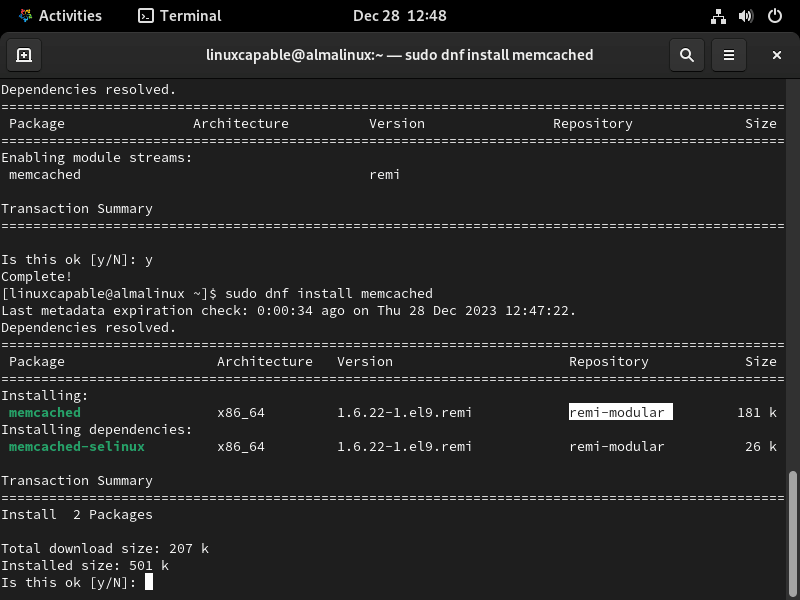
With the Memcached module enabled, you can now proceed to install Memcached:
sudo dnf install memcached libmemcached -yThis command installs the latest version of Memcached available in the Remi repository.
Confirm Memcached Installation
To ensure a successful installation, check the installed Memcached version:
memcached -vThis verification step confirms the correct installation of Memcached on AlmaLinux using the Remi repository.
Secure Memcached with Firewalld on AlmaLinux
Securing your Memcached server on AlmaLinux is a key step in maintaining data integrity and system security. This guide focuses on using Firewalld, a dynamic firewall manager, to create a secure environment for your Memcached instance.
Verify Firewalld Installation on AlmaLinux
Start by ensuring that Firewalld is installed on your AlmaLinux system. Use this command to check for its presence and version:
sudo firewall-cmd --versionIf Firewalld is installed, the command will return the version number. If not installed, you will need to proceed with its installation.
Install Firewalld on AlmaLinux for Memcached
In case Firewalld is absent, install it with the following command:
sudo dnf install firewalldAfter installation, activate Firewalld:
sudo systemctl enable --now firewalldCreate a Dedicated Memcached Zone in Firewalld
Isolating Memcached traffic in its own zone offers enhanced security.
Create Memcached Firewalld Zone
sudo firewall-cmd --permanent --new-zone=memcachedThis command creates a new Firewalld zone named ‘memcached’. The --permanent flag makes sure this change persists across reboots.
Set Default Policies for Memcached Firewalld Zone
To increase security, set a default policy to drop all unspecified traffic:
sudo firewall-cmd --permanent --zone=memcached --set-target=DROP
This command ensures that any traffic not explicitly allowed in the ‘memcached’ zone will be automatically dropped.
Add Memcached Service to Firewalld Zone
Add the Memcached service to your newly created zone:
sudo firewall-cmd --permanent --zone=memcached --add-source=<ip_address>
Replace <ip_address> with the actual IP address that needs access to Memcached.
Cluster Network with Multiple Instances
For a network with multiple instances:
sudo firewall-cmd --permanent --zone=memcached --add-source=<ip_address>/24
This command allows access from a range of IP addresses in a subnet. Replace <ip_address> with the subnet address.
Finalizing and Applying Changes
To apply and confirm your firewall settings:
Reload Firewalld
Apply all the changes with:
sudo firewall-cmd --reloadReloading Firewalld ensures all your new settings are active.
Confirm Zone Settings
Check the configuration of your Memcached zone:
sudo firewall-cmd --zone=memcached --list-allThis command displays all settings and rules in the ‘memcached’ zone, allowing you to verify that the configuration aligns with your security requirements.
Configure Memcached on AlmaLinux
This section covers the essential steps for configuring Memcached settings in AlmaLinux. We focus on editing the memcached.conf file, specifically adjusting the listening IP address, disabling UDP, and modifying the default memory allocation.
Access the Memcached Configuration File
Start by opening the memcached.conf file located at /etc/sysconfig/memcached. Use a text editor like Nano:
sudo nano /etc/sysconfig/memcached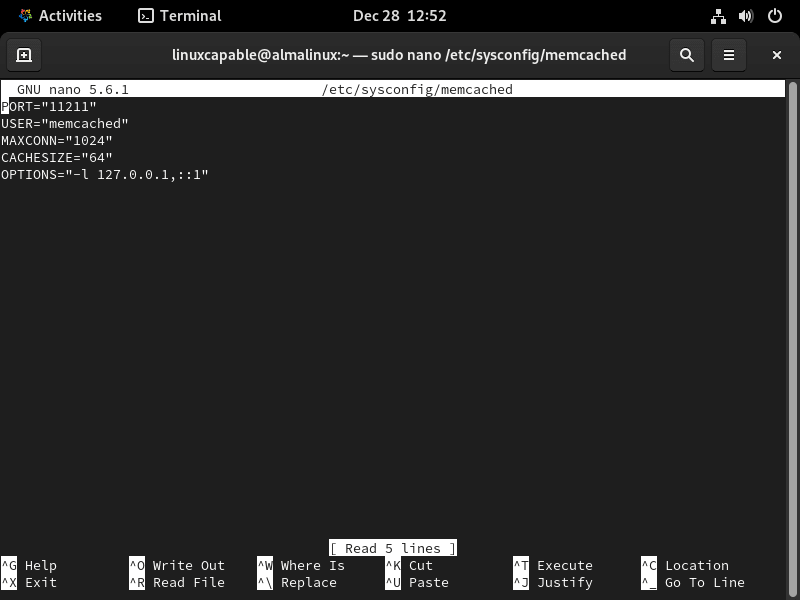
Depending on the method used, you will need to create the configuration manually.
Here’s an example to guide you:
# Example memcached.conf file

# Start with 64MB of memory as a reasonable default
-m 64

# Default listening port 11211
-p 11211

# Run as a background process
-d

# Log to syslog
-s

# Enable verbose logging
-vv

# Set max simultaneous connections to 1024
-c 1024
Configure the Listening IP Address
Memcached defaults to listening on IP address 127.0.0.1. Ensure the -l parameter in your configuration file reflects the correct IP address for your setup. Change it as needed:
-l <your_preferred_ip_address>Replace <your_preferred_ip_address> with the desired IP.
Disable UDP (Optional)
If UDP support is not required, it’s advisable to disable it for enhanced security. Add the following line to disable UDP:
-U 0Adjust Memory Allocation
The default Memcached memory allocation is 64MB. For larger applications, increase this value. Edit the -m parameter to set the desired memory allocation in megabytes. For 2GB, for example:
-m 2048Ensure the memory allocation aligns with your server’s available resources and requirements.
Save Changes and Restart Memcached
After making the necessary modifications, save the file. In Nano, press CTRL+O, confirm with Y, and exit with CTRL+X. To activate the changes, restart the Memcached service:
sudo systemctl restart memcachedAdditional Configuration Tips for Memcached on AlmaLinux
Fine-tuning Memcached on AlmaLinux involves adjusting several parameters beyond the basic setup. These enhancements cater to specific performance and security needs.
Specify User and Group
Memcached can run under specific user and group settings, which you can set using the -u parameter. For example, to run Memcached as the memcache user:
-u memcacheThis setting is crucial for maintaining appropriate permissions and security.
Enable Large Memory Pages
Enhancing performance on systems that support large memory pages is possible by enabling this feature. To activate large memory pages, uncomment the -L parameter:
-LThis can lead to performance improvements by optimizing memory usage.
Configure Maximum Item Size
Memcached’s default maximum item size is 1MB. To increase this limit, use the -I parameter followed by the desired size. For instance, for a 5MB item size:
-I 5mThis adjustment is useful for applications that require storing larger objects in the cache.
Set the Maximum Number of Threads
Memcached uses four threads by default. Depending on your server’s capacity and workload, you might want to alter this. To set the thread count to eight:
-t 8Adjusting threads can optimize Memcached’s performance on multicore systems.
Adjust Idle Timeout
Memcached closes connections after a period of inactivity, which is adjustable with the -o parameter. For a 600-second timeout:
-o idle_timeout=600This setting helps in managing resources more efficiently by terminating idle connections.
Enable SASL Authentication
For enhanced security, especially in environments where authentication is required for accessing the Memcached server, enable SASL (Simple Authentication and Security Layer).
Uncomment the -S parameter or add it:
-SSASL adds an additional layer of security to your Memcached server.
Restart Memcached Service
After making any configuration changes, restart the Memcached service to apply them:
sudo systemctl restart memcachedInstall Memcached Libraries on AlmaLinux
Memcached is renowned for its efficiency in caching data and objects in RAM, significantly reducing database load. This guide will detail the installation and configuration of Memcached libraries for PHP, Python, and Perl, along with their integration into Apache and Nginx web servers on AlmaLinux.
Setting up PHP Libraries for Memcached
Installing PHP Libraries for Memcached
To integrate Memcached with PHP, begin by installing the necessary libraries:
sudo dnf install php-memcachedThis command installs the PHP library for Memcached, enabling PHP applications to communicate with the Memcached server.
Installing Python Library for Memcached
To incorporate Memcached support in Python applications, install the pymemcache library:
sudo dnf install python3-pymemcacheThis command installs the Python library for connecting to Memcached.
Installing Perl Library for Memcached
To enable Memcached support for Perl, use the following command:
sudo dnf install perl-Cache-MemcachedThis installation allows Perl applications to interact with the Memcached server, completing the multi-language support setup for Memcached on AlmaLinux.

Troubleshooting Memcached and SELinux Interactions on AlmaLinux
Understanding SELinux’s Impact on Memcached
SELinux, a vital security module in Linux systems like AlmaLinux, can influence Memcached’s functionality. Incorrect SELinux settings might prevent Memcached from starting or accessing necessary files.
Identifying SELinux Issues Affecting Memcached
Checking SELinux Status
Begin by verifying SELinux’s current operational status:
sestatus
Inspecting SELinux Logs for Memcached
Examine the SELinux logs, typically found in /var/log/audit/audit.log, for any Memcached-related denials:
grep memcached /var/log/audit/audit.logResolving SELinux Policy Conflicts with Memcached
Enabling Memcached Network Access
Alter SELinux policies to allow Memcached network activities:
setsebool -P memcached_can_network 1Configuring SELinux for Memcached on Custom Ports
For Memcached running on non-default ports, create a SELinux policy for the specific port, such as 11211:
semanage port -a -t memcached_port_t -p tcp 11211Addressing SELinux File Context Restrictions for Memcached
Modifying File Contexts for Memcached
Adjust SELinux contexts for Memcached configuration files or directories:
semanage fcontext -a -t memcached_etc_t "/path/to/memcached/config(/.*)?"
restorecon -Rv /path/to/memcached/config
Generating Custom SELinux Policy Modules
Use audit2allow to create a SELinux policy module tailored to Memcached’s requirements:
grep memcached /var/log/audit/audit.log | audit2allow -M mymemcached
semodule -i mymemcached.pp
Confirming SELinux Configurations for Memcached
After implementing the changes, verify that SELinux settings are correctly aligned with Memcached’s needs:
getsebool -a | grep memcachedConclusion
We’ve covered quite a bit in our journey with setting up and fine-tuning Memcached on AlmaLinux. From getting it installed to diving into command-line management, this guide aimed to provide a comprehensive yet approachable look into enhancing server performance. Remember, the key to getting the most out of Memcached lies in customizing it to fit your specific requirements.