
Linux Mint ships Chromium as a real APT package, so you do not need Ubuntu’s Snap workaround just to get a Chrome-compatible open-source browser. You can install Chromium on Linux Mint with Mint’s chromium package, switch to the XtraDebs PPA for a newer community APT build, use Flathub, or add a separate snapshot build for short-term testing.
The official Chromium project documents the browser and its source tree, but it does not publish a Linux Mint-specific .deb installer. On Linux Mint the APT package name is chromium, not chromium-browser. Mint’s own package is the safest daily browsing path, XtraDebs is a community PPA, Flathub keeps Chromium in Flatpak’s app/runtime model, and the manual snapshot method is only for developers or testers who need current Chromium code.
Install Chromium Browser on Linux Mint
Four installation paths are available on Linux Mint. Mint’s own repository is the default choice, XtraDebs is a community-maintained PPA for a newer APT build, Flathub keeps Chromium managed by Flatpak, and the manual snapshot method installs a separate testing browser under /opt.
| Method | Channel | Freshness | Updates | Best For |
|---|---|---|---|---|
| Linux Mint repository | Mint Packages | Mint-packaged stable build | Standard APT upgrades | Most readers who want the simplest supported install |
| XtraDebs PPA | Launchpad PPA | Newer community APT build when the PPA is ahead | Standard APT upgrades after pinning | Readers who accept a community source for a newer APT package |
| Flatpak | Flathub | Current Flathub stable build | flatpak update | Readers who prefer Flatpak packaging and permissions |
| Manual snapshot | Chromium Linux x64 snapshots | Bleeding-edge continuous build | Rerun sudo update-chromium-snapshot | Developers and testers who need the newest Chromium code |
These steps support Linux Mint 22.x and 21.x on
amd64. Mint’s own repository and Flathub use the same commands on both releases, XtraDebs resolves to Ubuntu noble on Mint 22.x and jammy on Mint 21.x, and the manual snapshot method uses Chromium’s Linux x64 archive.
Update Linux Mint Before Installing Chromium
Refresh your package lists first so APT sees the current Mint packages and any newer dependencies the browser needs.
sudo apt update && sudo apt upgradeThese commands use
sudofor tasks that need root privileges. If your account does not have sudo access yet, follow the guide to create and add users to sudoers on Linux Mint.
Install Chromium from the Linux Mint Repository
Mint’s own package is the cleanest choice when you want Chromium to update with the rest of your normal APT maintenance. Install Chromium on Linux Mint with sudo apt install chromium; the package name here is chromium, not chromium-browser.
sudo apt install chromiumVerify the browser after the package finishes installing.
chromium --versionExample output on Linux Mint 22.x:
Chromium 148.0.7778.178 for Linux Mint
Mint 21.x currently reports the same Chromium version string. If apt complains about chromium-browser, you are using the wrong package name for Linux Mint.
Install Chromium from the XtraDebs PPA
The XtraDebs PPA is a community-maintained option for readers who want a newer APT build than Mint currently ships. Add the PPA first, then pin Chromium to the Launchpad origin so the PPA package can compete with Mint’s higher package priority without forcing a downgrade later.
Add the XtraDebs source. The -y flag accepts the repository prompt automatically.
sudo add-apt-repository ppa:xtradeb/apps -yRefresh APT and confirm Mint fetched the new repository metadata. Mint 22.x shows noble here, while Mint 21.x shows jammy.
sudo apt updateRelevant output includes:
Get:7 https://ppa.launchpadcontent.net/xtradeb/apps/ubuntu noble InRelease [24.1 kB]
Create a small APT preferences file before installing Chromium. tee writes the root-owned file because a plain > redirection would not inherit sudo.
printf '%s\n' 'Package: chromium' 'Pin: release o=LP-PPA-xtradeb-apps' 'Pin-Priority: 700' | sudo tee /etc/apt/preferences.d/chromium-pin > /dev/nullCheck the package policy before you install anything.
apt-cache policy chromiumRelevant output includes:
chromium:
  Installed: (none)
  Candidate: 148.0.7778.215-2xtradeb1.2404.1
  Version table:
     148.0.7778.215-2xtradeb1.2404.1 700
        500 https://ppa.launchpadcontent.net/xtradeb/apps/ubuntu noble/main amd64 Packages
     148.0.7778.178~linuxmint1+zena 700
        700 http://packages.linuxmint.com zena/upstream amd64 Packages
Mint 21.x shows the same candidate switch, but the PPA version ends in 2204.1, the PPA source line uses jammy, and the Mint package line uses virginia instead of zena. If the candidate still points to the Mint package, do not continue with the XtraDebs install; use Mint’s repository package or check whether the PPA has caught up for your release.
Install Chromium once the candidate points to XtraDebs.
sudo apt install chromiumVerify the installed build.
chromium --versionThe version line should match the XtraDebs branch selected in the package policy check. XtraDebs builds against the Ubuntu base that Linux Mint inherits, so Mint 22.x packages use the Ubuntu 24.04 base and Mint 21.x packages use the Ubuntu 22.04 base.
Install Chromium with Flatpak
Linux Mint already includes Flatpak with Flathub configured at system scope, so this method can go straight to the application install. Use it when you want Chromium managed through Flathub instead of APT.
sudo flatpak install flathub org.chromium.Chromium -yThe -y flag confirms the install prompts automatically. Verify the installed Flatpak with the package metadata instead of trying to launch the browser over SSH.
flatpak info org.chromium.ChromiumRelevant output includes:
          ID: org.chromium.Chromium
         Ref: app/org.chromium.Chromium/x86_64/stable
        Arch: x86_64
      Branch: stable
      Origin: flathub
Installation: system
Flatpak permissions can still affect file pickers, removable media, devices, and host paths. If Chromium cannot see a folder or device later, check Flatpak permissions before changing system packages.
Install Latest Chromium Snapshot Manually
Use the manual snapshot method only when you need a separate bleeding-edge Chromium build for testing. Chromium’s Linux x64 snapshot archive is not a Linux Mint package, does not receive APT security maintenance, and can break between snapshots.
Snapshot builds can change profile data before stable Chromium understands it. The wrapper defaults to
~/.config/chromium-snapshotso your normal~/.config/chromiumprofile stays separate.
Install the download and runtime prerequisites. Linux Mint 22.x uses Ubuntu 24.04 time64 library names, while Linux Mint 21.x uses the Ubuntu 22.04 package names.
sudo apt update
sudo apt install ca-certificates curl unzip libnss3 libxss1 libgbm1

. /etc/os-release
case "${UBUNTU_CODENAME:-}" in
  noble)
    sudo apt install libgtk-3-0t64 libatk-bridge2.0-0t64 libasound2t64
    ;;
  jammy)
    sudo apt install libgtk-3-0 libatk-bridge2.0-0 libasound2
    ;;
  *)
    echo "Use Linux Mint 22.x or 21.x for this command set."
    false
    ;;
esac
The updater uses the curl command to read Chromium’s current Linux x64 snapshot revision, downloads the matching archive over HTTPS, installs it under /opt/chromium-snapshot, creates the chromium-snapshot launcher, sets the bundled SUID sandbox helper, and adds a Cinnamon-friendly desktop entry named Chromium Snapshot.
sudo tee /usr/local/bin/update-chromium-snapshot > /dev/null <<'EOF'
#!/usr/bin/env bash
set -euo pipefail

if [ "$(id -u)" -ne 0 ]; then
  echo "Run this updater with sudo: sudo update-chromium-snapshot" >&2
  exit 1
fi

if [ "$(dpkg --print-architecture)" != "amd64" ]; then
  echo "This Chromium snapshot method supports Linux Mint amd64 only." >&2
  exit 1
fi

for cmd in curl unzip install mktemp cp mv rm tr chown chmod; do
  if ! command -v "$cmd" >/dev/null 2>&1; then
    echo "Missing required command: $cmd" >&2
    exit 1
  fi
done

BASE_URL="https://storage.googleapis.com/chromium-browser-snapshots/Linux_x64"
INSTALL_DIR="/opt/chromium-snapshot"
TMP_DIR="$(mktemp -d)"
NEW_DIR=""
OLD_DIR=""

cleanup() {
  rm -rf "$TMP_DIR"
  if [ -n "${NEW_DIR:-}" ] && [ -d "$NEW_DIR" ]; then
    rm -rf "$NEW_DIR"
  fi
  if [ -n "${OLD_DIR:-}" ] && [ -d "$OLD_DIR" ]; then
    rm -rf "$OLD_DIR"
  fi
}
trap cleanup EXIT

LATEST="$(curl -fsSL "$BASE_URL/LAST_CHANGE" | tr -d '[:space:]')"
case "$LATEST" in
  ''|*[!0-9]*)
    echo "Unexpected Chromium snapshot revision: $LATEST" >&2
    exit 1
    ;;
esac

CURRENT=""
if [ -r "$INSTALL_DIR/.revision" ]; then
  CURRENT="$(tr -d '[:space:]' < "$INSTALL_DIR/.revision")"
fi
case "$CURRENT" in
  ''|*[!0-9]*) CURRENT="" ;;
esac

if [ -n "$CURRENT" ] && [ -x "$INSTALL_DIR/chrome-linux/chrome" ]; then
  if [ "$LATEST" = "$CURRENT" ]; then
    echo "Chromium snapshot $LATEST is already installed."
    exit 0
  fi
  if [ "$LATEST" -lt "$CURRENT" ]; then
    echo "Installed Chromium snapshot $CURRENT is newer than resolved snapshot $LATEST; keeping current install."
    exit 0
  fi
fi

ZIP_FILE="$TMP_DIR/chrome-linux.zip"
echo "Downloading Chromium snapshot $LATEST..."
curl -fL --progress-bar -o "$ZIP_FILE" "$BASE_URL/$LATEST/chrome-linux.zip"

unzip -q "$ZIP_FILE" -d "$TMP_DIR"
if [ ! -x "$TMP_DIR/chrome-linux/chrome" ]; then
  echo "Downloaded archive did not contain chrome-linux/chrome." >&2
  exit 1
fi

install -d -m 0755 "$INSTALL_DIR"
NEW_DIR="$(mktemp -d "$INSTALL_DIR/chrome-linux.new.XXXXXX")"
chmod 0755 "$NEW_DIR"
cp -a "$TMP_DIR/chrome-linux/." "$NEW_DIR/"
chown -R root:root "$NEW_DIR"

if [ -f "$NEW_DIR/chrome_sandbox" ]; then
  chown root:root "$NEW_DIR/chrome_sandbox"
  chmod 4755 "$NEW_DIR/chrome_sandbox"
fi

if [ -d "$INSTALL_DIR/chrome-linux" ]; then
  OLD_DIR="$(mktemp -d "$INSTALL_DIR/chrome-linux.old.XXXXXX")"
  rmdir "$OLD_DIR"
  mv "$INSTALL_DIR/chrome-linux" "$OLD_DIR"
fi
mv "$NEW_DIR" "$INSTALL_DIR/chrome-linux"
NEW_DIR=""
rm -rf "$OLD_DIR"
OLD_DIR=""

printf '%s\n' "$LATEST" > "$INSTALL_DIR/.revision"

cat > /usr/local/bin/chromium-snapshot <<'WRAPPER'
#!/usr/bin/env bash
SANDBOX="/opt/chromium-snapshot/chrome-linux/chrome_sandbox"
if [ -x "$SANDBOX" ]; then
  export CHROME_DEVEL_SANDBOX="$SANDBOX"
fi

has_user_data_dir=0
has_class=0
for arg in "$@"; do
  case "$arg" in
    --user-data-dir|--user-data-dir=*) has_user_data_dir=1 ;;
    --class|--class=*) has_class=1 ;;
  esac
done

if [ "$has_class" -eq 0 ]; then
  set -- --class=chromium-snapshot "$@"
fi

if [ "$has_user_data_dir" -eq 0 ]; then
  set -- --user-data-dir="${CHROMIUM_SNAPSHOT_USER_DATA_DIR:-$HOME/.config/chromium-snapshot}" "$@"
fi

exec /opt/chromium-snapshot/chrome-linux/chrome "$@"
WRAPPER
chmod 0755 /usr/local/bin/chromium-snapshot

cat > /usr/share/applications/chromium-snapshot.desktop <<'DESKTOP'
[Desktop Entry]
Type=Application
Name=Chromium Snapshot
Comment=Bleeding-edge Chromium snapshot
Exec=chromium-snapshot %U
Terminal=false
Icon=/opt/chromium-snapshot/chrome-linux/product_logo_256.png
Categories=Network;WebBrowser;
MimeType=text/html;text/xml;application/xhtml+xml;x-scheme-handler/http;x-scheme-handler/https;
StartupNotify=true
StartupWMClass=chromium-snapshot
DESKTOP
chmod 0644 /usr/share/applications/chromium-snapshot.desktop

if command -v update-desktop-database >/dev/null 2>&1; then
  update-desktop-database /usr/share/applications >/dev/null 2>&1 || true
fi

echo "Installed Chromium snapshot $LATEST."
echo "Run it with: chromium-snapshot"
EOF

sudo chmod 0755 /usr/local/bin/update-chromium-snapshot
Run the updater to install the current snapshot.
sudo update-chromium-snapshotCheck the snapshot browser version after the updater finishes.
chromium-snapshot --versionThe version will change as new Chromium snapshots land. The desktop entry uses StartupWMClass=chromium-snapshot, and the wrapper passes --class=chromium-snapshot so Cinnamon can match the menu launcher, panel icon, and running browser window.
Launch Chromium on Linux Mint
Chromium installs from a terminal, but it still needs an active graphical session to open a browser window. Use the launcher that matches the package you installed.
Launch Chromium from the Terminal
APT-installed Chromium, including the XtraDebs build, uses the normal desktop launcher name.
chromiumThe Flatpak build uses the application ID as the launcher.
flatpak run org.chromium.ChromiumThe manual snapshot method uses its own launcher so it does not overwrite the normal Chromium command.
chromium-snapshotAll three launchers accept the usual Chromium startup flags, so use the same option after the launcher that matches your install method:
--incognitoopens a private session without reusing your normal browsing history.--disable-extensionsstarts Chromium without loading extensions.--user-data-dir=/tmp/chromium-testcreates a temporary profile for testing.--disable-gpuis useful when GPU acceleration causes startup or rendering problems.
For example, start a clean incognito session without extensions from the Mint package:
chromium --incognito --disable-extensionsUse the same flags after the Flatpak launcher when you installed Chromium from Flathub:
flatpak run org.chromium.Chromium --incognito --disable-extensionsUse the same flags after the snapshot launcher when you installed the manual testing build:
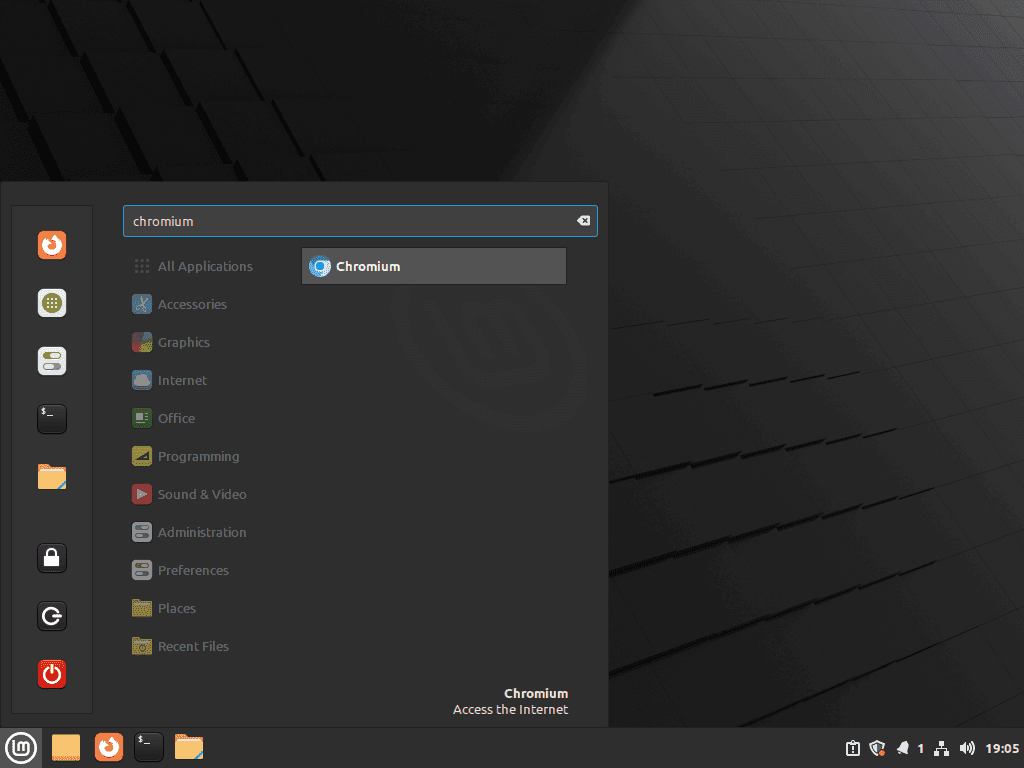
chromium-snapshot --incognito --disable-extensionsLaunch Chromium from the Applications Menu
Open the Linux Mint menu, go to Internet, and choose Chromium Web Browser for the APT or Flatpak build. The manual snapshot method appears separately as Chromium Snapshot, and its desktop entry uses the same window class as the wrapper so Cinnamon can match the running window to the launcher icon.
Update Chromium on Linux Mint
Update Chromium on Linux Mint with the same tool that installed it. APT covers Mint’s own package and the XtraDebs build, Flatpak updates the Flathub package separately, and the manual snapshot method uses its updater helper.
Update APT-Installed Chromium
Mint’s repository build and the XtraDebs build can both be updated without upgrading every other APT package at the same time.
sudo apt update && sudo apt install --only-upgrade chromiumIf you pinned the XtraDebs package earlier, keep the pin file in place so future upgrades continue to prefer the PPA build. Use your normal sudo apt update && sudo apt upgrade routine when you want Chromium updated alongside the rest of the system.
Update Flatpak Chromium
Update only the Chromium Flatpak when you do not want to upgrade every other installed Flatpak at the same time.
sudo flatpak update org.chromium.ChromiumUse sudo flatpak update when you want to update all system-scoped Flatpak applications. The broader maintenance workflow is covered in the guide to upgrade Flatpak on Linux Mint.
Update Manual Chromium Snapshot
Rerun the snapshot updater whenever you want to pull the newest continuous build. If the installed revision already matches the upstream marker, the helper exits without replacing the files.
sudo update-chromium-snapshotTroubleshoot Chromium on Linux Mint
Most Chromium problems on Linux Mint come from using the wrong package name, a damaged profile, GPU acceleration issues, or the extra moving parts in the manual snapshot method. Start with the check that matches the behavior you see.
Fix chromium-browser Package Errors
Linux Mint does not need Ubuntu’s Snap transition workaround for Chromium. If apt reports that chromium-browser has no installation candidate, retry with the real Mint package name instead.
sudo apt install chromiumReset a Broken Chromium Profile
Start by disabling extensions to see whether the crash or glitch comes from an add-on rather than the browser itself.
chromium --disable-extensionsIf Chromium still fails, launch it with a temporary profile so your normal data stays untouched during the test.
chromium --user-data-dir=/tmp/chromium-testFlatpak installs accept the same troubleshooting flag, but you need the Flatpak launcher in front of it.
flatpak run org.chromium.Chromium --user-data-dir=/tmp/chromium-testUse the snapshot launcher when you installed the manual testing build.
chromium-snapshot --user-data-dir=/tmp/chromium-snapshot-testIf the temporary profile works, your normal profile data is the likely cause. Back up anything important and then clean only the profile paths you confirm in the removal section below.
Work Around GPU-Related Chromium Startup Problems
When Chromium opens to a black window, flickers, or crashes immediately after launch, test it once with GPU acceleration disabled.
chromium --disable-gpuUse the matching Flatpak command when you installed Chromium from Flathub.
flatpak run org.chromium.Chromium --disable-gpuUse the snapshot launcher when the manual build opens but renders incorrectly.
chromium-snapshot --disable-gpuIf this workaround fixes the browser, recheck your graphics stack before making it permanent, especially on systems that still need to install NVIDIA drivers on Linux Mint.
Fix Manual Snapshot Sandbox or AppArmor Errors
The snapshot updater configures Chromium’s bundled chrome_sandbox helper with root ownership and the setuid bit, so the browser should not need a persistent --no-sandbox workaround. Re-run the updater first because it resets the helper permissions after each download.
sudo update-chromium-snapshotCheck the sandbox helper if the snapshot still reports sandbox errors.
ls -l /opt/chromium-snapshot/chrome-linux/chrome_sandboxThe permissions should start with -rws, and both owner fields should be root. If that looks correct, check fresh kernel logs before changing AppArmor or user namespace settings.
sudo journalctl -k --since "10 minutes ago" --no-pager | grep -Ei 'apparmor|userns_create|chromium-snapshot|chrome_sandbox' || echo "No matching AppArmor or sandbox messages found."Do not disable AppArmor globally for the snapshot build. If fresh denials point at the snapshot path, remove the manual method and use Mint’s APT package or Flatpak until the snapshot works again on your system.
Fix Manual Snapshot Missing Library Errors
The manual method depends on host libraries because the snapshot archive is not a packaged Mint build. Check the browser binary for missing shared libraries before adding random packages.
ldd /opt/chromium-snapshot/chrome-linux/chrome | grep 'not found'If the command prints missing libraries, rerun the prerequisite command for your Mint release. If the same library remains missing, switch back to the Mint package or Flatpak because the current snapshot expects a runtime library outside this command set.
Handle DRM-Limited Streaming Sites in Chromium
Chromium on Linux Mint does not bundle Widevine DRM, so Netflix and similar services can still fail even when local video playback works. If those sites matter more than the open-source package, install Google Chrome on Linux Mint instead.
Remove Chromium on Linux Mint
Remove Chromium with the same tool that installed it. Keep the optional cleanup steps separate so Mint repository users are not asked to remove a PPA, Flatpak data, or snapshot files they never added.
Remove APT-Installed Chromium
Remove the Mint package or the XtraDebs package together with orphaned dependencies in one step.
sudo apt remove --autoremove chromiumIf you used the XtraDebs PPA, remove the repository and the pin file after Chromium is gone.
sudo add-apt-repository --remove ppa:xtradeb/apps -y
sudo rm -f /etc/apt/preferences.d/chromium-pin
sudo apt update
Check the package policy after cleanup. A leftover -1 line for the old XtraDebs build only reflects local package history under /var/lib/dpkg/status; the active candidate should be the Mint package again.
apt-cache policy chromiumRelevant output includes:
chromium:
  Installed: (none)
  Candidate: 148.0.7778.178~linuxmint1+zena
  Version table:
     148.0.7778.178~linuxmint1+zena 700
        700 http://packages.linuxmint.com zena/upstream amd64 Packages
Remove Flatpak Chromium
Remove the Flatpak package and its sandboxed application data in one step.
sudo flatpak uninstall --delete-data org.chromium.ChromiumAfter that, clear any runtimes you no longer need.
sudo flatpak uninstall --unusedRemove Manual Chromium Snapshot
Delete the snapshot payload, updater, launcher, and desktop entry when you no longer need the testing build.
sudo rm -f /usr/local/bin/update-chromium-snapshot
sudo rm -f /usr/local/bin/chromium-snapshot
sudo rm -f /usr/share/applications/chromium-snapshot.desktop
sudo rm -rf /opt/chromium-snapshot
Remove the separate snapshot profile only when you no longer need its browsing data.
rm -rf ~/.config/chromium-snapshot ~/.cache/chromium-snapshotCheck for Leftover Chromium Data
APT removal leaves profile data behind until you delete it yourself, Flatpak data only remains when you skipped --delete-data, and the snapshot profile is separate from both. Check first instead of deleting guessed directories blindly.
find "$HOME/.config" "$HOME/.cache" "$HOME/.var/app" -maxdepth 1 -type d \( -name chromium -o -name chromium-snapshot -o -name org.chromium.Chromium \) 2>/dev/nullIf the command prints APT or snapshot profile/cache paths, delete only the ones you want to remove.
rm -rf ~/.config/chromium ~/.cache/chromium ~/.config/chromium-snapshot ~/.cache/chromium-snapshotIf it prints the Flatpak sandbox path and you did not already use --delete-data, remove that directory separately.
rm -rf ~/.var/app/org.chromium.ChromiumConclusion
Chromium is ready on Linux Mint through Mint’s package, the XtraDebs PPA, Flathub, or a separate testing snapshot. Keep daily browsing on a maintained package path unless you specifically need snapshot builds. If streaming DRM or Google integration matters more than the open-source package, install Google Chrome on Linux Mint instead.

Formatting tips for your comment
You can use basic HTML to format your comment. Useful tags currently allowed in published comments:
<code>command</code>command<strong>bold</strong><em>italic</em><a href="https://example.com">link</a><blockquote>quote</blockquote>