If you’re using Fedora Linux and looking to enhance your web browsing experience with a focus on privacy and performance, installing Brave Browser is a smart move. This guide will provide the necessary steps to install Brave Browser on Fedora Linux, including the bonus of Brave beta and developer builds.
Key Features of Brave Browser:
- Privacy-Centric: Brave has built-in features to block ads and trackers, ensuring your browsing habits remain private.
- Speed and Efficiency: Without the clutter of ads, Brave loads pages faster, saving time and data.
- Brave Rewards: This innovative program rewards users with BAT for viewing privacy-respecting ads, with the option to support favorite content creators.
- Extension Compatibility: Being Chromium-based, Brave supports many extensions from the Chrome Web Store, enhancing functionality.
- User Interface: The browser offers a clean and intuitive interface, customizable to fit your preferences.
- Enhanced Security: Brave prioritizes your safety with features like automatic HTTPS upgrades, protecting you from various online threats.
With these features in mind, let’s dive into the installation process of Brave Browser on Fedora Linux, which includes importing the Brave repository and selecting the version that best fits your needs.
Import Brave Browser RPM Repository on Fedora
Step 1: Update Fedora System Packages
Before installing Brave Browser, it’s crucial to update your Fedora system to prevent potential software conflicts. Use the following command:
sudo dnf upgrade --refreshStep 2: Import the GPG Key for Brave Browser
Importing the Brave GPG Key
To authenticate and ensure the integrity of the Brave Browser packages, import the GPG key:
sudo rpm --import https://brave-browser-rpm-release.s3.brave.com/brave-core.ascStep 3: Add the Brave Browser Stable Repository
Stable Brave Repository Configuration
Add the stable repository to your Fedora system with the command below for regular browser usage:
sudo dnf config-manager --add-repo https://brave-browser-rpm-release.s3.brave.com/x86_64/Options for Beta and Nightly Builds
Beta and Nightly GPG Key Import
If you wish to install Beta or Nightly builds, first import the shared GPG key with this command:
sudo rpm --import https://brave-browser-rpm-beta.s3.brave.com/brave-core-nightly.ascBeta Repository Addition
For accessing pre-release features, add the Brave Beta repository as follows:
sudo dnf config-manager --add-repo https://brave-browser-rpm-beta.s3.brave.com/x86_64/Nightly Repository Addition
For the latest updates, suitable for developers and advanced users, add the Brave Nightly repository:
sudo dnf config-manager --add-repo https://brave-browser-rpm-nightly.s3.brave.com/x86_64/Remember, the Stable, Beta, and Nightly versions of Brave Browser can coexist on your system as they are separate installations. This is facilitated by using the DNF package manager and the official repositories provided by Brave.
Install Brave Browser on Fedora
Step 1: Install the Stable Version of Brave Browser
Begin the installation by executing the command below to install the latest stable version of Brave Browser. The stable version is the most reliable for everyday use:
sudo dnf install brave-browser Step 2: Install Brave Beta or Nightly Builds
Installing Brave Beta
After adding the beta repository, install the Brave Beta version for pre-release features testing with this command:
sudo dnf install brave-browser-betaInstalling Brave Nightly
To test the newest developments, execute the following command to install Brave Nightly. Keep in mind that the Nightly build is cutting-edge but may have stability issues, so it’s not recommended for critical daily usage:
sudo dnf install brave-browser-nightlyInstalling the Beta or Nightly builds is best suited for secondary devices or users experienced in managing potential bugs and instability that can occur with pre-release software.
Launch Brave Browser on Fedora
Start Brave Browser Using the Terminal
After installing Brave Browser, open it quickly by entering this command in the terminal:
brave-browserLaunch Beta or Nightly Builds from the Terminal
For Brave Beta
To access the Beta release with the latest features under testing, use:
brave-browser-betaFor Brave Nightly
For the absolute latest build, often used for development and testing, execute:
brave-browser-nightlyOpen Brave Browser via GUI
Accessing Brave Without Terminal
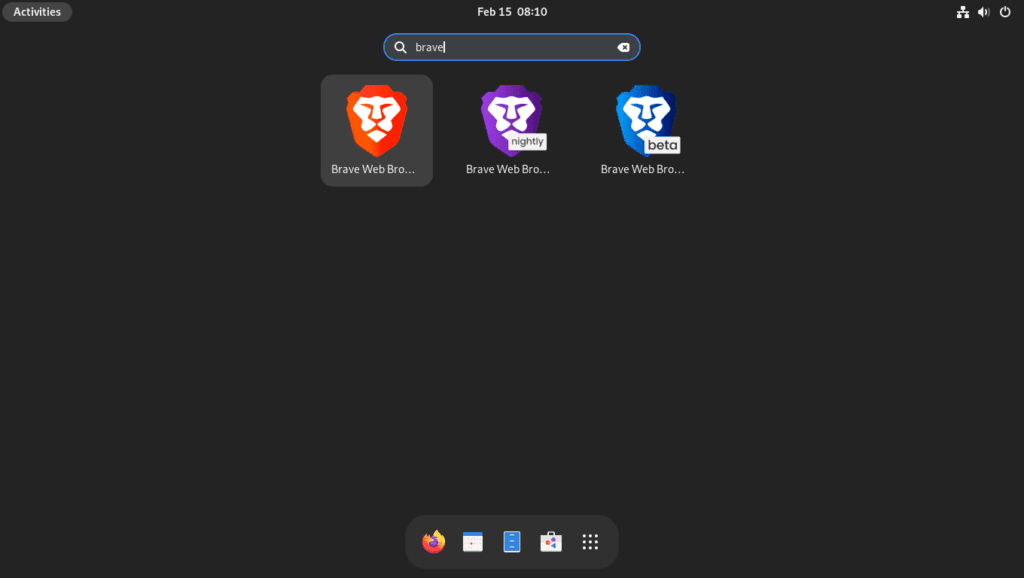
Desktop users can launch Brave Browser without the terminal. Navigate through the graphical interface with the following steps:
- Click “Activities” at the top left corner of the screen.
- Select “Show Applications” at the bottom of the dock.
- Find and click the “Brave Browser” icon to open it.
This method provides a user-friendly way of accessing Brave Browser for those who prefer not to interact with the command line.


First-Time Tips with Brave Browser on Fedora
General Tips for First-Time Brave Users on Fedora
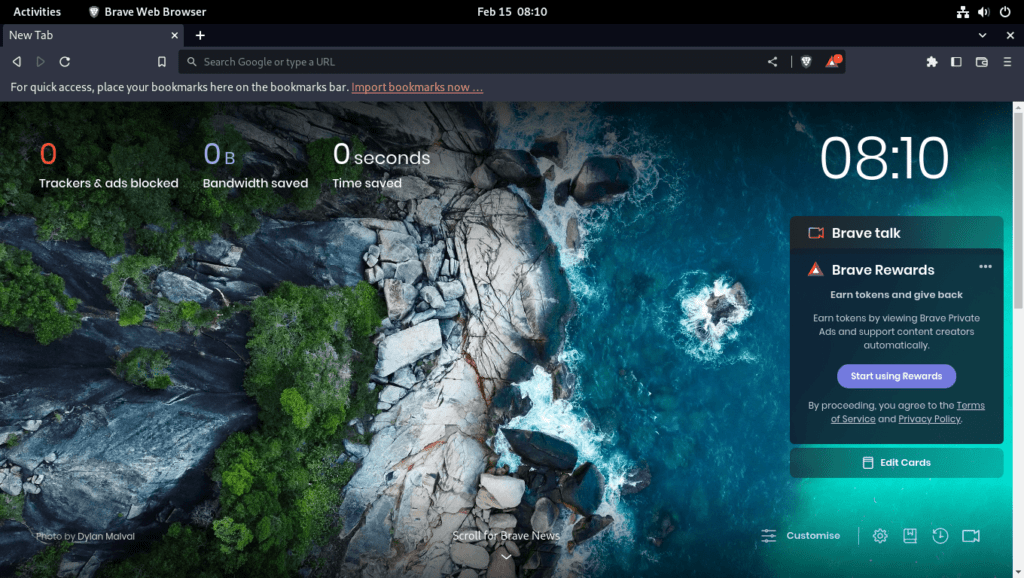
Familiarize with Brave’s Interface: Brave’s interface on Fedora Linux is streamlined for efficiency. Spend some time exploring the layout. Key elements include the address bar, the shields icon for privacy and security settings, and the settings menu.
Customize Your Experience:
- Adjusting Shields Settings: Shields are Brave’s built-in tools for blocking ads and trackers. You can tailor these settings by clicking the shields icon next to the address bar and toggling the controls for a customized browsing experience.
- Enabling HTTPS Everywhere: To enhance security, ensure that HTTPS Everywhere is activated by navigating to the security section in the settings menu.
- Setting Up Brave Rewards: Brave offers a unique feature called Brave Rewards. It allows you to earn cryptocurrency for viewing privacy-respecting ads. Set it up in the Brave Rewards section within settings to start earning.
- Keyboard Shortcuts Mastery: Knowing shortcuts can significantly enhance your productivity. Use
Ctrl + Tto open a new tab,Ctrl + Wto close a tab, orCtrl + Shift + Tto reopen a closed tab.
Customizations for an Enhanced Fedora Linux Experience
- Theme Customization: Personalize the appearance of Brave by selecting a theme that suits your preferences. Access this feature through the settings menu:
brave://settings/appearance- Install Extensions: Extend the functionality of Brave by installing extensions. Fedora Linux users can visit the Brave Web Store and choose from a wide range of extensions to install:
brave://extensions/- Default Search Engine: Set your preferred search engine as default to streamline your web searches. This can be modified in Brave’s search engine settings:
brave://settings/searchOther Tips for Optimizing Brave on Fedora Linux
- Manage Your Passwords: Brave includes a password manager to securely store and auto-fill your login information. Access the password manager to add, remove, or modify credentials.
- Bookmark Management: Organize your frequently visited sites by using Brave’s bookmarking tool. Create folders for different categories to maintain a neat and accessible bookmark bar.
- Utilize Brave’s Task Manager: Monitor which processes or extensions are utilizing resources. Open the task manager with
Shift + Escto monitor performance and close any unnecessary resource-intensive tasks.
By engaging with these tips, you’re setting yourself up for a secure, efficient, and personalized web browsing experience on Fedora Linux.
Additional Commands for Brave Browser on Fedora
Remove Brave Browser from Fedora
Uninstall Brave Browser
To uninstall Brave Browser from your Fedora system, use the appropriate command based on the installed version of the browser. If you have the stable release of Brave installed, execute the following command:
sudo dnf remove brave-browserFor those who have installed the Beta or Nightly versions, utilize these commands:
sudo dnf remove brave-browser-betasudo dnf remove brave-browser-nightlyEach version of Brave Browser maintains a separate installation path and associated repositories, allowing for distinct management.
Cleaning Up Brave Repositories
After uninstalling Brave, it’s a prudent measure to remove the associated repositories if you have no plans to reinstall Brave in the future. This action ensures your system’s package database remains clean.
To remove the repositories for the Beta or Nightly builds, issue these commands:
sudo rm /etc/yum.repos.d/brave-browser-rpm-beta.s3.brave.com_x86_64_.repo
sudo rm /etc/yum.repos.d/brave-browser-rpm-nightly.s3.brave.com_x86_64_.repo
If you wish to remove the repository for the stable release, use:
sudo rm /etc/yum.repos.d/brave-browser-rpm-release.s3.brave.com_x86_64_.repoPlease adjust your repository removal command according to the versions you installed. Failing to retain the stable version repository while removing only Beta or Nightly will stop the stable version from receiving future updates. This ensures that your system remains up-to-date with the versions you choose to use.
Conclusion
In conclusion, Brave Browser is a secure, fast, and user-friendly web browser that offers enhanced privacy and security features. Installing Brave Browser on Fedora is a straightforward process that involves importing the necessary GPG keys and repositories and utilizing the DNF package manager to install the desired version of the Browser. Once installed, users can customize the Browser’s settings and preferences to suit their needs and enjoy a faster, more private browsing experience.


