

Apache HTTP Server powers millions of websites worldwide, making it one of the most battle-tested web servers available for Linux. It handles everything from serving static HTML files to running complex PHP applications, WordPress sites, and API backends. Apache’s modular architecture means you can enable only what you need: SSL/TLS encryption for secure connections, URL rewriting for clean permalinks, authentication for protected areas, and caching for faster page loads.
This guide covers installing Apache on Debian, configuring virtual hosts to serve multiple websites from one server, securing your site with free Let’s Encrypt SSL certificates, and setting up firewall rules. By the end, you will have a production-ready web server capable of hosting websites accessible from anywhere on the internet.
Update Debian System Packages
The initial step in setting up Apache on your Debian system involves updating the system’s packages. To begin, this is an essential procedure that ensures all the existing packages in your system are up to date.
Therefore, open your system terminal and run the following command:
sudo apt update && sudo apt upgradeInstall Apache via APT Command
With your system updated, you can proceed with the Apache installation. Conveniently, Debian provides a default repository of software packages from which you can easily install Apache.
Specifically, run the following command to install Apache:
sudo apt install apache2This command installs the Apache2 package from Debian’s default repositories.
Verifying the Apache Installation
Upon successful installation of Apache, it’s always good practice to verify that everything was correctly set up. For instance, the first method to do this is by checking Apache’s version number. This helps you ascertain that the correct version of Apache was installed.
Consequently, use the following command in the terminal to check Apache’s version:
apache2 -vYou should see output similar to:
Server version: Apache/2.4.x (Debian)
Server built:   [build date varies]
The version number confirms Apache installed correctly. The exact version may differ depending on when you install.
Another method to verify the installation involves checking Apache’s service status using systemd, the system and service manager for Linux operating systems. This is essential to ensure that the Apache service is running correctly.
You can check the systemd status with the following command:
systemctl status apache2You should see output indicating the service is active and running:
● apache2.service - The Apache HTTP Server
     Loaded: loaded (/lib/systemd/system/apache2.service; enabled; preset: enabled)
     Active: active (running) since [date] [time] UTC; 2min ago
       Docs: https://httpd.apache.org/docs/2.4/
    Process: 1234 ExecStart=/usr/sbin/apachectl start (code=exited, status=0/SUCCESS)
   Main PID: 1235 (apache2)
      Tasks: 55 (limit: 4915)
     Memory: 12.5M
        CPU: 150ms
     CGroup: /system.slice/apache2.service
             ├─1235 /usr/sbin/apache2 -k start
             ├─1236 /usr/sbin/apache2 -k start
             └─1237 /usr/sbin/apache2 -k start
The system will return inactive if Apache’s service isn’t running. To rectify this, you can initiate the Apache service and enable it to start on the system boot using the following command:
sudo systemctl enable apache2 --nowThis command sets Apache to automatically start each time your system boots, ensuring continuous, uninterrupted operation of your web server. The –now flag starts the service immediately after enabling it.
Once this is done, your Apache HTTPD Web Server should be up and running and ready for configuration to host your websites and web applications.
Configure UFW Firewall for Apache HTTP
Understanding UFW
Uncomplicated Firewall (UFW) provides an intuitive interface for managing iptables firewall rules. However, although UFW is not preinstalled on Debian, it is readily available from the default repositories. Therefore, configuring UFW rules is essential if your server is publicly accessible. For comprehensive UFW configuration beyond Apache, see our detailed UFW installation guide for Debian.
Install UFW on Debian
If UFW isn’t on your system, fortunately, the installation is just a terminal command away. Specifically, the following command instructs the APT package handling utility (the standard tool on Debian for handling packages) to install the UFW package:
sudo apt install ufw -yHere, the -y flag is used to automate the process by automatically saying yes to the prompts and running non-interactively.
Activating UFW on Debian
Subsequently, with UFW successfully installed, the next step is to activate it. However, before enabling the firewall, ensure you allow SSH access first to prevent lockout from remote servers.
Critical: If you are connected via SSH, allow SSH access before enabling UFW to prevent lockout.
sudo ufw allow sshAfter allowing SSH, activate UFW:
sudo ufw enableBy default, UFW blocks all incoming connections while allowing all outgoing connections. This configuration provides a basic security level by deterring unsolicited access to your system while still allowing outbound communication.
Checking Installed Applications UFW Profiles
Additionally, UFW comes with a feature known as application profiles. Essentially, these are pre-defined rules that can be easily applied to specific applications. To see the list of installed applications that have UFW profiles, simply use the following command:
sudo ufw app listAfter installing Apache, you should see Apache-related profiles:
Available applications:
  Apache
  Apache Full
  Apache Secure
  OpenSSH
Debian 11/12 users: Your output may show “WWW”, “WWW Full”, and “WWW Secure” instead of Apache profiles. These are functionally identical: WWW opens port 80, WWW Secure opens port 443, and WWW Full opens both.
The three Apache profiles (or WWW profiles on older Debian versions) serve different purposes: “Apache” or “WWW” opens only port 80 (HTTP), “Apache Secure” or “WWW Secure” opens only port 443 (HTTPS), and “Apache Full” or “WWW Full” opens both ports.
Setting UFW Rules for Apache HTTP
Depending on your requirements, set UFW to allow connections to Apache on HTTP (Port 80), HTTPS (Port 443), or both. Use the Apache or WWW profile name that appears in your ufw app list output:
To allow HTTP (Port 80) only:
# Debian 13:
sudo ufw allow 'Apache'
# Debian 11/12:
sudo ufw allow 'WWW'
For HTTPS (Port 443) only:
# Debian 13:
sudo ufw allow 'Apache Secure'
# Debian 11/12:
sudo ufw allow 'WWW Secure'
For both HTTP and HTTPS:
# Debian 13:
sudo ufw allow 'Apache Full'
# Debian 11/12:
sudo ufw allow 'WWW Full'
Verifying UFW Firewall Rules
After setting up the rules, it is essential to confirm they have been correctly implemented. To do this, the following command lets you verify the currently active firewall rules:
sudo ufw statusIf you enabled “Apache Full” (Debian 13) or “WWW Full” (Debian 11/12), the output should show:
Status: active

To                         Action      From
--                         ------      ----
Apache Full                ALLOW       Anywhere
OpenSSH                    ALLOW       Anywhere
Apache Full (v6)           ALLOW       Anywhere (v6)
OpenSSH (v6)               ALLOW       Anywhere (v6)
On Debian 11/12, the output displays “WWW Full” instead of “Apache Full”. Both confirm that HTTP and HTTPS traffic can reach your Apache server.
Test the Apache Default Page
Next, after configuring UFW, verify you can access the Apache default page. To verify, navigate to your server’s IP address in your web browser:
http://your_server_ip
For local installations or testing on the same machine where Apache is installed, use localhost (which always refers to 127.0.0.1, your local machine):
http://localhost
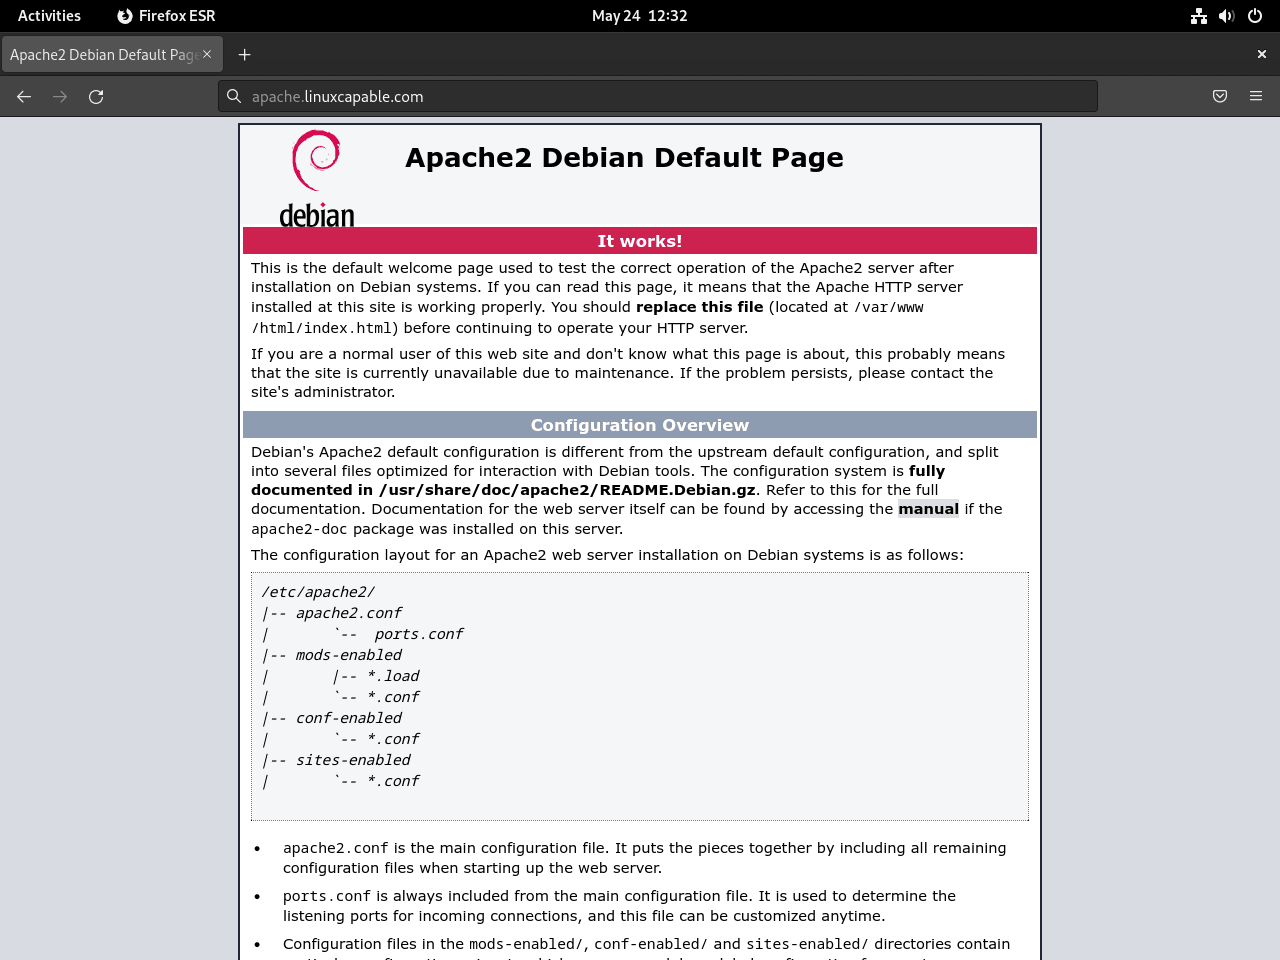
If everything was set up correctly, you should see the Apache default landing page.
Create Virtual Hosts for Apache HTTP
Functionally, virtual hosts in Apache allow you to manage multiple domains on one server, similar to server blocks in Nginx. For this guide, we will demonstrate setting up a virtual host for a domain we will call “example.com.” However, remember to replace this with your actual domain name as you follow the steps.
Create and Set Permissions for Apache Directories
Typically, Apache serves documents from /var/www/html by default. While this default location works fine for single-site hosting, hosting multiple websites requires separate directories for each domain. Therefore, we will keep /var/www/html as the fallback for any requests not matching configured virtual hosts.
First, create a new directory for your example.com domain:
sudo mkdir -p /var/www/exampleNext, assign ownership to your current user using the $USER environment variable. This allows you to edit files without sudo while Apache can still read them:
sudo chown -R $USER:$USER /var/www/exampleSetting ownership to your user account makes development easier since you can edit files without sudo. For production servers running PHP or other dynamic content where the web server writes files, use
www-data:www-dataownership instead. See the troubleshooting section for fixing permission issues.
Verify the correct permissions are set for the web root:
ls -l /var/www/The output should show 755 permissions (drwxr-xr-x):
drwxr-xr-x 2 username username 4096 [date] example
drwxr-xr-x 2 root     root     4096 [date] html
If your permissions do not match, correct them with:
sudo chmod -R 755 /var/www/exampleNext, create a sample index.html page using the nano text editor:
sudo nano /var/www/example/index.htmlPaste the following HTML content:
<html>
    <head>
        <title>Welcome to Website!</title>
    </head>
    <body>
        <h1>Success! The virtual host is working! You did not mess it up.</h1>
    </body>
</html>
After writing, save the file (CTRL+O), then exit (CTRL+X).
Create a Virtual Host For Apache HTTP
Now, with the landing page created and the correct ownership and permissions set, create a virtual host configuration file. Typically, Apache stores virtual host files in /etc/apache2/sites-available/:
sudo nano /etc/apache2/sites-available/example.confPaste the following configuration, replacing ServerName, ServerAlias, and DocumentRoot with your actual domain:
<VirtualHost *:80>
    ServerAdmin webmaster@localhost
    ServerName example.com
    ServerAlias www.example.com
    DocumentRoot /var/www/example
    ErrorLog ${APACHE_LOG_DIR}/error.log
    CustomLog ${APACHE_LOG_DIR}/access.log combined
</VirtualHost>
Modify the ServerName and ServerAlias directives to match your domain, and adjust DocumentRoot to match the directory you created earlier.
After setting the configuration, save the file (CTRL+O) and exit (CTRL+X).
Activate the Apache HTTP Virtual Host
Next, enable your virtual host configuration. Conveniently, Apache provides the a2ensite and a2dissite commands to manage virtual hosts (unlike Nginx, which uses symbolic links directly).
First, disable the default server block:
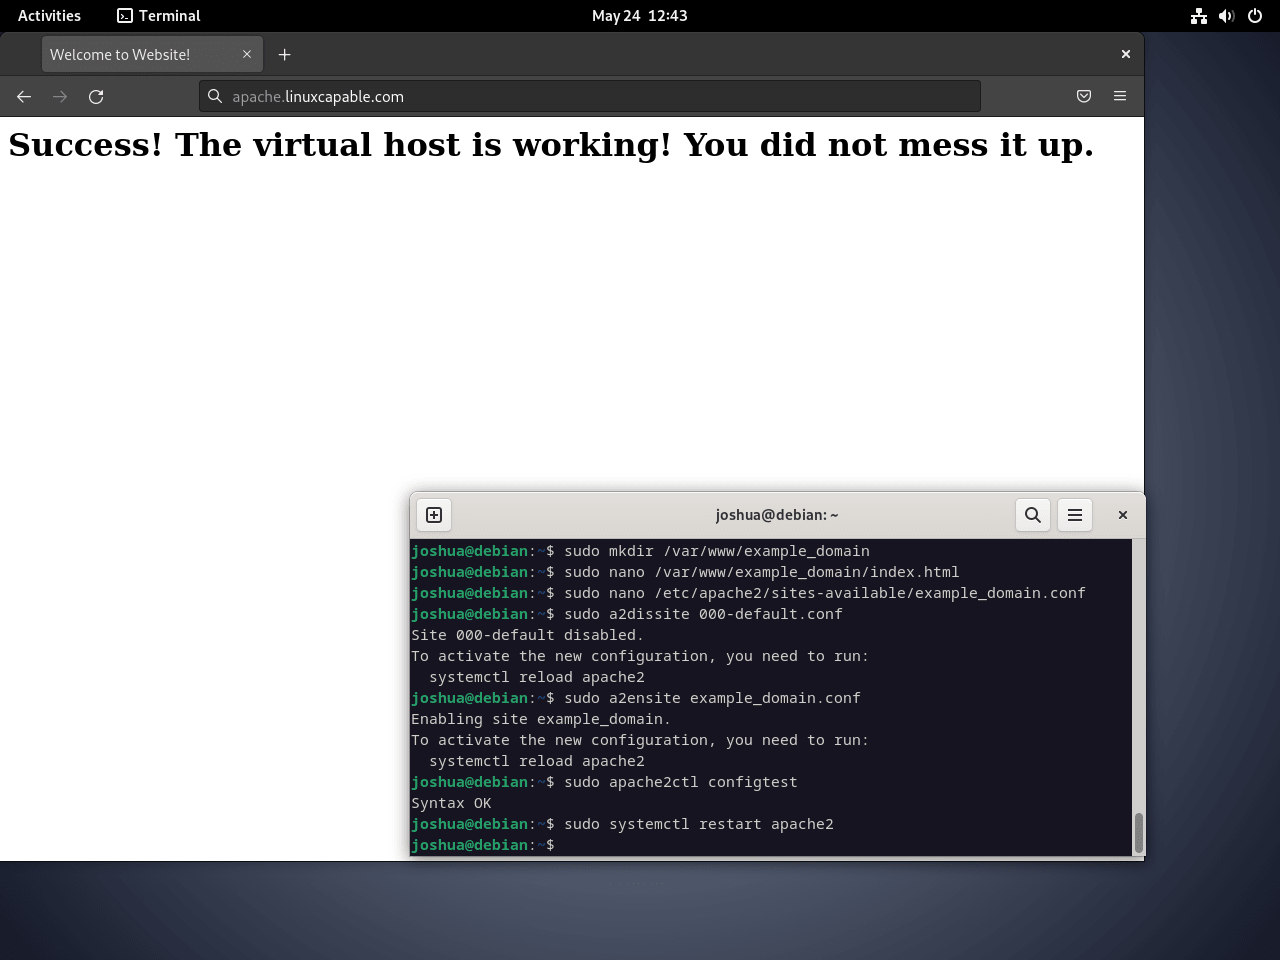
sudo a2dissite 000-default.confNext, enable your new virtual host:
sudo a2ensite example.confTest your configuration for syntax errors before restarting Apache:
sudo apache2ctl configtestA successful test shows:
Syntax OK
If there are errors, you will see the exact file and line number:
AH00526: Syntax error on line 3 of /etc/apache2/sites-enabled/example.conf:
Invalid command 'DocuemntRoot', perhaps misspelled
Restart Apache to activate your new virtual host:
sudo systemctl restart apache2Apache should now serve your landing page. Open your web browser and navigate to http://example.com (or use your server’s IP address if DNS is not yet configured). You should see the test page you created in index.html.
Create Let’s Encrypt’s Free SSL Certificate For Apache HTTP
Securing your website with SSL/TLS encryption is essential for protecting user data and meeting modern web standards. Let’s Encrypt provides free, automated SSL/TLS certificates from the nonprofit Internet Security Research Group (ISRG), making HTTPS accessible to everyone. For comprehensive Let’s Encrypt configuration including renewal troubleshooting and advanced options, see our dedicated guide on securing Apache with Let’s Encrypt on Debian.
Install the Apache Certbot Package
To begin, the first step towards securing your website is to install the certbot package. Essentially, this handy tool automates procuring and installing SSL/TLS certificates from Let’s Encrypt. To install it, run the following command:
sudo apt install python3-certbot-apache -yGenerating and Setting Up the SSL Certificate
Once certbot is installed, proceed to generate your SSL/TLS certificate and configure Apache automatically:
sudo certbot --apache --agree-tos --redirect --hsts --staple-ocsp --email you@example.com -d www.example.comThis command includes several security enhancements:
- –redirect: Automatically redirects HTTP traffic to HTTPS (forces secure connections)
- –hsts: Adds Strict-Transport-Security header (tells browsers to always use HTTPS for your domain)
- –staple-ocsp: Enables OCSP Stapling (improves SSL handshake performance and privacy)
Replace the email address and domain name with your actual information.
Validating SSL Configuration
Consequently, upon successful execution of the previous steps, the URL of your website should now begin with https://www.example.com instead of http://www.example.com. Furthermore, anyone who tries to access your website using the old HTTP URL will automatically be redirected to HTTPS, thus ensuring a secure connection.
To ascertain that the SSL configuration is active, visit your website and look for the padlock symbol in your browser’s address bar. This symbol indicates that the connection to your website is secure and encrypted.
Automating SSL Certificate Renewal
Importantly, it’s worth noting that the certificates issued by Let’s Encrypt have a validity period of 90 days. Therefore, it’s crucial to establish an automated renewal process. Fortunately, by default, Certbot incorporates either a cron job or systemd timer to manage renewals automatically.
To manually verify the renewal process, you can run the following command:
sudo certbot renew --dry-runThis command conducts a dry run of the renewal process, testing whether the renewal will function without actually renewing the certificate. If the test is successful, it’s a reassuring indication that your certificate will be renewed automatically before its expiration.
Monitoring Your Apache HTTP Service
However, managing a web server does not end with setting it up and securing it with SSL/TLS. Therefore, it’s vital to continuously monitor your server to ensure optimal performance, detect potential issues, and fix them promptly.
Installing and Configuring Apache’s mod_status
Specifically, Apache provides a handy module called mod_status that offers information on your server’s performance. If it’s not already enabled, you can simply activate it using the following command:
sudo a2enmod statusThe mod_status module provides a web page with real-time server statistics. To make the status page accessible, edit the module configuration:
sudo nano /etc/apache2/mods-enabled/status.confYou should see a configuration block like this:
<Location /server-status>
    SetHandler server-status
    Require local
</Location>
By default, this restricts access to local connections only (127.0.0.1). To allow access from specific IP addresses, use Require ip followed by the IP address. Avoid using Require all granted on production servers, as it exposes sensitive server information to anyone on the internet. Save the file (CTRL+O), then exit (CTRL+X).
Checking Apache Server Status
Now, with mod_status activated and configured, you can access the server status page by navigating to http://your_server_IP/server-status.
The status page offers information like:
- The number of workers serving requests
- The number of idle workers
- The current CPU usage
- Details about the requests being processed
Configuring Apache Log Files
Additionally, Apache keeps comprehensive logs, offering a wealth of information about what’s happening on your server. Specifically, by default, Apache keeps two log files:
- Access log (/var/log/apache2/access.log): Records every page served and every file loaded by the web server.
- Error log (/var/log/apache2/error.log): Records all errors encountered in processing requests.
Monitoring these logs can provide insights into server performance and potential issues, which the next section covers in more detail.
Tips For Managing Your Apache HTTP Web Server
In the previous sections, we successfully learned how to set up, secure, and monitor your Apache web server. Now, however, it’s time to manage it. For instance, key server management aspects include understanding server logs and mastering Apache commands for effective daily operation.
Understanding Apache Server Logs
Undeniably, Apache logs are crucial for diagnosing issues, overseeing user activity, and acquiring insights about your server’s performance. For example, logs can track server errors, identify potential security threats, and monitor user activities. Ultimately, they are a treasure trove of information, provided you know how to utilize them effectively. Therefore, let’s look at a few examples of Linux commands that can peruse and analyze Apache logs.
Review Recent Log Entries
Use the tail command to check recent log entries:
tail /var/log/apache2/access.log
tail /var/log/apache2/error.log
Monitor Logs in Real-Time
Watch logs in real-time while troubleshooting:
tail -f /var/log/apache2/error.logSearch for Specific Errors
Use grep to find specific error codes or patterns:
grep "404" /var/log/apache2/error.log
grep -c "500" /var/log/apache2/error.log
Identify Unique IP Addresses Accessing the Server
The awk command can be used to list unique IP addresses that have accessed your server by analyzing the access log:
awk '{print $1}' /var/log/apache2/access.log | sort | uniqTo identify the top 10 IP addresses by request volume:
awk '{print $1}' /var/log/apache2/access.log | sort | uniq -c | sort -rn | head -10These log analysis techniques help you monitor traffic patterns, identify potential security threats, and troubleshoot performance issues effectively.
Familiarizing with Basic Apache HTTP Service Commands
Additionally, below are some of the most commonly used Apache commands you’ll likely need for routine management of your Apache web server:
Stopping the Apache Web Server:
sudo systemctl stop apache2Starting the Apache Web Server:
sudo systemctl start apache2Restarting the Apache Web Server:
Use restart for major changes (module installation, MPM changes):
sudo systemctl restart apache2Reloading the Apache Web Server:
Use reload for configuration changes (virtual hosts, .htaccess) without dropping active connections:
sudo systemctl reload apache2Disabling Apache on Server Boot:
sudo systemctl disable apache2Enabling Apache on Server Boot:
This is typically enabled by default upon installation:
sudo systemctl enable apache2Update and Remove Apache
Regular maintenance keeps your Apache installation secure and performant. The following commands cover updating to the latest version and completely removing Apache if needed.
Update Apache HTTP
First, before initiating the update process, you must check for available updates for your system. This can be done easily using the “apt update” command, which fetches information about available updates from the repositories:
sudo apt updateTo update only Apache without upgrading all packages on your system, use the --only-upgrade flag:
sudo apt install --only-upgrade apache2This command upgrades Apache to the latest available version while leaving other packages untouched. For production servers, consider backing up your configuration before upgrading. After the upgrade, verify Apache is running correctly:
apache2 -version
systemctl status apache2
Remove Apache HTTP
To uninstall Apache from your system, use the apt remove command:
sudo apt remove apache2Next, remove any orphaned dependencies that were installed alongside Apache but are no longer needed:
sudo apt autoremoveTo completely remove Apache including configuration files, use purge instead:
sudo apt purge apache2Verify the removal completed successfully:
apache2 -versionExpected output confirming removal:
-bash: apache2: command not found
Troubleshooting Common Apache Issues
Unfortunately, when Apache does not behave as expected, systematic diagnosis helps identify the root cause. Therefore, below are common issues with step-by-step solutions showing exactly what to look for.
Apache Fails to Start: Port Already in Use
If Apache fails to start, you should first check its status for error messages:
sudo systemctl status apache2If you see an error mentioning “Address already in use” or “could not bind to address”, another service is using port 80 or 443. Find the conflicting process:
sudo lsof -i :80The output shows which program is using the port:
COMMAND   PID     USER   FD   TYPE DEVICE SIZE/OFF NODE NAME
nginx   12345     root    6u  IPv4  54321      0t0  TCP *:http (LISTEN)
In this example, Nginx is using port 80. Stop the conflicting service before starting Apache:
sudo systemctl stop nginx
sudo systemctl start apache2
403 Forbidden: Permission Denied Errors
Similarly, when you see “403 Forbidden” in your browser, Apache cannot read your website files. To investigate, check the error log for details:
sudo tail -20 /var/log/apache2/error.logLook for lines containing “Permission denied” or “AH01630”. A typical permission error looks like:
[timestamp] [authz_core:error] [pid 1234] [client 192.168.1.100:54321] AH01630: client denied by server configuration: /var/www/example/
Verify the web directory ownership and permissions:
ls -la /var/www/example/The output should show www-data as owner or at least readable by others:
drwxr-xr-x 2 www-data www-data 4096 [date] .
drwxr-xr-x 4 root     root     4096 [date] ..
-rw-r--r-- 1 www-data www-data  234 [date] index.html
If ownership is incorrect, fix it with:
sudo chown -R www-data:www-data /var/www/example
sudo chmod -R 755 /var/www/example
Configuration Syntax Errors
Crucially, always test configuration before restarting Apache. Otherwise, a syntax error prevents Apache from starting entirely:
sudo apache2ctl configtestA successful test shows:
Syntax OK
A configuration error shows the exact file and line number:
AH00526: Syntax error on line 8 of /etc/apache2/sites-enabled/example.conf:
Invalid command 'DocuemntRoot', perhaps misspelled or defined by a module not included in the server configuration
This indicates line 8 has a typo: “DocuemntRoot” should be “DocumentRoot”. Open the file and correct the error:
sudo nano /etc/apache2/sites-enabled/example.confVirtual Host Shows Default Page Instead of Your Site
Occasionally, when your browser shows the Apache default page instead of your custom site, the virtual host is likely not enabled. In this case, verify enabled sites:
ls -la /etc/apache2/sites-enabled/You should see your configuration file as a symbolic link:
lrwxrwxrwx 1 root root 35 [date] example.conf -> ../sites-available/example.conf
If missing, enable it and reload Apache:
sudo a2ensite example.conf
sudo systemctl reload apache2
Also verify your ServerName in the virtual host configuration matches exactly how you access the site. If you type “example.com” in your browser but the configuration specifies “www.example.com”, Apache will not match the request to your virtual host.
Check Apache Error Logs for Other Issues
Finally, when something goes wrong, the error log is your first stop. To do this, view the most recent errors:
sudo tail -50 /var/log/apache2/error.logTo watch errors appear in real-time while you test in another terminal or browser:
sudo tail -f /var/log/apache2/error.logPress Ctrl+C to stop watching the log.
Additional Security Considerations
Beyond SSL certificates and firewall rules, you should also consider implementing additional security measures to harden your Apache installation. For instance, ModSecurity provides web application firewall capabilities that can block SQL injection, cross-site scripting, and other common attacks. Additionally, Fail2ban monitors Apache logs and automatically blocks IP addresses that show malicious behavior like repeated failed login attempts.
For server administration, ensure you have secure remote access configured. Our guide on enabling SSH on Debian covers setting up key-based authentication and hardening SSH against attacks. To run dynamic websites, install PHP on Debian and then deploy applications like WordPress with Apache. Complete your LAMP stack with our MariaDB installation guide for Debian.
Final Thoughts
In conclusion, you now have a production-ready Apache web server on Debian with virtual host configuration, SSL encryption via Let’s Encrypt, and firewall protection. Next, to serve dynamic content, install PHP and connect to a database. Alternatively, for other web server architectures, consider Nginx on Debian, which uses an event-driven model instead of Apache’s process-based approach. Finally, keep your server secure by running regular updates with sudo apt update && sudo apt upgrade and monitoring the error logs for unusual activity.

Formatting tips for your comment
You can use basic HTML to format your comment. Useful tags currently allowed:
<code>command</code>command<strong>bold</strong><em>italic</em><blockquote>quote</blockquote>