This guide will demonstrate how to install AnyDesk on Ubuntu 24.04, 22.04, or 20.04 LTS Linux releases using the command-line terminal and either the APT Package Manager or the third-party package manager Flatpak with Flathub for an alternative installation.
AnyDesk stands out as a cutting-edge remote desktop application, enabling users to access personal computers and servers from anywhere in the world with an internet connection. Its unparalleled speed and reliability have made it a preferred choice for IT professionals and casual users alike. Below are key features and highlights that set AnyDesk apart:
- High Performance: Enjoy seamless remote access with low latency, high frame rates, and real-time collaboration.
- Secure Encryption: Every connection is secured with TLS 1.2 technology and RSA 2048 asymmetric key exchange encryption.
- Cross-Platform Support: AnyDesk is available for Linux, Windows, macOS, iOS, and Android, ensuring wide compatibility.
- Easy to Use: Its intuitive interface allows for easy navigation and control, even for first-time users.
- Lightweight Installation: The software is designed to be lightweight, requiring minimal system resources.
- File Transfer: Effortlessly transfer files between devices during a remote session.
- Customization Options: Tailor AnyDesk to fit your specific needs with customizable settings.
- Multi-Language Support: AnyDesk supports a variety of languages, making it accessible to a global audience.
These features make AnyDesk an indispensable tool for remote access, combining ease of use with robust security measures.
Now, let’s dive into the technical how-to.
Install AnyDesk on Ubuntu via APT PPA
Update Ubuntu Before AnyDesk Installation
Before diving into the installation process, updating your system with all existing packages is wise. To do this, execute the following commands in your terminal:
sudo apt update
sudo apt upgrade
Install Initial Required Packages
First, make sure you have the necessary dependencies installed on your system. Although you may already have most of these packages, run the following command to confirm their presence and install them if needed:
sudo apt install dirmngr ca-certificates software-properties-common apt-transport-https curl -yIf you encounter issues later, return to this step and execute the command again.
Import AnyDesk APT Repository
The initial part of this step involves importing the GPG key to validate the integrity of the downloaded packages. Run the following command in your terminal to add it to your keychain:
curl -fsSL https://keys.anydesk.com/repos/DEB-GPG-KEY | gpg --dearmor | sudo tee /usr/share/keyrings/anydesk.gpg > /dev/nullSubsequently, proceed to import the AnyDesk repository with the following command:
echo 'deb [signed-by=/usr/share/keyrings/anydesk.gpg] http://deb.anydesk.com/ all main' | sudo tee /etc/apt/sources.list.d/anydesk.listUpdate APT List Cache After AnyDesk PPA Import
With the AnyDesk repository now added to your list of sources, it’s time to run another APT update to reflect these changes:
sudo apt updateInstall AnyDesk on Ubuntu via APT Command
Now, you’re all set to install AnyDesk! Run the following command:
sudo apt install anydeskInstall AnyDesk on Ubuntu via Flatpak and Flathub
The Flatpak package manager offers a different way to install AnyDesk on Ubuntu. Similarly to Snap, Flatpak serves as a universal package system for deploying, distributing, and managing software on Linux. People highly regard its ability to sandbox applications, which enhances system security and privacy. Moreover, it lets developers build a single application for multiple Linux distributions.
Note: If your system is currently bereft of Flatpak, you may wish to consult our guide, “How to Install Flatpak on Ubuntu”, for an exhaustive walkthrough on setting up the latest supported version of Flatpak.
Enable Flathub on Ubuntu For AnyDesk
To install AnyDesk using Flatpak, the first task is to enable the Flathub repository. Flathub is the de facto hub for Flatpak applications, hosting many applications and libraries. Adding this repository gives you access to many applications, including AnyDesk.
Execute the following command in your terminal to enable Flathub:
sudo flatpak remote-add --if-not-exists flathub https://flathub.org/repo/flathub.flatpakrepoBy using this command, you add the Flathub repository to your Flatpak configuration. Consequently, you expand the range of available software.
Install AnyDesk on Ubuntu via Flatpak Command
With Flathub now accessible, you can advance to the installation of AnyDesk. This is achieved using the flatpak install command, which fetches and installs the specified application. Run the following command in your terminal:
flatpak install flathub com.anydesk.Anydesk -yThis command sets in motion the installation of AnyDesk from the Flathub repository. Upon successful execution, you’ll have the latest version of AnyDesk at your disposal.
Initiating AnyDesk on Ubuntu via CLI Commands or GUI Path
After successfully installing AnyDesk, you can use it on your Ubuntu Linux. You can launch AnyDesk in several ways, depending on your preference. For instance, you can use the terminal, the command line interface (CLI), or the Graphical User Interface (GUI).
Command Line Launch Method For AnyDesk
Users who favor using the terminal can quickly start AnyDesk with a straightforward command. To do this, type the following in your terminal:
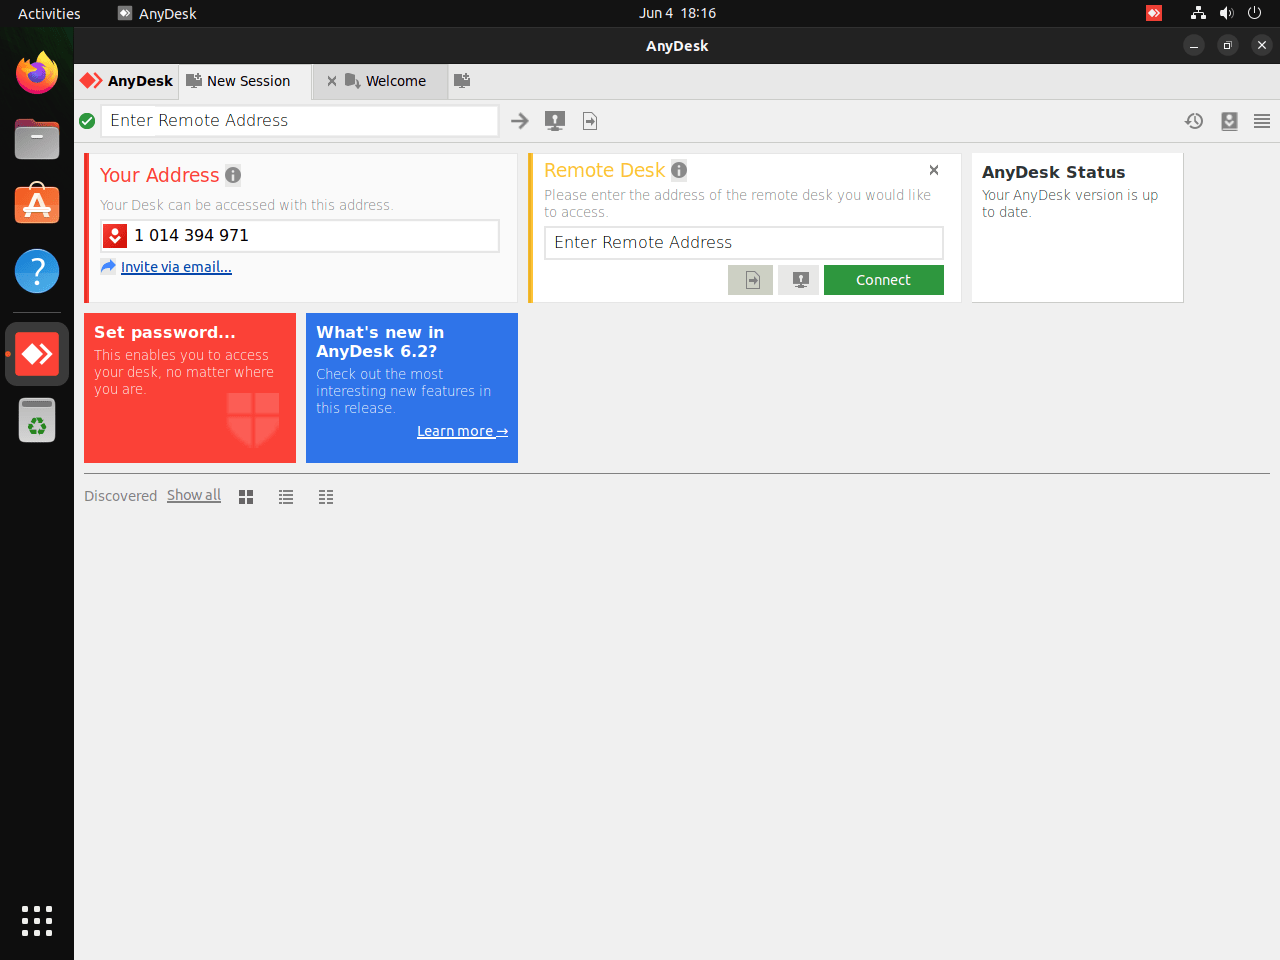
anydeskThis launches the AnyDesk application, providing access to the remote desktop interface.
For users who have installed AnyDesk using Flatpak, the command alters slightly. The corresponding command to initiate AnyDesk is as follows:
flatpak run com.anydesk.AnydeskGUI Launch Method For AnyDesk
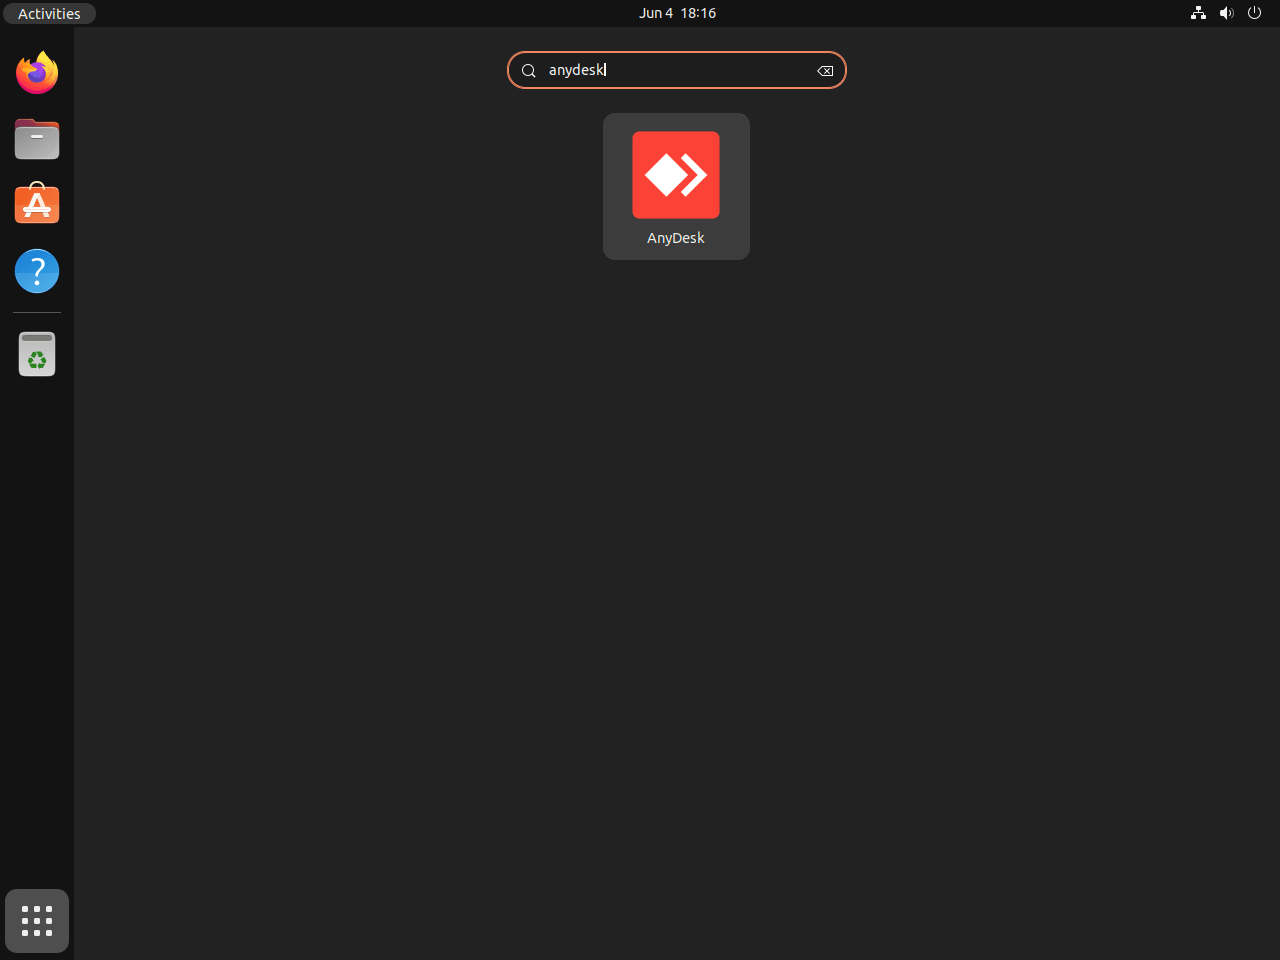
AnyDesk can also be accessed using the GUI for those who prefer a more visual approach. This approach allows users to avoid the command line terminal and access the application directly. The sequence of steps to achieve this is as follows:
- Open ‘Activities’
- Navigate to ‘Show Applications
- Search and click on ‘AnyDesk’
First-Time Tips with AnyDesk on Ubuntu
Now that you’ve successfully installed AnyDesk on Ubuntu, here are some first-time tips on making the most of this powerful remote desktop software:
Maximizing Security in AnyDesk
Security is paramount when accessing your system remotely. AnyDesk offers robust features to ensure your remote sessions remain secure.
- Set a Strong Password: Navigate to Settings > Security and establish a strong, unique password for unattended access.
- Enable Two-Factor Authentication (2FA): Add an extra layer of security by enabling 2FA under the Security settings.
- Whitelist Trusted Devices: Limit access to your device by whitelisting trusted devices only, preventing unauthorized access attempts.
- Review Connection Permissions: Customize which actions remote users can perform by adjusting the access permissions in the security settings.
Efficient Use of AnyDesk
Leverage AnyDesk’s features to enhance your remote desktop experience efficiently.
- Customize Display Quality: Adjust the display quality for a balance between performance and visual clarity based on your internet speed.
- Use the Address Book: Organize your frequent connections by adding them to the AnyDesk address book for quick access.
- Session Recording: Enable session recording to keep a record of your remote sessions for security or training purposes.
- Keyboard Shortcuts: Familiarize yourself with AnyDesk’s keyboard shortcuts for faster navigation and control during remote sessions.
AnyDesk Keyboard Shortcuts for Ubuntu
Keyboard shortcuts can significantly improve your efficiency in navigating and managing remote sessions.
- Switch Between Monitors: Use
Ctrl+↑/↓to switch between monitors in a multi-monitor setup. - Take a Screenshot: Press
Ctrl+Alt+0to take a screenshot of the remote desktop. - Open the AnyDesk Menu:
Ctrl+Alt+Shift+F11opens the AnyDesk main menu. - Close the Current Session: Quickly close the session by pressing
Ctrl+F8.
Customizing AnyDesk
Tailor AnyDesk to fit your workflow and preferences by exploring its customization options.
- Change Your Alias: Instead of the numeric ID, set a more memorable alias under Settings > Profile for easier identification.
- Adjust Audio Settings: If you’re using AnyDesk for meetings, fine-tune the audio transmission settings to ensure clear communication.
- Select Startup Preferences: Choose whether AnyDesk starts automatically upon system boot under Settings > Security.
- Customize User Interface: Adjust the look and feel of AnyDesk by selecting different themes or color schemes to match your preference.
Optimizing AnyDesk Performance
To ensure a smooth remote desktop experience, consider these performance optimization tips.
- Adjust the Resolution: Lowering the remote desktop’s resolution can improve performance on slower internet connections.
- Limit Background Processes: On both the local and remote system, limit running unnecessary background applications to free up resources.
- Use LAN Connection If Possible: For the best performance, use a wired LAN connection instead of Wi-Fi where feasible.
- Configure Network Settings: In AnyDesk, under Connection, adjust the connection settings to optimize for speed or quality based on your network.
With these tips, you’re now equipped to use AnyDesk on Ubuntu more securely, efficiently, and effectively. Remember, continuous learning and customization can elevate your remote desktop experience to new heights.
Additional AnyDesk Commands with Ubuntu
Update AnyDesk
The AnyDesk software integrates seamlessly into your Ubuntu package management system, ensuring you usually receive updates during your regular system updates. However, you might want to check for an AnyDesk update manually in certain situations.
Input the following command into your terminal:
sudo apt update && sudo apt upgradeThis command checks for AnyDesk updates and updates to all installed packages on your Ubuntu system.
For users who installed AnyDesk through Flatpak, the command for checking for updates differs slightly:
sudo flatpak updateThis command prompts Flatpak to check all its installed applications, including AnyDesk, for updates.
Remove AnyDesk
There may come a time when you no longer require AnyDesk on your Ubuntu system. When this time comes, you can uninstall the software using the following command:
sudo apt remove anydeskThe first command removes the AnyDesk list from your APT sources, and the second command removes the associated GPG key.
If you installed AnyDesk using Flatpak, you would need a different command to uninstall it:
sudo rm /etc/apt/sources.list.d/anydesk.list
sudo rm /usr/share/keyrings/anydesk.gpg
Lastly, if you installed the Flatpak version, use the following command to remove it:
flatpak uninstall com.anydesk.AnydeskThis command signals Flatpak to remove AnyDesk from your system.
Conclusion
In this guide, we walked through the process of installing AnyDesk on Ubuntu versions 24.04, 22.04, and 20.04 LTS, using both the APT Package Manager and alternative methods like Snap and Flatpak. We’ve shared essential first-time tips to secure and optimize your AnyDesk experience, along with keyboard shortcuts and customization tricks to make remote access as smooth as possible. As you dive into using AnyDesk, remember to keep your software updated and regularly check for new features or security enhancements. Whether you’re managing remote teams, accessing your desktop on the go, or providing IT support, AnyDesk on Ubuntu is a reliable, secure, and efficient tool for your remote desktop needs. Keep exploring, stay secure, and make the most out of AnyDesk’s powerful features to enhance your remote access experience.


